Update Your Light Switch Plates With This Simple Paint Pour Project

Looking for a fun way to personalize your home? This paint pour project is the perfect solution if you’re feeling crafty but don’t want to commit to a long, arduous project. These custom light switch plates are sure to brighten your home. In this tutorial I’ll show you two different color schemes, one that is bright and loud, and another that is more subdued but no less stunning. An added bonus to this project is that you can get two projects in one, by making a paint pour canvas at the same time. Intrigued? Check out my step-by-step guide below to make your own!
Hometalk Recommends!
Tools and Materials:
- Light switch plates
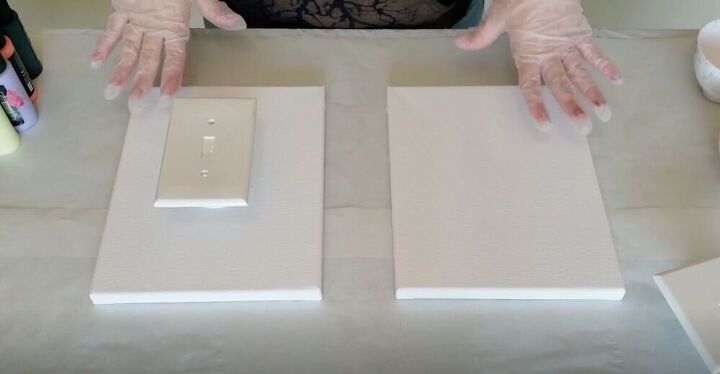
- Canvas (this isn’t totally necessary, but it’s fun to get two projects in one with this paint pour)
- Acrylic pouring paint
- Small bowl
- Cup
Prep the Paint
In order to do a proper paint pour, you need to mix the paint in a separate bowl beforehand. I poured various colors into a small bowl, pouring each color into the center of the last.
I also propped my light switch plate up on a cup on top of a canvas. That way, the overflow can be used to create a paint pour picture on the canvas as well. Two projects for the price of one!
Pour the Paint
There is no specific technique that you need to do for this. I started by pouring in the center and working in a circular motion.
Once I was happy with the design on my light switch plate, I poured the remaining paint directly onto my canvas.
I repeated the process with some lighter colors on the other light switch plate.
Tilt the Canvas
I lifted the light switch cover up carefully using the cup underneath it and then tilted the canvas a bit to spread out the paint.
Tip:
If the paint is too thick on your canvas it will crack, so even if you are happy with the design, it’s still important to tilt it to remove excess paint.
Then I left everything to dry completely.
That’s all there is to it! I plan on hanging the canvases I made near their matching light switches for some fun homemade artwork. What colors would you use on this project? Let me know in the comments below!










Frequently asked questions
Have a question about this project?
How thin do you leave the paint on the canvas
I did this! I used a light and dark green with yellow. Each one was totally different. Thank you for a great idea.
Do you cut a hole to put the light switch under the canvas ?