Fall Crafts: How to Make a Beautiful Cloth Pumpkin and Plunger Tree

Autumn is upon us, and it's time to get your creative juices flowing with some fabulous fall crafts. Whether you're itching to make an enchanting cloth pumpkin or a whimsical fall tree craft, I've got the creative inspiration you need.
You can see more of my crazy creations here
This post was transcribed by a member of the Hometalk editorial team from the original HometalkTV episode.
Tools and Materials:
- Plunger
- Hot glue gun
- Fall stems
- White duct tape
- Black Paint
- Paintbrush
- Pizza pan
- Fabric
- Foam pumpkin
- Twine
- Fall leaves
Hometalk may receive a small affiliate commission from purchases made via Amazon links in this article but at no cost to you.
How To Create a Plunger Tree:
1. Gather Your Supplies
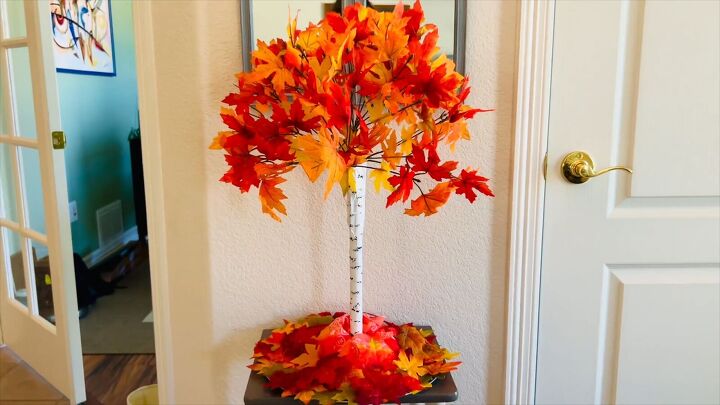
Begin by visiting your local dollar store and grab a plunger. It's the base of our captivating fall tree craft idea.
2. Glue the Leaves
Apply a small dab of hot glue to the top of the plunger handle.
Stick a batch of leaves onto the hot glue, and repeat on the opposite side.
Continue this process, gluing leaves as you move around the plunger, creating the foliage density you desire.
3. Secure with Duct Tape
To reinforce the leaves, use strips of white duct tape.
Wrap the tape down the entire length of the plunger, ensuring the leaves stay in place.
4. Shape Your Tree
Bend the leaves down and out creating the shape of a tree.
5. Add Bark Detail
Take your Apple Barrel Multi-Service Black Paint and dip a paintbrush into it.
Gently tap the paint onto the white tape, giving it a textured bark appearance.
6. Assemble Your Display
Grab a pizza pan.
Place the plunger onto a pizza pan.
Wrap both the pan and the plunger base with fabric, and add some faux leaves to conceal the base.
Your stunning fall tree craft is now ready to grace your home with autumn charm.
How To Create a Cloth Pumpkin:
1. Prepare Your Pumpkin
Start with a foam pumpkin and remove the stem.
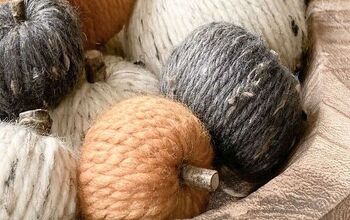
2. Wrap with Cloth
Take a piece of scrap fabric and lay it on a table.
Begin stuffing it in a circular fashion around the foam pumpkin, ensuring the foam is completely enclosed.
Hot glue the cloth closed.
3. Replace the Stem
Once the fabric is securely wrapped, place the stem back on top using hot glue.
4. Optional Leaves
If you want to add an extra touch of fall, consider including some leaves around the pumpkin.
5. Add Vine Effect
Enhance the pumpkin's appearance by attaching a piece of twine to the stem, giving it a charming vine-like effect.
Fall Craft: Handcrafted Fall Tree and Pumpkin Ideas
As you put the finishing touches on your fall crafts, remember that the beauty of these projects lies not only in their end result but in the joy of creating them.
I invite you to continue crafting and decorating your space with the warmth and charm of autumn.
Please share your gorgeous creations and ideas in the comments below!
I would love to have you stop by my blog Chas' Crazy Creations for the full tutorial as well as sign up for my latest creations, posts, recipes, exclusives, and more…
I would love for you to subscribe to my YouTube channel to see more of my crazy creations - https://www.youtube.com/c/chascrazycreations
Enjoyed the project?

Comments
Join the conversation
-
Very inventive! I will use your idea in my school library. The best part is the hight of the decoration, it can vary. Thank you
 L**86443345
on Sep 28, 2023
-













Frequently asked questions
Have a question about this project?