DIY Sunburst Mirror

Within the last couple months, I've seen a ton of really cute rattan sunburst mirrors making a trend lately. Perfect for any bohemian touch to a room. I found a simple basic round mirror on marketplace and along with a couple other items, I turned it into a beautiful, budget-friendly and trendy DIY!
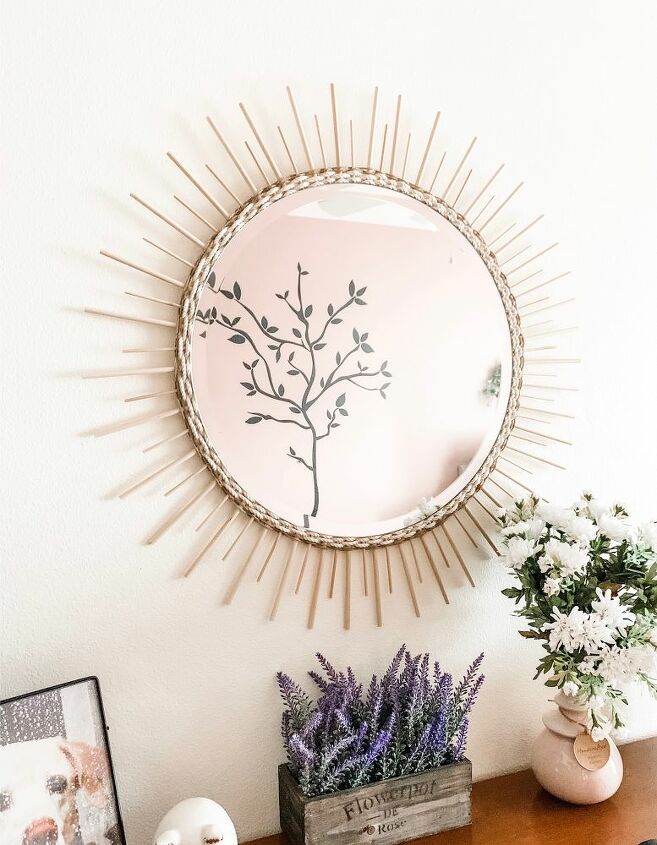
This is the finished sunburst mirror in my guest bedroom. I found the mirror for $20 on Marketplace, but you can find them at the craft store too in different sizes depending on what you want. It was just a basic mirror, and luckily it already had a hanging bracket glued to the back.
You'll need the mirror, a hot glue gun (worked the best), strong hold glue (such as E6000) and the macrame cords/twine you want to use.
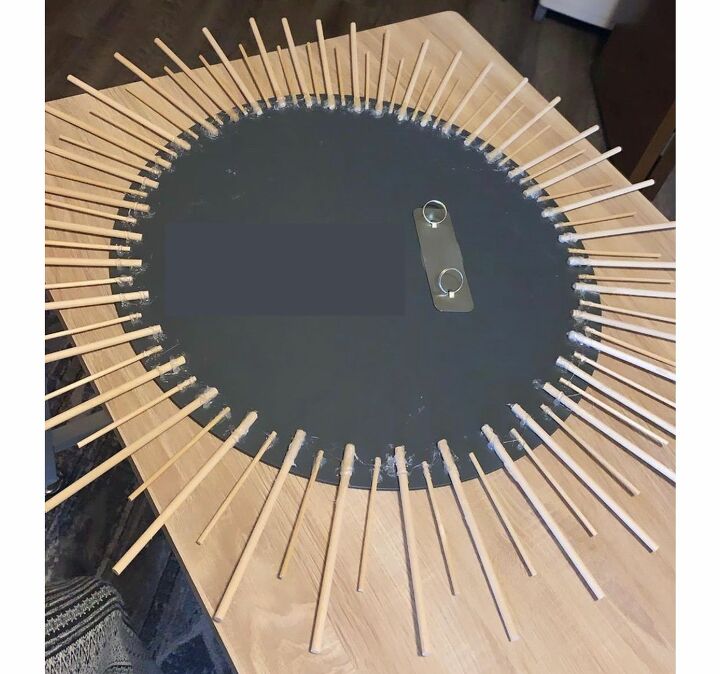
The first step to it was just placing the mirror on a flat surface. I bought my dowel rods at Walmart already packaged in 3" and 6" lengths, so I didn't have to do any cutting.
Next step is arranging them in the pattern you'd like them in so it creates a sunburst pattern. I went with an alternating pattern between the short and long rods.
Once I arranged them in the alternating pattern, I used my hot glue gun to hold them in place first, and once that was dry, I then went in with the strong hold glue on top. I let it sit and dry for about 30 minutes under a fan so that it holds.
After everything was dry, I was ready to move onto the border. At this point in the process, picking this bad boy up and flipping it over mirror side up was tricky--make sure you're holding onto the base of the mirror when handling it, otherwise the sticks could break off!
To do the border I just took the macramé cord, hot glued the starting end to the back of the mirror, and then intertwined the cord between the small and long wooden dowels. For example, the cord would go over the big dowel, under the small dowel, over the big one, and so on.
Once I completed one lap (or layer, whatever you want to call it) around the mirror, I alternated the cord to intertwine the opposite way (over the smaller, under the bigger). I did 3 layers of the white macramé cord, and then used my jute twine with the same technique and did 2 layers to finish it off.
At last, the mirror was finally complete! The darker jute twine border really gave the finishing touch to this piece. It looks amazing in my guest bedroom. This was a pretty simple DIY and you can easily make your own variations in the placement of the dowels, the type of cord/yarn/twine you use, shape of the mirror, etc. to make it your own. Good luck!
Enjoyed the project?
Resources for this project:
See all materialsComments
Join the conversation
-
 Miss Daisy
on Dec 31, 2023
I absolutely love this and want to make one, thank you for sharing.
-
-
 Amp152955904
on Mar 11, 2025
Amazing, Im seriously inspired by this and have exactly the place for it! Ty so much very tasteful ‘high tea’ homey. The dog made it so warm and inviting 🥰
-











Frequently asked questions
Have a question about this project?
It's so pretty! Is that a stencil of a tree on the wall that is reflected in the mirror?