How to Make a Tomato Cage Christmas Tree in 5 Easy Steps

As the holiday season approaches, there's nothing quite like the magic of decorating your own Christmas tree. This year, we're taking a unique approach by creating a Christmas tree out of a tomato cage! With a few creative steps and some basic materials, we'll craft a tree that's both whimsical and budget-friendly.
In this tutorial, I'll guide you through each step, from securing the cage's top to adding the finishing touches. From deco mesh to ornaments and ribbons, we'll bring this tomato cage Christmas tree to life, creating a beautiful focal point for your holiday decor.
Let's get started on this fun and festive DIY Candyland Christmas project!
This post was transcribed by a member of the Hometalk editorial team from the original HometalkTV episode.
Tools and materials
Hometalk may receive a small affiliate commission from purchases made via Amazon links in this article but at no cost to you.
How to make a Christmas tree from a tomato cage
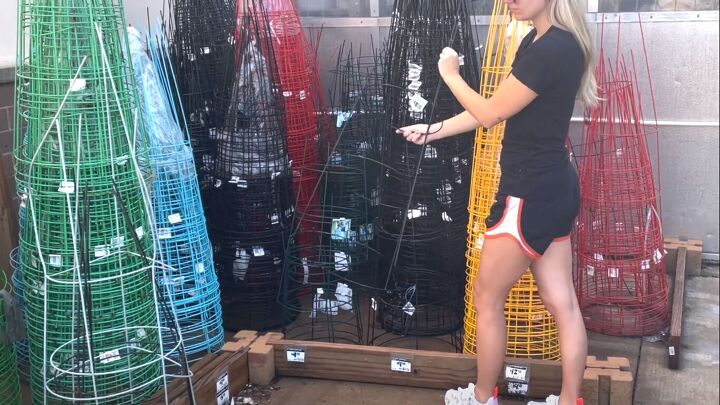
1. Tie the top of the tomato cage with a zip tie
We're going to start up top and secure the three spikes that go on the ground using a zip tie and that'll prevent them from poking through the mesh. it'll also create more of a conical shape for our tree.
2. Tie scrunched deco mesh to the tomato cage
We're going to start off with some deco mesh and pipe cleaners. I'm just going to scrunch up a little bit of the mesh.
To secure it, I'm going to take a red pipe cleaner, tie it around, and tuck that pipe cleaner underneath so it's hidden. Then we can repeat this process every few inches or so.
Repeat up and down the tomato cage
Instead of going all the way to the bottom, we're going to start our next layer. It's all about repetition. We'll repeat that process over and over again all the way around.
There's really no rhyme or reason for my exact placement. I'm just trying to create that tree-shaped effect. You can also use the same pipe cleaner to attach new layers of mesh.
Tuck in the end of the roll
Here we have the end of the roll. I'm going to tuck that in and it's going to stay in place, especially since we're going to come back in with ornaments and some ribbon on top of it.
3. Add bows
Next, we're going to work in some ribbon. Here I have some peppermint or candy cane ribbon. I thought it would be pretty if we had some loops and tails.
We're going to cut a length with one loop and two tails. Grab a pipe cleaner to secure it and there we have a little accent.
Dovetail the ribbon
To create a professional touch, we're going to take the ends of our ribbon, line them up, and dovetail. To dovetail, you cut from the middle out towards the wired edges. It's definitely more professional.
Poke in the pipe cleaners
Coming back to our tree, really poke those pipe cleaners in there so they stay in place.
Tip: You can also use hot glue, but by working them in with just the pipe cleaner, you have the possibility of switching it up, storing the tree afterward, and switching the decorations out each year.
4. Add ornaments
Now I have some red and white ornaments that match the tree perfectly. We are going to dip these in a glue skillet. This is a little crock pot full of hot glue and it melts the glue. When you unplug it, the glue hardens back up in the container.
Apply a generous amount of hot glue, then take the ornaments and place them sporadically.
With the ribbons, those pipe cleaners are in deep enough; but with these ornaments, they will pop right off unless you use some hot glue. Hold them in place for a minute or so while they solidify.
Treat your tomato cage Christmas tree like you would a real Christmas tree; decorate it however you would like. You can add flowers, decorative sprays and picks, and little presents, if you want to.
Ornaments on sticks
Here we have some ornaments on sticks so these are going to be a little bit easier to insert. Snip each one individually.
Swirl these in hot glue and poke them wherever you see fit.
Add an ornament as a tree topper
Instead of a star, we'll take one ornament and we'll poke it up top.
Smaller ornament sprays
We also have this decorative spray and we're going to cut some of these little ornaments off. Having ornaments in different sizes, shapes, and textures really enhances anything that you're decorating.
Since we're going with the red and white theme today, I thought it would be really nice to work in these little peppermint candies. Dip these in your hot glue as well and then poke them throughout.
5. Add single loops of ribbon
I made a bunch of single-loop pieces of ribbon. I just folded the piece over itself and then took a little pipe cleaner to secure it.
Dip them in our glue skillet, apply a generous amount of hot glue, and then poke them in. That's going to deflect a little bit away from the deco mesh and make this tree look fuller and more whimsical.
Feel free to choose whatever colors and ribbons you want. You can use as many different prints as you like. I usually like to shy on the side of less is more, but you could work in three, four, or five different types of ribbon.
Making a Christmas tree from a tomato cage
Here's our finished tomato cage Christmas tree! I've put this outside in a planter. I love it on my front steps.
This is an incredibly easy way to upcycle a basic tomato cage that only costs a couple of dollars.
Are you thinking of making tomato cage Christmas trees? Let me know in the comments below.
DIY Christmas Decorations
Enjoyed the project?

Comments
Join the conversation
-
What a great tree for outdoors!
 Dl.5660408
on Sep 17, 2023
-
-
What a great idea! I would add some white lights to the inside to make it glow at night. It really is a pretty tree!
 Diane Nusser
on Sep 17, 2023
-














Frequently asked questions
Have a question about this project?