How to Make a Life Size Fake Snowman With Expanding Foam

Take a trip to Walmart and grab some rubber balls and expanding foam, I am going to show you how to make a life size fake snowman - the most adorable Christmas craft to make the neighborhood smile!
This fun Winter DIY project will bring the spirit of the season right to your doorstep.
This post was transcribed by a member of the Hometalk editorial team from the original HometalkTV episode.
Tools and Materials:
- Rubber balls
- Plywood
- Construction adhesive
- Expanding foam
- Black ornaments
- Black paint
- Round pegs
- Plastic Planter
- Scarf
Hometalk may receive a small affiliate commission from purchases made via Amazon links in this article but at no cost to you.
1. The Base
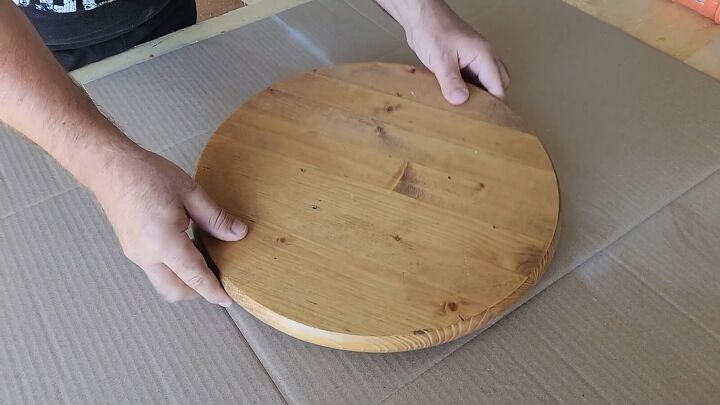
To kick off our DIY snowman, you'll need a base. You can use a round plywood base or a square piece if you prefer.
Start by using construction adhesive to secure the rubber ball to the base. You may be thinking that this adhesive won't hold it in place, but don't worry; we have a solution!
And here it is, snowy white expanding foam!
2. Foam It Up
Now, let's bring in the magic of expanding foam. Carefully apply it around the base, but be cautious not to use too much. We don't want the foam to push the ball away from the base.
Expanding foam is sticky, which makes it perfect for securing your snowman.
3. Building the Snowman
Now that your snowman has its base secured, time to go up and down the sides with more expanding foam. This will create a snowy texture.
4. Adding the Ornaments
Grab black ornaments, remove the top, and place them as the gumdrops on your DIY snowman's vest.
Make sure to do this while the expanding foam is still sticky, and it will adhere just fine.
5. Layering Up
Let’s start layering our snowless snowman up.
For the next layer, grab a smaller ball and place it on top. Stick it right in the wet foam.
Now, continue spraying the foam around this second ball.
Don't forget to add more gumdrops!
Grab your smallest ball for the third layer. Add a dollop of foam on the top of the second ball and stick down this last layer.
Continue adding your expanding foam.
Be sure to coat each layer thoroughly to achieve the appearance of three perfectly rounded snowballs.
6. Creating the Face
Every snowman needs a face! Craft the eyes, mouth, and nose using black-painted round pegs.
Begin by sticking the eyes into the foam.
When working on the mouth, start at the bottom.
Then work your way up to the cheeks, filling in the area in between.
Create a carrot-like nose using a piece of wood painted orange and sharpened at the tip.
Secure it in place.
7. The Iconic Top Hat
Now for the most crucial part: the snowman's top hat. Cut a wood round and paint it black.
Then take a black planter and add glue around the bottom edge.
Glue the two pieces together.
When the glue dries, touch it up with some black paint for a seamless look.
8. Putting It All Together
As the expanding foam is still sticky, set the top hat in place. Your snowman is now complete! Decorate the hat and add a scarf to give your creation that perfect finishing touch.
More DIY Snowman Ideas
How to Make a Life Size Fake Snowman
And there you have it – your very own Spray Foam Snowman, a unique addition to your holiday decor. Whether you place it indoors or outdoors, it's sure to be a conversation starter.
If you've had a blast with this DIY project, I would love to hear how you personalized it and made this snowman your own!
Share your thoughts, ideas, or even photos of your finished project in the comments below.
Enjoyed the project?
Comments
Join the conversation
-
Frosty is adorable!
 Happy Days Hometalker
on Nov 14, 2023
-
-
So cute, and creative!
 Dl.5660408
on Nov 15, 2023
-















Frequently asked questions
Have a question about this project?