How to Craft a Stunning Cornucopia Wreath for Fall Front Door Decor

If you're looking for a beautiful Fall front door decor idea that can last all the way through Thanksgiving, you've come to the right place.
In this step-by-step guide, I’ll show you how to transform a simple cornucopia wreath into a masterpiece that will leave your guests in awe.
If you would like to see more diy fall wreaths you can make, check out these I have made and shared the tutorials!
So, let's dive into this Thanksgiving wreath craft and get your creative juices flowing!
This post was transcribed by a member of the Hometalk editorial team from the original HometalkTV episode.
Tools and Materials:
- Grapevine cornucopia
- Grapevine wreath (larger than the cornucopia wreath)
- Brown pipe cleaners
- Foam blocks
- Steel picks machine (optional)
- Assorted decorative items: leaves, gourds, apples, artichokes, pears, pumpkins
- Wood skewers
- Floral tape
- Hot glue gun and glue sticks
- High-quality faux foliage
1. Combining the Wreath
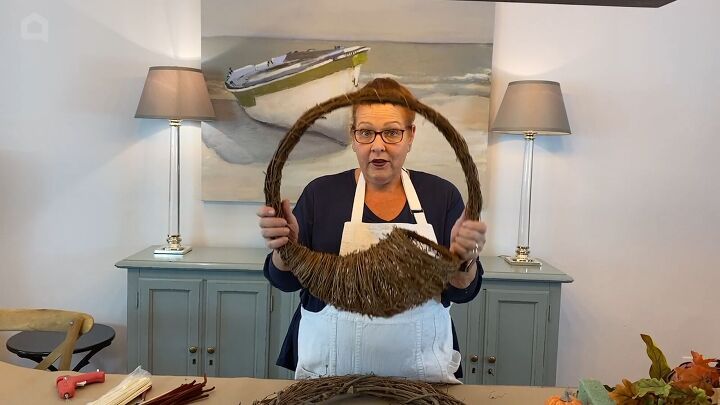
Begin by placing your cornucopia wreath inside the grapevine wreath.
Secure the two wreaths together using brown pipe cleaners. If you would rather start with a premade cornucopia wreath, you can find that here for just $14.99!
Attach the pipe cleaners all around the wreath, twisting them together and snipping off the ends.
Pipe cleaners have sharp points so it is a good idea to conceal the twists by tucking them into the wreath form. This will ensure you don’t scratch the door when hanging the autumn wreath.
2. Adding Styrofoam
Wedge pieces of Styrofoam into the cornucopia to provide a stable foundation for your festive decorations.
3. Preparing Decorative Items
Now we are going to start decorating this cornucopia wreath with a variety of fall-themed faux pieces such as leaves, apples, and pumpkins. But before that, we need to prepare these pieces.
If you have a steel picks machine, to add a sharp end to your floral picks great!
If not, don't worry; you can also attach wooden skewers to the stems of your picks with tape. The skewers will allow you to push your decorative item into the foam so it remains in place.
To do this you should first cut the stem a little bit shorter, then place the skewer up against it and wrap them together with floral tape. I like to wrap in one direction and then again in the other direction.
And for items without stems, like the pumpkins and artichokes, you can insert the wooden skewer directly into the top of them and use glue to secure it in place.
4. Building Up the Design
Start by inserting decorative items like leaves, gourds, and berries into the wreath. Some items may not need picks, like the mini apples and pumpkins. These can be stuck directly to the wreath with glue.
Continue decorating by adding more items around the wreath's edge. Think apples, artichokes, and other fall-themed decor.
Mix and match to create an appealing arrangement while keeping the cornucopia's shape visible.
5. Blending High-Quality Foliage
To enhance the overall look, tuck high-quality artificial foliage among the less expensive leaves.
This simple step will elevate the entire wreath's appearance.
More Thanksgiving Wreath DIY Projects
Fall Front Door Decor: Cornucopia Wreath Tutorial
You've just crafted a stunning cornucopia wreath that will be the envy of your neighbors. Hang it on your front door now and revel in its beauty throughout the Fall season and all the way to Thanksgiving.
I hope you enjoyed this gorgeous seasonal craft idea. I'd love to see your creations and hear your thoughts!
Share your own twists on this cornucopia wreath in the comments below.
Enjoyed the project?















Frequently asked questions
Have a question about this project?