How to Decorate Your Yard With the Cutest Easter Carrot Patch

Get ready to add a touch of fun to your spring decor with this simple DIY Easter decoration!
We’re creating a cute carrot patch that will stand out in your home, and you’ll get to try your hand at a little spray painting, crafting bunny feet, and adding some carrot accents.
Grab your materials and let's dive into this project together!
This post was transcribed by a member of the Hometalk editorial team from the original HometalkTV episode.
Tools and Materials:
- Glasses (vases or jars)
- Rust-Oleum orange spray paint
- Coir Basket
- Hot glue gun and glue sticks
- Pom-poms
- Placemat (for bunny feet)
- Pink vinyl
- Dry erase marker
- Folk Art Home Decor brown paint
- Paintbrush
- Dollar store centerpiece (for green strands)
- Mulch or artificial grass
Hometalk may receive a small affiliate commission from purchases made via Amazon links in this article but at no cost to you.
1. Clean and Paint the Glasses
Start by cleaning the glasses to make sure they’re dust-free.
Once dry, grab your Rust-Oleum orange spray paint and give them a good coat of orange paint. This will be the base color for your Easter carrot patch.
Let them dry completely before moving on to the next step.
2. Create Bunny Feet
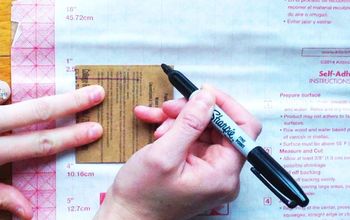
Take a placemat and cut it in half, then into quarters. Stack two quarters together and use a dry erase marker to draw a bunny foot outline on the back.
Cut them out so you have two feet.
For the pink foot pads, cut 2 ovals and 6 small circles from the pink vinyl.
Hot glue them onto the placemat feet.
These feet will be glued to the bottom of the flower basket insert.
3. Assemble the Bunny Butt
Turn the flower basket insert upside down and
Hot glue a pom-pom onto the bottom.
This will be the bunny's fluffy tail! Let the glue cool completely before continuing.
Now, glue your bunny feet to the flower basket.
4. Add Carrot Details to Glasses
Once the glasses are dry, grab some Folk Art Home Decor brown paint.
Lightly dip your brush in the paint and make short strokes across the glasses, creating the illusion of carrot ridges.
This simple step will make your glasses look just like Easter carrots!
5. Add Green Tops to the Carrots
Cut off small strands from the dollar store centerpiece, which will serve as the carrot greens.
Add a dab of hot glue to the bottom of the glass and stick the green strands in place.
Let them cool and set.
6. Assemble the Carrot Patch Scene
Place a pile of mulch or artificial grass onto your display surface and nestle the bunny butt in the middle.
Arrange your painted carrot glasses around it to complete your festive Easter carrot patch.
You can add other spring-themed items to your display to enhance the look.
Looking for More Easter Fun?
How to Make an Adorable Easter Carrot Patch
And there you have it! Your homemade Easter carrot patch is all set and ready to become the centerpiece of your Easter decorations.
This is a fun and easy project to get into the spring spirit, and it’s perfect for adding a festive touch to your yard.
If you enjoyed this project, don’t forget to leave a comment below with your thoughts or suggestions for more DIY Easter decorations!
I would love to have you stop by my blog Chas' Crazy Creations for the full tutorial as well as sign up for my latest creations, posts, recipes, exclusives, and more…
I would love for you to subscribe to my YouTube channel to see more of my crazy creations - https://www.youtube.com/c/chascrazycreations
Enjoyed the project?

Comments
Join the conversation
-
 Chas' Crazy Creations
on Dec 10, 2024
Thank you
I'd love to invite you to join me ...
Chas' Blog - https://chascrazycreations.com/
Chas' YouTube - https://www.youtube.com/c/chascrazycreations
-









Frequently asked questions
Have a question about this project?