


Lemon Vinegar Cleaner Gel: Clingy Citrus Scrub for Sparkling Surfaces

Ever tried a spray cleaner that just slides off your shower tile before making a dent in soap scum? Say hello to your new best friend: the lemon vinegar cleaner.
This easy DIY gel uses two pantry heroes, white vinegar and lemons, plus a dash of xanthan gum to create a clingy, citrus-packed scrub that gives grime zero chance of escape.
Ready to turn leftover peels into a cleaning treat?

Tools and Materials:
- 1 large glass jar (with tight-fitting lid)
- 3–4 organic lemons, scrubbed and cut into pieces
- 2 cups white vinegar (5% acidity)
- ¼–½ teaspoon xanthan gum
- Small saucepan
- Whisk or mini immersion blender
- Funnel
- Empty squeeze bottle or jar with wide mouth
- Optional: 1 tsp liquid Castile soap or Dish Soap
- Optional: 5–10 drops lemon or tea tree essential oil
Hometalk may receive a small affiliate commission from purchases made via Amazon links in this article but at no cost to you.

Step-by-Step: Making Your Lemon Vinegar Gel
1. Infuse Your Vinegar
- Pack lemon pieces into your glass jar and pour in 2 cups white vinegar.
- Seal and store in a cool, dark spot for 10–14 days, shaking gently every other day to coax out oils.

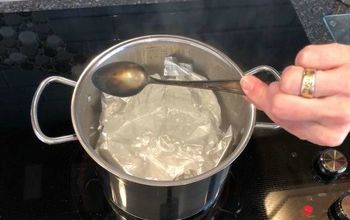
2. Warm the Infusion
- Strain the lemon-vinegar liquid into a small saucepan, discarding solids.
- Gently heat until just warm—do not boil.

3. Thicken with Xanthan Gum
- While whisking continuously (or using an immersion blender), sprinkle in ¼ teaspoon xanthan gum.
- Watch it thicken into a smooth gel; if it’s too runny after a minute, add another ⅛ teaspoon.

4. Boost the Effectiveness (Optional)
- Switch off the heat and stir in 1 teaspoon liquid Castile soap or Dawn dish soap for extra dirt-busting suds.
- Optional: Once slightly cooled, stir in 5–10 drops of lemon and tea tree oil for antimicrobial oomph and fresh scent.

5. Decant
- Pour your mixture into an old dish liquid squeeze bottle.
- Store at room temperature and use within 4–6 weeks.

Where to Use Your Gel
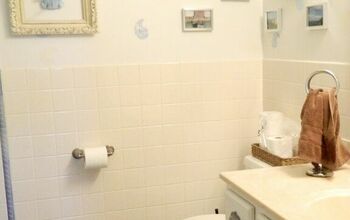
- Bath and Shower Walls & Doors: Apply liberally to soap-scummy tiles; let sit 5–10 minutes before scrubbing.
- Faucets & Fixtures: Squeeze under handles and around spouts to dissolve hard water spots.

- Grout Lines: Work into cracks with an old toothbrush, then rinse clean.
- Stainless Steel Sinks: Rub in a circular motion; rinse and buff with a microfiber cloth.

Why a Gel Works Better
- Cling Factor: Gel hugs vertical surfaces—showers, faucets, grout—so citric and acetic acids get time to dissolve mineral deposits and soap scum.
- Controlled Application: No drips or waste; you decide exactly where you need cleaning power.
- Satisfying Texture: Feels spa-like and indulgent, turning chore time into a mini self-care ritual.

Pro Tips & Variations
- Herbal Citrus Boost: Drop in a sprig of fresh rosemary or mint during infusion for a spa-fresh aroma.
- Baking Soda Scrub: Mix a spoonful of baking soda into the gel before scrubbing grout for gentle abrasion.

- Double-Citrus Punch: Swap half the lemons for orange or grapefruit peels to amplify grease-cutting oils.
- Spot Test First: Try on a hidden area of painted walls or delicate surfaces to ensure colorfastness.

Natural Lemon Vinegar Cleaner Gel That Crushes Grease
You’ve just whipped up a show-stopping lemon vinegar gel cleaner that clings, cleans, and smells like sunshine—no harsh chemicals required. Squeeze, scrub, and watch grime vanish.

Give it a whirl on your toughest spots, then swing back and share your before-and-after photos!
Comments
Join the conversation
-
It says "with a few household items you can achieve making this cleaner", and that's awesome, yes we all want something more natural to work with and to be safe around our pets and family. However, who has "Xanthan Gum" laying around their house? Where and why would somebody buy it and keep it in their pantry? ❓️❓️
-
so sorry to be the burden of bad news vinegar is not recommended for granite, ceramic tile, hardwood surfaces, or shiny surfaces, shower enclosurers, It removes the sealant and leaves dull spots in places….you cannot get this shine back vinegar is acidic whether you boil it or you don’t boil it it is not recommended. My tax statement says professional cleaner. and you shouldn’t be putting xanthan gum down your drains not recommend it. I live with a plumber. He’s done it for 40 years. He does not advise that you do this. and he does not recommend putting dish soap in your toilet either it is just what it says dish soap does it say toilet cleaner


Frequently asked questions
Have a question about this project?
Do you use lemon pieces or just the peel?
I love to clean with vinegar! However, I read where you should never put xanthan gum down any drains because it can become very sticky and thick when exposed to water. Is this mixture completely safe for drains?