DIY Cheap and Easy Shelves

Welcome to my new happy place! I’m so excited with how this turned out. It was a week long process to transform this space but it was ALL worth it. I wanted to create a calm and inspirational space for crafting/filming YouTube videos- stay tuned for those. 😉 The nice thing is that this space barely cost me that much money and I’m in love!
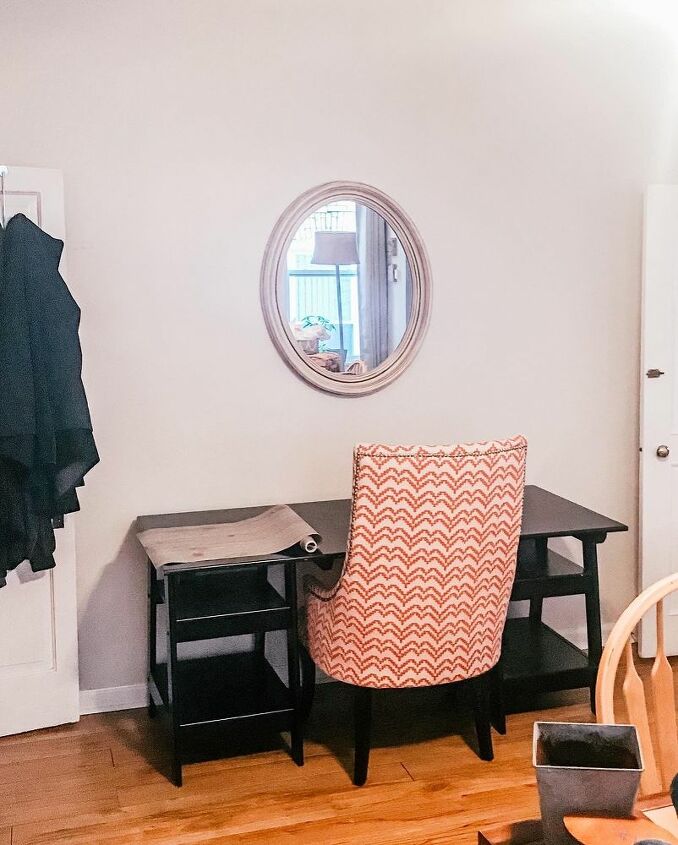
The BeforeThis space was okay before- dare I say boring. We have a large dining room that we barely use. It kinda turned into catch-all. I decided to move the table out of the middle of the room and on to one side, leaving a space for my new craft area. 🙌🏼 I wanted to create a feature wall above the desk that anchored the space. That’s where the shelves come into play. 😊
I did start this whole project out by freshening up with walls with Showcase in color Adley Grey from Lowe’s. I LOVE this paint and the color. I actually have used this color in three rooms now. It’s the perfect warm grey!
To create the shelves, I measured out the space above the desk up to the ceiling. I knew I could fit 4 shelves at about 15in apart. The cheapest and easiest way to do this was to buy two 10ft by 8in boards from Lowe’s and have them cut them in half. They are so helpful in the store, and it only cost about $14 per board. They make life so much easier! Each shelf is 5ft long and that’s perfect because I wanted them to be about the width of the desk. I think it helped to kinda create a custom look for the space. I stained all 4 pieces in Early American from Minwax. What a beautiful color!!
Wow, brackets for shelves are so expensive! I think the cheapest I saw was around $3 per one. Considering I needed 8, no way! I picked up these L brackets for around $2.50 for 4, and they also came with screws. What a steal! I spray painted them with Rustoleum Matte Hammered in black. Love the metallic look of this paint!
I attached the shelves to the wall by using drywall anchors. This is a must!! Let’s just say these old walls couldn’t handle the weight and I learned the hard way. Soo after some patches and painting, I installed the anchors and attached the L brackets to the wall. I found this to be way easier instead of attaching them to the board first. This whole process was a little time consuming, but you get the hang of it after the first couple. I found the easiest way for me to do this was to create a level line across the top of the wall in pencil, making marks every 15in down in two lines about 30in apart. I placed the bracket just above each mark and made two little marks in the whole where I would put the anchors in the wall. I used the the screw in kind of anchors, so simple! I screwed the brackets on to the anchors using the screws that came with the anchors. Once I had all of my brackets up, I simply screwed the boards right onto them. The shelves are sturdy enough now I can put all my crafts and knick-knacks on them! 😆
I learned a fun little trick off of YouTube! To touch up the silver screws, simply spray a little of the paint in the lid of the can and use a small paint brush to cover the silver! Perfect!
I am soo happy with the way these came out!! This space just screams inspiration when I walk into the room! Now that I have my little work space, I can’t wait to start filming some of my projects to share with everyone! I hope you enjoyed this and it inspires you to make your own little happy space. Don’t forget to follow me on Instagram @justinwray, for weekly DIY. 😊
Enjoyed the project?
Resources for this project:
See all materialsComments
Join the conversation
-
 Edith Thomas
on Mar 10, 2022
I have used L brackets instead of decorative brackets because you are able to camouflage them most of the time. Makes them almost invisible.
-
-
 C Sue Upton Rauscher
on Mar 11, 2022
Thanks for sharing!!
I love this, I been on the fence about open shelves..I will check into this and do the brackets as you did!
Thank you!
-











Frequently asked questions
Have a question about this project?
What size were the brackets?
I'm just curious as to why you didn't just screw the brackets in to the wall studs for more stability? I love this idea and would love to try it.
That little table has a whole new life, after being painted that bright white !!! And the shelves, just beautiful !!!