DIY Porch Planters Under $25

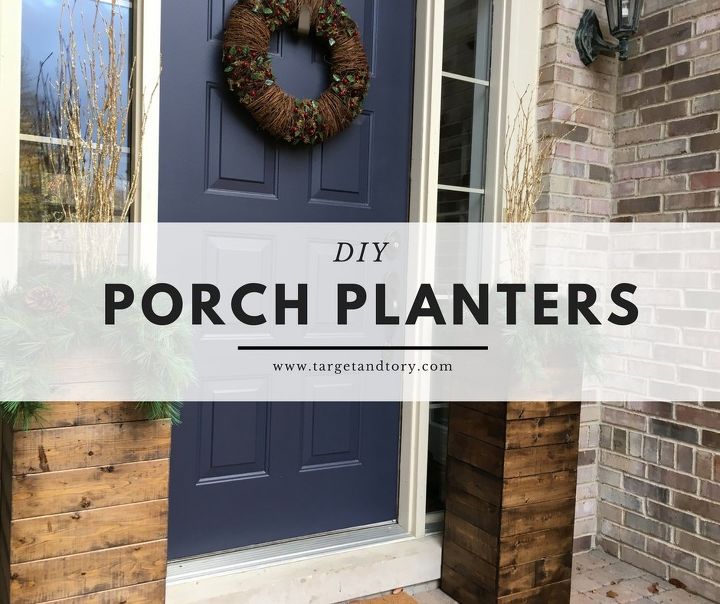
Hey guys! Today I'm going to share a super basic DIY project that I completed this week. This is a VERY easy build and it cost under $25 for each planter!
Hometalk Recommends!
Lets start with the before. I hate gardening and yard work. Well, practically anything that has to do with home maintenance outside. That includes porch decor. It's just not my thing. Sorry neighbors, I keep trying to get better!
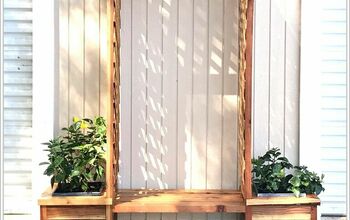
The thing is, you can see right into my living room from the front door. And at night, anyone in the street or on the sidewalk has a clear view of what is happening. Blinds for those small windows were a fortune, and curtains there aren't really my thing. Then I realized that a tall planter would block everyone's view from the sidewalk, but I could still let natural light it and see out if needed. NOTE: I DO NOT want full privacy. I want to see out, and seeing in from the porch is fine. I just don't want people looking in from 40 feet away. Since the porch is elevated, I only needed to block the bottom few feet to accomplish this. I found this planter on Pinterest and decided it was perfect for my space. http://www.remodelaholic.com/vive-la-france-tall-wooden-planter/
I went to Lowe's with a basic plan. I knew I wanted 1x2 furring strips for the inside posts. At only $1 for 8 feet, how could I not? Then I remembered the rolling shoe storage I made for my mudroom (http://www.targetandtory.com/diy-laundry-room-makeover/). I used tongue and groove planks there, and decided this is practically the same and bought some more.
I purchased a planter from Lowe's and then started winging it. I cut the furring strips to 35" with my miter saw. I then placed them on the sides of the planter to get an idea at how long I needed to cut my planks. I ended up needing 12.5" on 2 sides (I made sure there was enough overhang so the side pieces would fit up against it) and 10.25" on the other 2. I attached all of the planks with my Ryobi Nail Gun.
Once it was built, I stained it with my current favorite color. Minwax Dark Walnut. I always use a sock when staining. I finished it off with a top coat of spray poly in satin.
I needed a place for the planter to sit on, so I added a few furring strips 9.5" down and nailed them in as well. The original post that I was following on Pinterest added a lot more work (pocket holes, etc). I could (should?) have done that, however I didn't feel it was necessary for my purpose.
I went to JoAnn's and bought items to fill the planters at 50% off, which I swear is still so expensive! Each planter cost $20 each to fill.
Once I had them up I thought they looked a touch boring, but I liked it, but I was torn. I decided to make a template out of cardboard and add gold screws.
I then decided to see what it would look like for the holidays if I added some red to the decor. I love it! (Pic was taken before the gold screws were added)
There's a few more DIY projects over at the blog if you want to check them out!
More Exterior Updates
Enjoyed the project?
Resources for this project:
See all materials










Frequently asked questions
Have a question about this project?
Why not Just use pool noodles to fill it? $1 each and it will fill it. Put plants, decorations on top
Love to see your shoe rack??
how to cover window in the shower for privacy?