


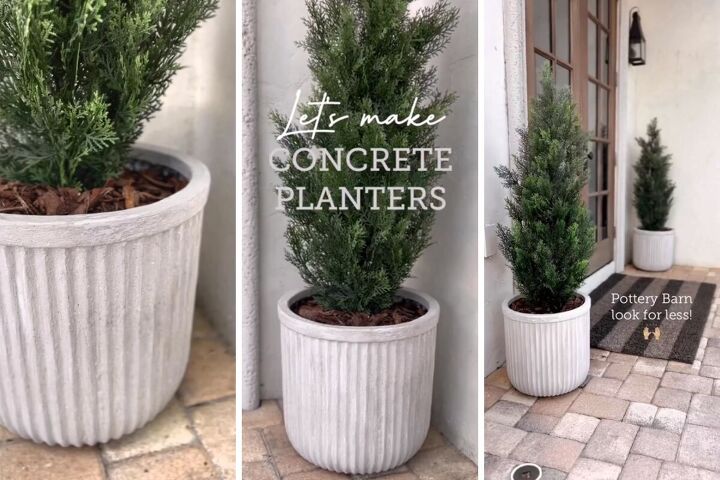
How to Make DIY Concrete Planters With a Stylish Fluted Design

I'm excited to walk you through the step-by-step process of making stunning diy concrete planters. Follow along as I transform regular planters into eye-catching pieces for your garden. Let's get started!
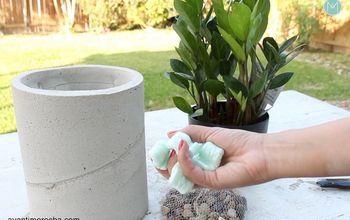
First things first, you'll need an old planter as your base. I lucked out and found these fantastic large fluted planters at Walmart for an amazing price.
Tools and materials
- Old planter (for the base)
- Flexible molding
- Paintbrushes (various sizes)
- Sandpaper (medium and fine grit)
- Mixing container
- Stirring stick
- Protective gloves
- Waterproofing membrane (optional)
- Black paint
- Taupe limewash paint
- Shrubs or plants of your choice
- Water source (for mixing paint and microcement)
Steps
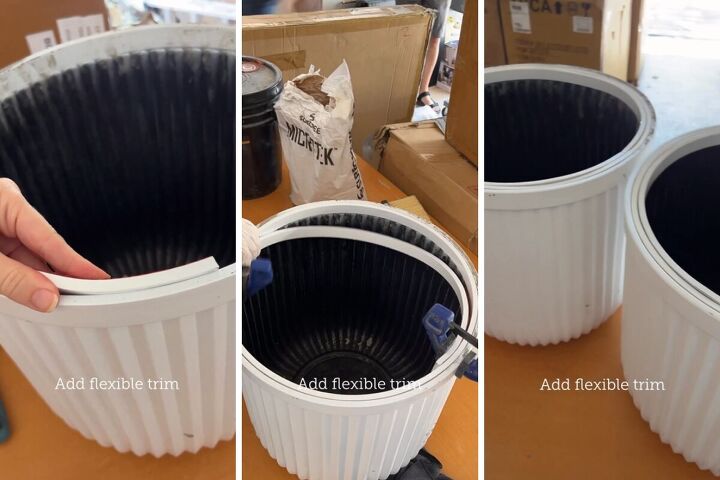
1. Attach flexible molding
To give your planters a more substantial appearance, attach flexible molding along the top edges. This simple trick will instantly elevate the aesthetics of your planters and make them look even more impressive.
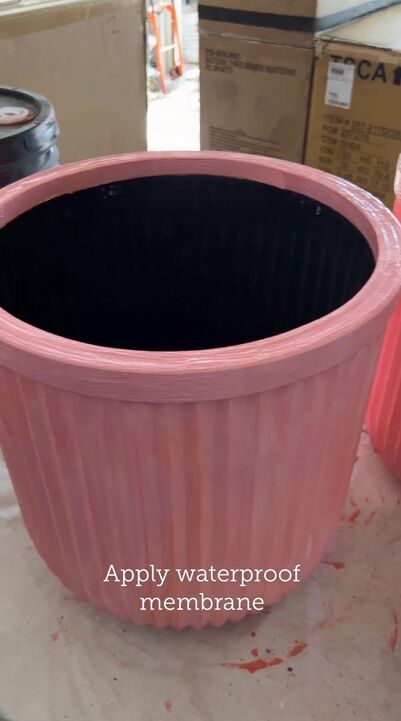
2. Apply waterproof membrane (optional)
Though optional, I decided to go the extra mile and ensure the longevity of my project. Apply a layer of waterproofing membrane to the planter's surface. This step is particularly beneficial if you have some leftover membrane from previous projects. It's all about making the most of what you have!
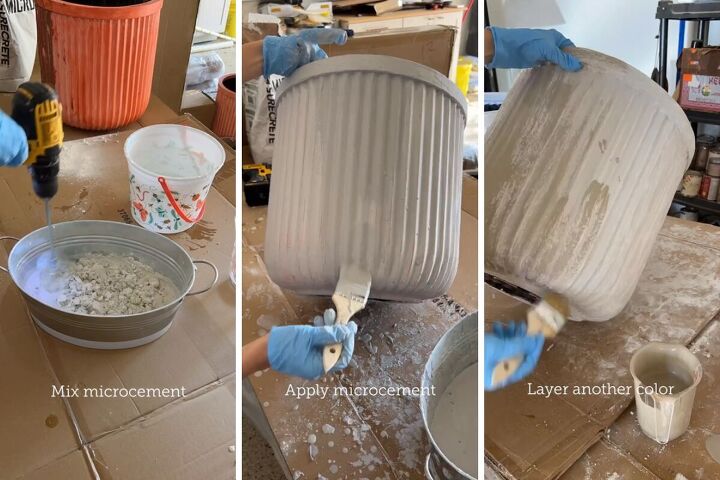
3. Apply microcement
Now comes the fun part – applying the microcement! Mix in a bit of black paint to create a unique color effect. I found that three coats of the microcement were necessary to achieve full coverage and the desired look.
To add some visual depth, I brushed on a layer of taupe limewash paint for that touch of color variation.
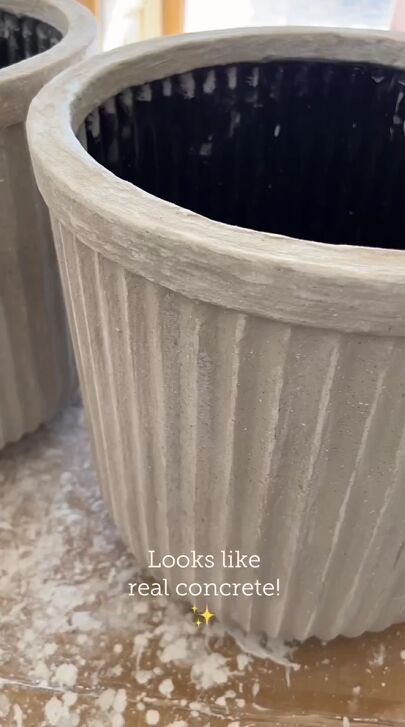
4. Sand
To really make those fluted details pop, gently sand along the ridges of the planter. This will reveal the layers underneath and create a fantastic textured effect that adds character to your planters.
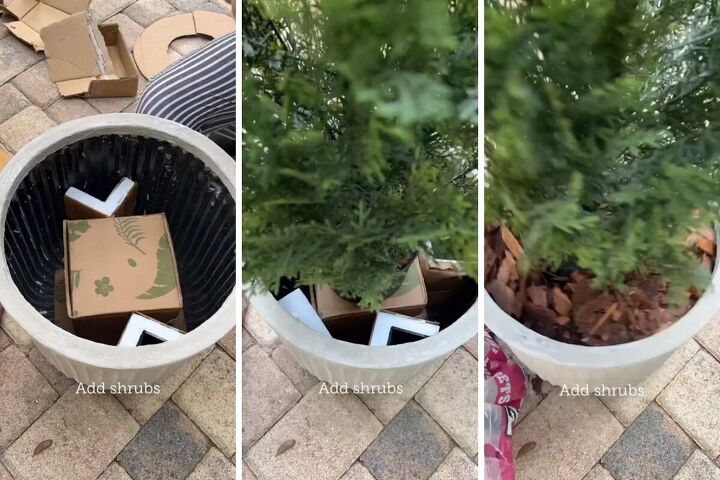
5. Add plants
Your fluted concrete planters are almost ready to shine! All that's left to do is fill them with your favorite shrubs or plants. Pick ones that complement the colors and style of your newly crafted planters.
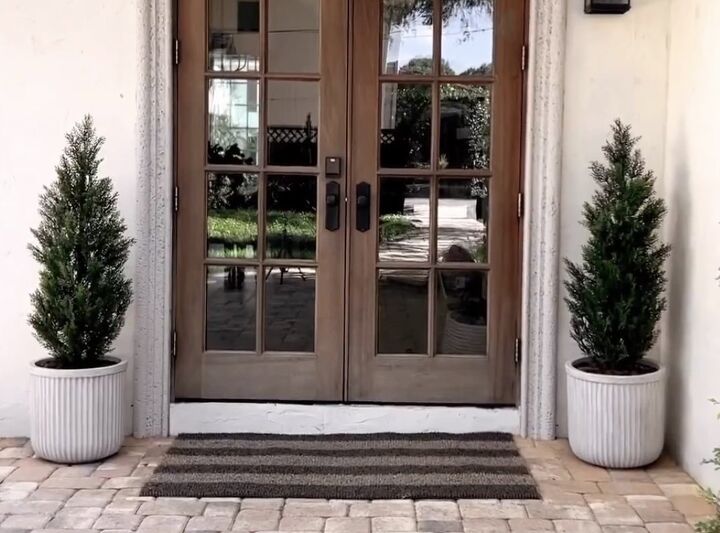
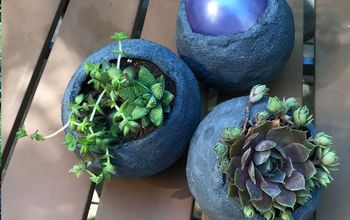
DIY concrete planters
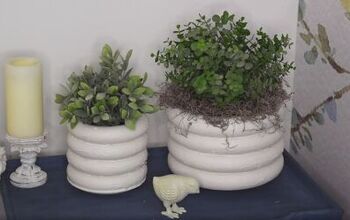
There you have it – your very own set of stunning fluted concrete planters! Place them in your garden, on your patio, or wherever you'd like, and take a moment to appreciate the beauty you've created. These planters are sure to be a conversation starter and a source of pride.
I hope you enjoyed this tutorial on how to make diy concrete planters. Creativity knows no bounds, so feel free to experiment with colors, textures, and plant choices. Share your projects in the comments below.
Follow @jennasuedesign on Instagram for more DIY ideas.
Comments
Join the conversation
-
Nice
-
Very nice, you made a significant, impressive change in these planters. Well done to you! Thanks for sharing.


Frequently asked questions
Have a question about this project?