Fast & Easy DIY Pallet Coat Rack {20 Min. Project!}

by
Brooke Riley-Re-Fabbed
(IC: blogger)
$16.00
20 Minutes
Easy
I am so excited to share this SUPER EASY DIY pallet coat rack with you today! Since we made the first one, we have had so much interest. It is way too easy {and cheap} to not share with you!
Be prepared for lots of pics :) I like to be pretty detailed if I do a tutorial, although I still manage to forget a step from time to time, so if I do~forgive me and just ask! {And be prepared for a fine looking hunk in the photos. Sorry ladies he is taken!}
Ok..so after you find your pallet, you are ready to get started! This whole process takes my husband about 10 minutes {dead serious}.
After you get the board cut off, you will take it and place it on top of the pallet. You can see in the picture very clearly where to place it.
After you get the board placed across the top of the pallet, you are ready to nail it on. This board will be your shelf!
Mr. Re-fab says he likes to use these nails because they don't back out as easily. You can use screws as well, but we feel like nails because it flows better with the "pallet look." Now just nail each side on, and in the middle and you are finished with that part!
When you are finished nailing, you simply cut the board off right below the curve in the pallet.
Can you spot the little helping hands? She loves to help with projects :)
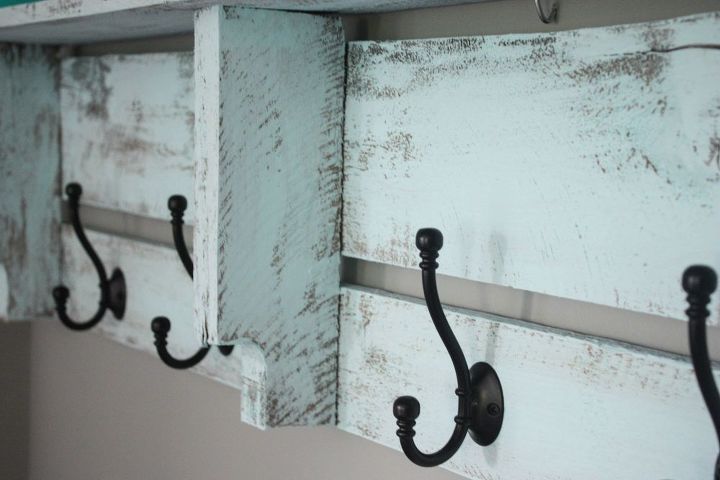
Now let me show you one that I have hanging in my own house! It is slightly different than this one, although barely it is the SAME exact process so no difference there! The only difference is that the top board is a little larger.
I painted this one Glacier by Vintage Market & Design. It is chalk paint, and I had it on hand at the time. I took a regular little chip brush and just barely went over the wood. I wanted it to look really worn, so I did not want good coverage. It took about 5 minutes :) {This is such an easy, fun project!} The hooks came from Lowe's, and they were around $4.00/each. With the rest of the project being free, they were the whole cost! So basically, for $16.00, I have a beautiful coat rack! How awesome is that?!
Well, that's all folks! I told you it was easy!!
Enjoyed the project?

Want more details about this and other DIY projects? Check out my blog post!
Published July 29th, 2015 11:29 AM
Comments
Join the conversation
2 of 93 comments
-
 Woo71479666
on Oct 12, 2022
I love this idea so much! Thank you!
-
-











Frequently asked questions
Have a question about this project?
Just wondering- do you think when cutting and adding the top shelf another park could be added for little cubbies?
How did you mount it on the Wall????
It looks like you could make two coat racks from each pallet, one from each end. Is that right?