DIY Bench

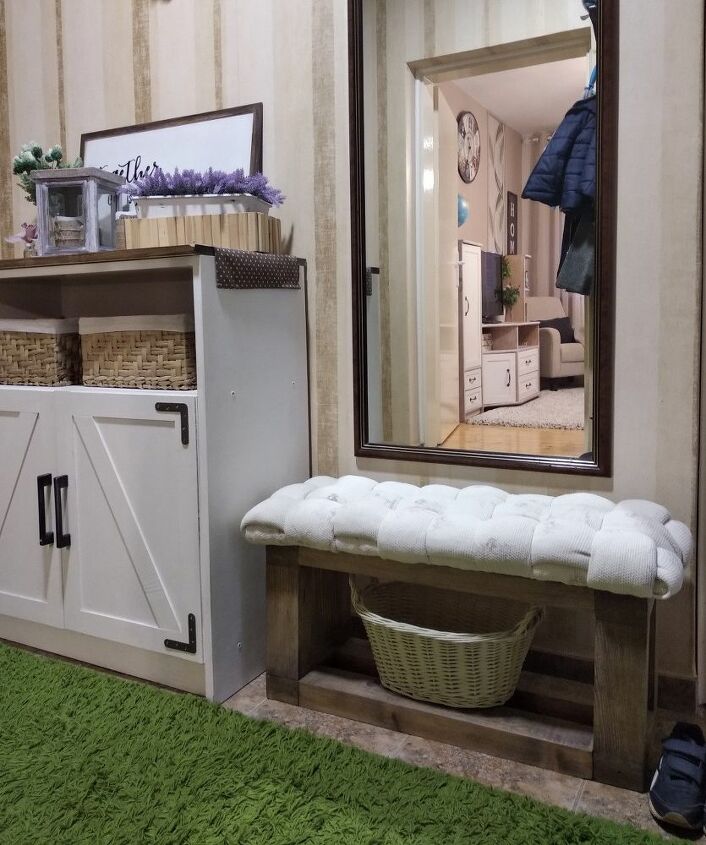
Here'a a tutorial on how to make a bench, that is a bit different. I made this bench with my husband cause we needed a place in our hallway to sit on, while putting our shoes on. Now, I know that not everybody would wanna make this, but I have to addmit that it wasn't hard as it may look. Just takes time... And it was sooo worth it! So, let' s go!! 🙂
So, first I have to say that all of the materials I used I allready had in the house. So this was a very budget friendly project. So here' s what you' ll need.
- A fabric of your choice ( I used a really old bed sheet )
- Wood planks ( mine are 5 x 10 cm and 2 x 5 cm ) that I used to make the base and a 25 x 75 cm plank for the top
- Poly fill ( I used stuffing from old pillows)
- Stain of your choice
- Paint ( optional ) - for drybrushing.
First I cut my fabric. I made 10cm wide stripes. Since I knew that my bench would be 75 cm long, and 25cm wide, I made 3 long stripes, and 8 short. All you have to do is sew a strait line down the edge. You can do it by hand. You don' t have to be precize, couse that part will be facing down, so it won' t show.
Here you can see that mine are all different. And it really doesn' t matter 🙂
Next is to fill in the tubes. Really stuff them to be nice and puffy!
This is how they looked all stuffed up. Don' t bother closing the tubes, cause we'll be stapling them to the plank.
I stapled this fabric on to my base.
Then I stapled the tubes on. 3 long ones on the long side of the plank, and 8 short ones across.
Now the braiding. You can see the pattern... But basicly, you take your tubes and pull one over, and the next one under the previous. If the previous was under, the next will be over that one. It' s not hard once you get the idea how it works. Now, make sure you really pull them and make them tight, cause the next thing is stapling them down to the bottom. You will probably have some leftover fabric, so you can cut that off, once you stapled it.
This is how it looks when it's finished.
Now the base. I cut 22cm long 8 parts, and 4 parts that are 65cm long. Out of the shorter parts I made 2 squares, so that would be the legs of the bench. And added the long ones between, to join them together.
This is the finished base. Now, I used thinner planks on the top, and thicker ones on the bottom, as you can see.
Now the staining. I always do it with some old cloth. It gives such a fine finish.
I did some whitewashing over the stain, and then some drybrushing as well, using some acrylic paint in brown and black.
Look at the colour 🙂🙂
And the final touch would be attaching the top of the bench to the base. And..voila 🙂🙂🙂
Enjoyed the project?
Comments
Join the conversation
-
-
 Lat85117438
on Jun 26, 2023
I think this was a great idea also. Keep up the good work
-









Frequently asked questions
Have a question about this project?
Thank you, but I’m having trouble figuring out where you put the screws so they wouldn’t show. Between the columns?
Why use the wrong side of the fabric and not the inside being a lovely material
I want to do this. This is a stupid question but, how did you connect the legs to the top. Meaning, where exactly do you put the screws, or is their something else you use to connect them.