Build a Vintage Doorknob Coat Rack

by
PatonHaus
(IC: vlogger)
5 Materials
$20
1 Day
Medium
With only a small piece of wood and a few doorknobs you can create a beautiful antique-inspired coat rack for your home!
Check out my quick 5-minute video below to see exactly how I built mine!
{
"id": "4012690",
"alt": "",
"title": "",
"video_link": "https://www.youtube.com/embed/eIyePin2wKQ",
"youtube_video_id": "eIyePin2wKQ"
}
{
"width": 634,
"height": 357,
"showRelated": true
}
Check out the full video here! ^^^
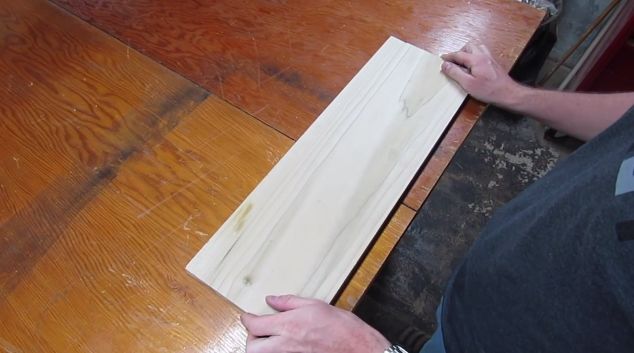
I used a piece of hardwood, about 23 inches long and 8 inches wide. You can use any species and size of wood you like! A length of hardwood this size might cost around $10.
I used 5 doorknobs I picked up from a second-hand store, but any antique shop should have some too (although probably a little pricier). I think I got mine for about $2 a piece.
I trimmed down the wood to size, around 6 inches wide. I used a table saw for this job. The staff at Home Depot or Lowes can usually help cut down wood to size if you ask nicely :)
I decided to cut the corners on an angle to add some interest to the piece. I used a mitre saw for this job, but if you have a handsaw that would work too.
I marked out the spacing for the doorknobs on the wood and drilled the holes. I also drilled a pair of holes 16” apart to attach it to the wall. Standard stud spacing in North America is almost always 16” in the typical home. Also known as “16 on centre".
I also used my router to add another interesting detail to the perimeter of the wood. If you don’t have a router you can give the edges a light sanding to soften the edges a bit.
Next up, stain and clear coat! I used a dark stain and a wipe-on polyurethane clear. The wipe-on polyurethane clear dries very quickly compared to brushing on. Stain usually takes a little while to dry, try to leave it overnight to make sure it's completely dry!
To attach the doorknobs to the wood I used threaded rod and cut it to length. You can also just use regular bolts for this, just make sure you get the right length depending on your wood thickness.
Because the doorknobs had varying thread sizes I had to tap them all to accept the threaded rod. Make sure the tap size matches the size of the threaded rod! Once I was done threading the doorknobs I used some JB Weld (two-part adhesive) to permanently attach them together. We’re not building a tank, so you can skip this step if you prefer.
Once I was done threading the doorknobs I used some JB Weld (two-part adhesive) to permanently attach them together. We’re not building a tank, so you can skip this step if you prefer. Here you can see the doorknobs and threaded rod all ready to go.
I used nuts on the back to attach the doorknobs to the wood. You can see here that I drilled a larger hole on the back to recess the nuts (so they don’t stick out and damage your wall).
I located my studs and marked it out on the wall.
I made sure to attach mine to the wall studs with long screws for strength.
Great job! 

Enjoyed the project?
Suggested materials:
- Hardwood plank (Home Depot)
- Doorknobs (Second-hand store)
- Thread rod or bolts, and nuts (Home Depot)
- Stain and clear coat (Home Depot)
- A few screws (Home Depot)
Published July 11th, 2017 4:56 PM
Comments
Join the conversation
2 of 22 comments
-
 Slw21358627
on Aug 12, 2017
Great Job!!! Your instructions were very clear.
I may have to do one of these. It looks really nice!!!
-
-
 54m8927216
on Apr 25, 2023
Nice touch, using your socks!
-







Frequently asked questions
Have a question about this project?