DIY Sliding Barn Doors Using Glass From Old Patio Doors

A few years ago we replaced our French patio doors, and being the crafter I am, I saved the glass to be used later. Well this is later, and I decided to use the glass to learn how to build barn doors for the master closet. If you don’t already have some glass to repurpose, head to your local Habitat Restore and you can find old patio doors for fairly cheap.
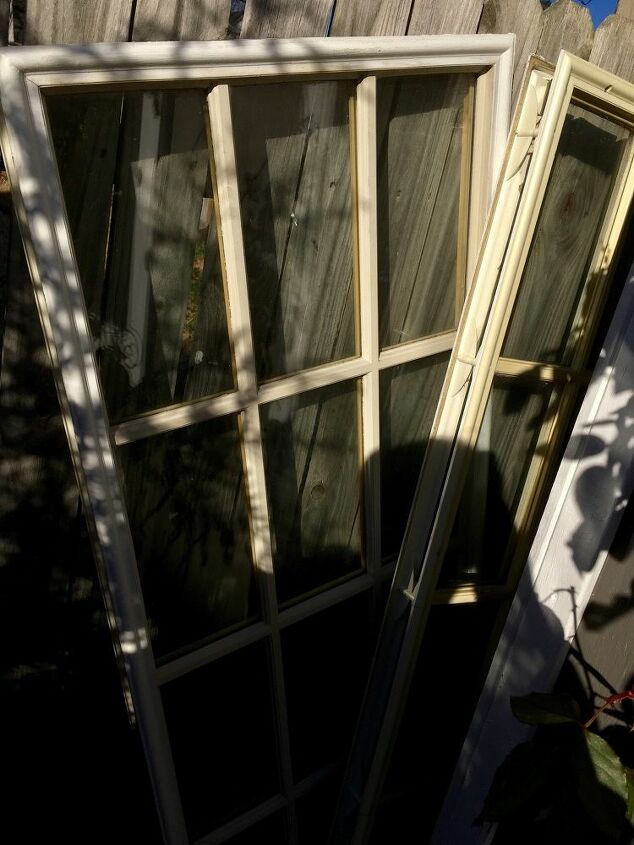
Here are our old glass panels, tucked between our shed and fence until I found a use for them.
Other supplies you will need:
-table saw and/or router to cut the grooves for the glass to sit in and for the frame pieces to fit together.
-wood screws and wood glue
-wood boards (size will depend on the size of your glass and the door opening you are covering. We used 2x4s for the sides and 2x10s for the top and bottom. Our glass pieces were 20”x64”, so the finished size of each door was 26 1/2”x82”
We wanted to leave the original trim around the door opening, so all we would have to patch is where the old hinges were. To do that, our doors are a bit of an odd size. Again, you will need to build these to YOUR needs.
Our first step was to cut the boards to length. The vertical pieces (2x4s) are cut to the true length of the door, but the top and bottom pieces need a little extra math. If you want, you can use pocket holes for your frame and simply cut the horizontal pieces to your **finished size minus two times the width of your verticals**. We went a different route with tenons and grooves, since we were cutting grooves for the glass anyway. To go this route, you will need to add the length of your tenons to the above calculation (within the **). For example, our final doors needed to be 26.5” wide and each side board is 3.5”.
26.5 - 2(3.5) = 19.5 (make sure this number is smaller than the width of your glass!!! This will be the final visible length.)
Now add in the length of the tenons...
19.5 + 2(0.5) = 20.5” as the cut length.
Next step is to add the tenons and grooves. My husband did this on the table saw and finished with a chisel, but you could also use a router. We made 1/2” thick grooves down the entire length of the 2x4 verticals, as that is the thickness of our double-paned glass pieces and tenons. As far as the depth of the grooves, the tenons on the top and bottom are 1/2”, so where those sit was cut to a hair over 1/2”. Where the glass sits only needs to be 1/4” deep.
We practiced our tenons and grooves on a scrap piece first, but this is basically what the top and bottom pieces should look like after all cuts are made. Tenons on the ends (1/2” wide x 1/2” long), and grooves on the inside edge (1/2” wide x 1/4” deep).
After everything was cut, we lightly sanded then stained.
Next, I used a glass frosting spray on the closet side of the glass, followed by clear coat. I used around 4 coats of the frosting spray to get the level of opaque I was going for.
Last step- putting it all together. We test fitted everything first, then using wood glue, we attached the bottom piece to both sides, slid the glass in the middle, then slid the top into place. We used ratchet straps and clamps to hold the door together while the glue dried, and for added security, we put two screws into each side at the bottom, and one on each side at the top. Holes were then lightly sanded and stained.
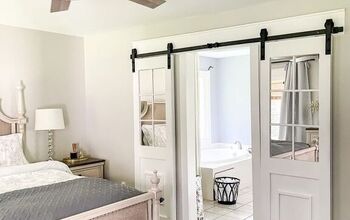
We bought a barn door hardware kit and installed according to the directions.
Because we left the trim around the door frame, we had to add washers between the bar and spacers to compensate.
The hardware kit comes with door stoppers, so we placed them where one door could slide all the way past the light switch so it could easily be turned on or off with the door open or closed. (Note: this method will require two floor guides on that side.)
The stopper for the other side stops the door right at the trim.
Here are the final doors! This is what they look like with the closet light off...
... and the closet light on.
Not counting the hardware kit (where price varies from around $50-$200), we spent around $30 to make two doors ($10 for four 2x4s, $14 for one 2x10, and $6 for two cans of spray paint).
Hopefully this inspires you to make your own doors!
Enjoyed the project?
Resources for this project:
See all materialsComments
Join the conversation
-
-
 Jeanne Matusiak
on Jun 14, 2020
Finally I found someone who thinks like me! I LOVE these doors! My friend is doing an addition on my daughter’s kitchen next summer. He’s going to build huge barn door windows that will open an entire wall of my daughter’s kitchen up to her deck. I super excited to see it come to fruition!
-












Frequently asked questions
Have a question about this project?
What happened to the mullions? You began with individual glass panes and ended up with one solid piece of glass in each door.
I'm wondering how the hardware is holding up, or if the added washers caused everything to rattle and shift?
My first thought would have been a solid piece of wood attached to the wall at the studs and then the barn door sliding mechanism attached to that. The support against the wall could be painted the same as the wall to let it disappear, or given the same dark treatment to make it seem like a matched set and a more substantial feel. Either way sounds good to me. It would increase the cost to add the second piece, but it would give me peace of mind. I'd also use the wooden bar as a picture rail (mirror?), if your decor wants that.
Thanks for letting me add some ideas, and please let us know how your beautiful doors are standing up with time!