Repurposed Television Armoire Cabinet

I recently received a call from one of my “furniture finders” about this television armoire cabinet. Yep, someone actually threw it away. Here is the story of the repurposed television armoire cabinet.
Before I go any further, I want to explain my “dumpster diving” tactics. My email inbox is always flooded with questions regarding my furniture finds. This armoire was found in a construction dumpster. Which means no household garbage. Just wood scraps, boxes, or anything else which pertains to a construction site. Possibly a little dirt, but nothing that can’t be cleaned off. I DO NOT remove furniture items from household trash dumpsters unless they are on the ground next to it. I am sure some people do, but I choose not too. And trust me, I wish I could. Why, because I LOVE saving thrown out furniture. But it’s just too risky and well just plain gross.
Anyway, back to the repurposed television armoire cabinet makeover. Once we got the call, the Hubs and I immediately showed up on site. Luckily, there was a business located near the dumpster which had a few extra men who were eager to help the Hubs remove it from the dumpster. It was solid wood and HEAVY, so I knew I could not be of much help.
I thoroughly inspected it after we got home and unloaded it from the truck before taking it inside. It was surprisingly clean! I did vacuum underneath and inside the cabinet, just to be on the safe side.
It sat in my workshop for over a week. For some odd reason, the week we found the piece, I was in a creative slump. I am telling you; no creative juices were flowing. Burnout had crept in. Which is normal, so I didn’t worry. I just simply walked away.
A few days had passed. I decided it was time to have a pow-wow in front of the beast that was torturing me. Enough was enough. I was determined to construct a plan, no matter what. I pulled up a chair and just sat in front of it, brainstorming ideas. Here are a few of my thoughts:
- This size cabinet is hard to sell in my area. As a matter of fact, they very rarely sell. Most people have larger televisions or they prefer smaller more decorative cabinets.
- The cabinet could be repurposed into an armoire, but that’s the NORM. I am not that type of flipper because I love thinking outside the box.
- I want a unique piece that the Hubs and I could work together on.
After my brainstorming session, I discussed the points that I jotted down with the Hubs. The final decision was to cut the armoire in half. We would repurpose the bottom into a beautiful piece and the top could be repurposed into a cabinet.
The Hubs went to work, removing the top using his circular saw.
I saved the two large doors! They can be used for all sorts of neat projects.
Here it is with the top removed.
Our hope was to save the top and create a cabinet, but it was just too flimsy, and the inside was not worth the time to repair. The Hubs cut the pieces and placed them in our recycle bin for pickup. You can see a hutch top we repurposed and saved .
The top was damaged in one small area, but Hubs to the rescue! He would construct a planked top.
The Hubs used 1x6x8’s and cut them to the length needed for the top (you can get these from Lowe’s or your local home improvement store). For the trim, he used a 1x2x8.
He sanded all the pieces with 220-grit sandpaper using his orbital sander.
The new top was attached using wood glue and nails. The hubs first glued the strips into place.
He then used his brad nailer and nailed each piece for extra adhesion. He attached the trim using the same method.
The first order of business was the stain for the top. I chose Dixie Belle’s Voodoo Stain.
I mixed two colors together, Tobacco Road and Up in Smoke. One was a light brown color, and the other was gray.
I used a piece of tack cloth to remove any sanding dust and wiped with a damp cloth. After it dried, I applied a coat of the mixed stain to the top, and I was IN LOVE! How gorgeous is this? And, the Vodoo stain is very easy to use.
I had these corner pieces for cabinet doors in my stash. I decided to use these on the doors to give the cabinet a little more depth.
My plan was to distress the cabinet so the pretty wood would peek through. The wood applique was a lighter wood, so I needed to darken it up a bit. I applied one coat of Minwax English Chestnut (it matched the color of the cabinet) to each applique.
After the wood appliques dried overnight, I added them to the corner of the doors using E6000.
My color choice was Dixie Belle’s Drop Cloth. I would describe it as an antique white. Very pretty, but not too bright.
The next day, I cleaned the entire cabinet with my vinegar and water solution (1 part vinegar, 1 part water). After it dried, I applied one coat of paint to the entire base of the cabinet and the two doors, including the wood appliques. (I did not paint the inside). After about 4 hours of drying time, I applied a second coat. It only took two coats of paint.
After the paint dried overnight, I distressed the cabinet by hand with a piece of 220-grit sandpaper after allowing the paint to dry overnight. The wood appliques were also distressed.
sanded the entire piece lightly with 220-grit sandpaper to achieve a smooth surface even the doors (by hand). After, I cleaned the sanding dust away with a tack cloth. To seal the piece, I applied one coat of Minwax Finishing Paste. I also applied a layer of the wax to the top.
The last step was to add new hardware to the doors. It was purchased from Amazon. I was delighted with the quality, and the rusty patina was gorgeous!
We attached the doors to the cabinet. I left the door hinges black, I did not paint it.
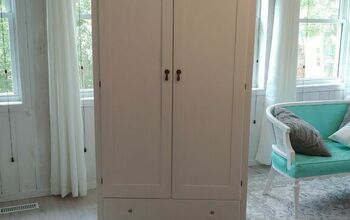
Here is the finished piece. Isn’t the cabinet absolutely a beauty?
What once was tossed in the garbage, is now a charming farmhouse cabinet ready for a new home. But wait. I think I may keep this one!
See another repurposed project . We took an old sideboard cabinet and made a kitchen island! See it HERE.
Head on over to the blog and subscribe to get FREE tutorials right in your inbox HERE.
Enjoyed the project?
Resources for this project:
See all materials
Comments
Join the conversation
-
 Syl77428291
on Jan 25, 2023
Gorgeous!!!!!! Love it
-
-
 Jlo117673696
on May 13, 2025
Very inspired now - awesome job!!
-








Frequently asked questions
Have a question about this project?
What did you do with the top of it. I would’ve turned it into wine Cabinet glass holder on top Two glass shelves in with metal Or wooden legs. I bought a cabinet like this that cost me $1200 that would’ve been a nice project.
I thought you would like to see it.
always nice to have another idea.
I'd really like to see the finished product. Can you post a picture of it? Thx
Amazing job! Crazy how an out dated armoire can turn into a beautiful piece of work! Did you need to sand it down or was cleaning it good enough? Thank you!