Waterfall Vanity Refinish

by
New Moon Vintage
(IC: homeowner)
9 Materials
$100
5 Days
Medium
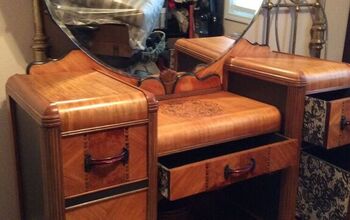
I had been making different seasonal crafts and building furniture and my sister approached me and asked if I would refinish her Waterfall Vanity. With the confidence I had with the other things I had been working on I was up for the challenge. This post does contain tips that I learned along the way.
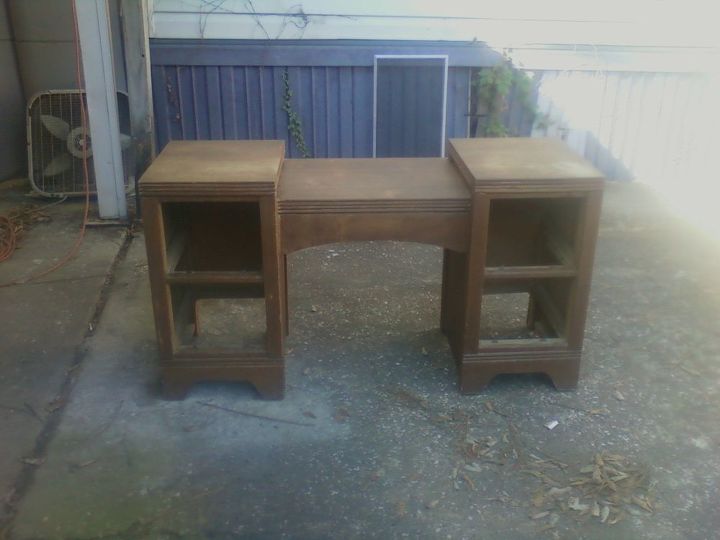
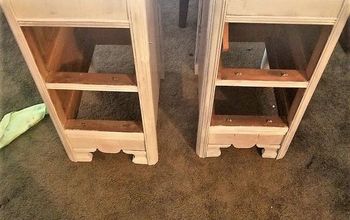
This was the vanity before sanding. Sorry no pics of the drawers. Not sure why. I used my palm sander for this. I first used 60 grit sandpaper. You want to make sure you sand with the wood grain. After sanding the whole piece with 60 grit I then used 100 grit and then 150 grit till I was down to bare wood. I wanted a smoother feel so I headed down to the Auto store, yes I said Auto store and picked up sandpaper made for vehicles. Purchased a variety pack and used 1000 grit paper to get it real smooth.
At this point I was ready to start the staining and painting. I taped around the bottom of the top before staining because my sister wanted a red mahogany top and white bottom. Make sure you clean the table first with a lint free damp cloth. I originally used one of those tacky cloths but ended up getting some of the tacky on the top and had to get that off before staining.
I started at the top and applied the wood stain. I let it dry overnight and the next morning a small portion of it was still tacky. This was because I put it on to thick in this area and stain would not absorb all the way. I decided to wait several days and it was still tacky. After doing some research there were several options like paint thinner, sanding and restarting all of which was a little more than I wanted to do. I read another post and found that I could use clorox wipes in the orange/yellow container. I tried it by wiping gently with the wipe and it worked like a charm. Did that a couple of times and wiped off with paper towel. Project saved. Waited overnight and put second coat of stain on top.
While I waited for paint to dry I started to work on the original handles. Sorry no before pic. The handles were green/brownish in color from oxidation but if you put them in baking soda and water and boil for 20 minutes it removes the oxidation and will also remove paint that will then be wiped off. This is after that process. They look better than the pic.
I started painting the bottom with white chalk paint bought at Walmart. After two coats I started to get bleed through of the wood. Ugh!! I then got out Zinseer Shellac clear and sprayed the white paint. You want to do a couple of light coats if you don't it will run and be visible through your paint and will need to be sanded down. Should have done the shellac before painting. You never know what type of wood will bleed through.
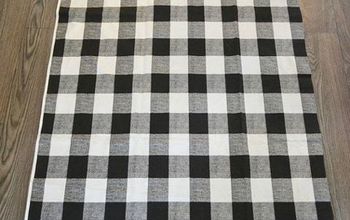
And finally added peel and stick wallpaper to the drawer sides to pretty up. Bought wallpaper at Walmart. This process is pretty simple. Cut out enough wallpaper to cover the drawer side by around 1/2 in on all sides. Apply paper and lay flat with paper on bottom so you can cut excess off with box cutter type knife. Your done.
Finished vanity. Applied a two coats of Polyvine Wax Finish Varnish from Amazon in satin. Very easy to apply since it is liquid form. Did not want to do the tedious work of applying actual wax. It looks and feels like a wax finish.
Enjoyed the project?
Resources for this project:
See all materials
Any price and availability information displayed on [relevant Amazon Site(s), as applicable] at the time of purchase will apply to the purchase of this product.
Hometalk may collect a small share of sales from the links on this page.More info
Published December 26th, 2017 10:39 AM
Comments
Join the conversation
4 of 50 comments
-
 Maureen Barringer
on Jan 24, 2018
BE WOULD OF MADE A GREAT MAKE UP TABLE WITH WHEELS ON IT & MIRROR ON A WALL BEAUTIFUL JOB
-
This was for my sister and she did not have a mirror. She is looking into buying one. But thank you for the compliment!! Working on a French Provincial Dresser now will post as soon as I am done.
 New Moon Vintage
on Jan 24, 2018
-
-
-
 Mary Coakley
on Jan 25, 2018
Really beautiful colour combination great tip for hardware noted and thanks
-
Thanks so much!! Working on another piece I will be post soon. It does take patience and quite a bit of work to get to bare wood but it so worth it in the end. I have really become addicited to the refinishing thing. Going this weekend to buy another piece that dates back to the 50's.
 New Moon Vintage
on Jan 25, 2018
-
-










Frequently asked questions
Have a question about this project?
Is it peel an stick wallpaper or really contact paper? Thankyou in advance