Upcycled Crib Into Bathroom Vanity
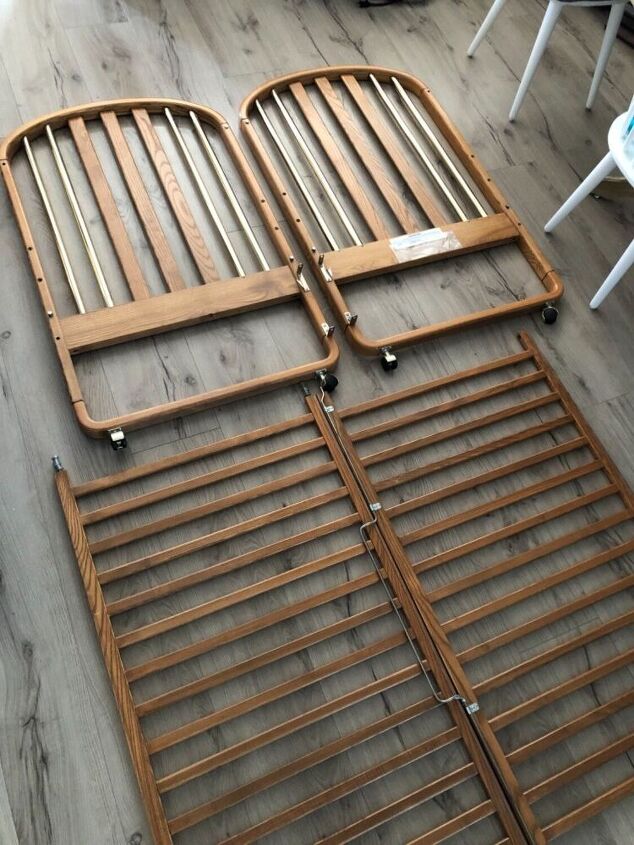
A while ago I was given an old crib from a friend who was moving and was going to donate it. I never turn down a piece of furniture as I try to see potential in everything.
Hometalk Recommends!
I had been thinking of doing a faux vanity in my powder room around the pedestal sink. I was initially planning on buying wooden dowels from the hardware store, but let’s face it, lumber is insanely expensive right now.
I had a light bulb moment and thought I could use the crib slats.
I began by cutting the rounded crib tops to use as the top and middle supports.
After the top pieces were cut, I used the jigsaw along the edges and cut the slats off. They were glued and pegged so cutting was the easiest way to get them loose.
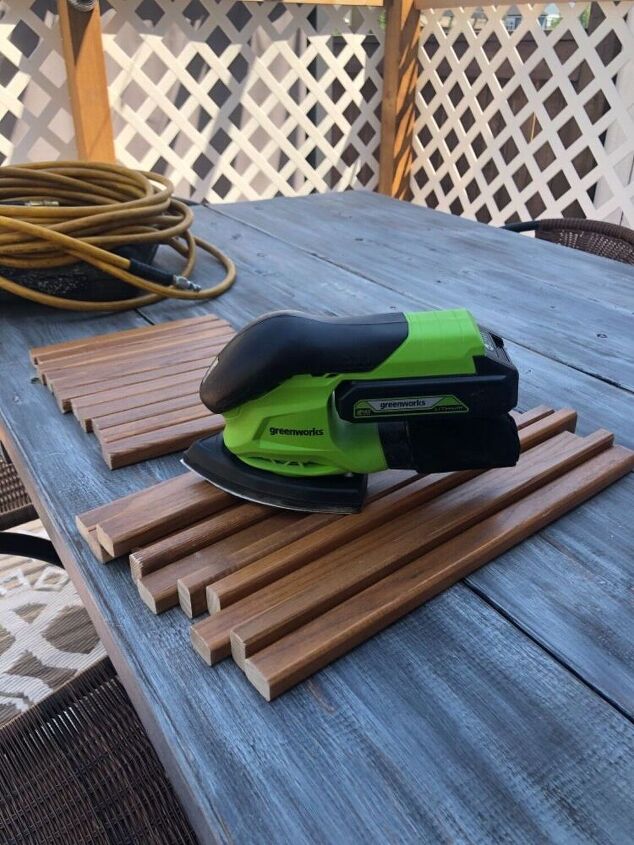
Once all the pieces were cut, I sanded down the edges.
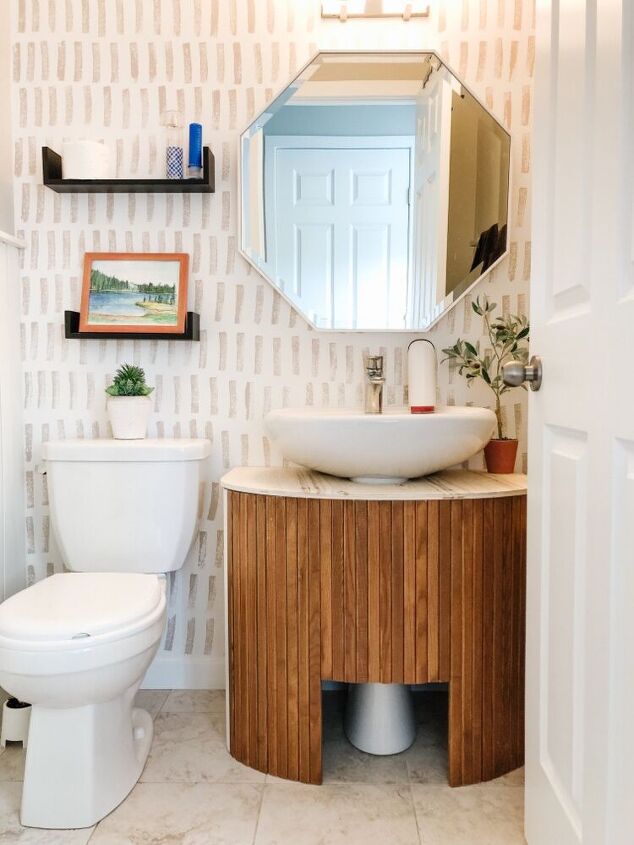
I planned on having a hidden stool at the bottom so after measuring the width of the pedestal sink, I removed 11 slats and cut them down to allow for the stool.
I then nailed the slats onto the curved pieces.
As this was going against the wall, I only needed to close in one side. I used some molding I had on hand and some plywood.
For the plywood I cut out a small gap to allow space for the baseboard.
I then traced around the vanity leaving about 1cm around for the top piece.
I then needed to add the cut out for the pedestal sink. I got this super handy contour gauge off of Amazon and it worked well in getting the shape I needed.
Once that was cut to size, I moved it into place and slid the top on. I then added some nails to attach it to the base.
I had cut down the 11 slats for the front of the stool so I used those to see how wide the stool needed to be.
The next step was to figure out the stool. I used the contour gauge to figure out the bottom of the pedestal sink and the level to see how deep the stool could be.
I then nailed the stool together and nailed the crib slats onto the front.
I then used my go-to primer, chalk paint, and antique wax.
Primer allows for no sanding.
The chalk paint covers great over the primer. I always use a cream chalk paint for this finish.
Then a layer of antique wax gives the driftwood look.
I then sprayed the whole vanity with this matte clear sealant.
I finished off the stool with a fun blue accent on the sides and a leather strap to pull it out.
I’ve linked the contour gauge above and also here
Enjoyed the project?
Resources for this project:
See all materialsComments
Join the conversation
-
 Ecp108397771
on Dec 07, 2025
I will be honest, it looks bulky and l do not like it.
plus you loose so much storage space under that sink.
just my 2 cents :)
-
-
 Kim Lunsford
on Dec 07, 2025
I really like this but I liked it more before you painted it.
-













Frequently asked questions
Have a question about this project?
Why not use a marble or tile top? That space between the sink & cabinet upsets the flow of the cabinet. Cover it with something other than plywood
It looks like a great surround, but I wonder, is there some way to incorporate some storage into it? Maybe put some shelves or drawers in it that are 'hidden' from the front but you can pull it out and access from the back? One of the drawbacks of a pedestal sink is there is no storage under it...just a thought. Blessings!
I love how you turned something most people would toss into a functional and stylish piece. Using the crib slats instead of pricey wood dowels was such a smart move, lumber prices are no joke these days. I recently looked into Native Trails customer service because I was considering one of their farmhouse sinks, but now I’m tempted to DIY something instead! Have you done other furniture flips?