OLD Cab Over Camper Make-over!

by
Beth Elliott
(IC: homeowner)
$400.00
2 Weeks
Medium
We got this 1979 camper for free! It was a ton of work to clean, paint and add flooring and carpet but we are camping in it for our 2nd year! I do have a few fixes to work on this year but as far as I have got on this project, it works great! :D
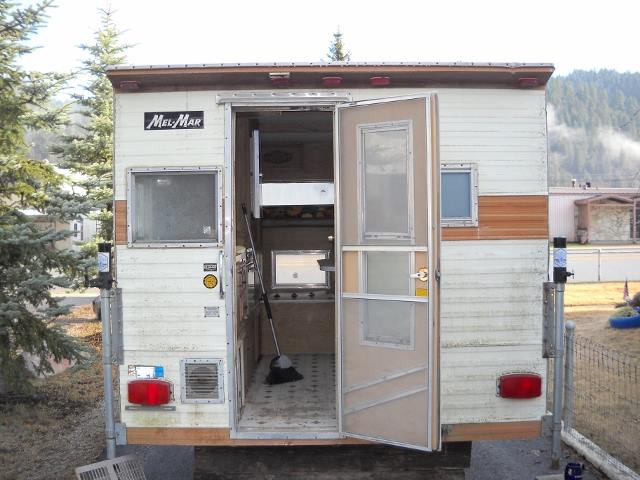
Let me say... I sat back and asked myself... What have I gotten myself in to? This was sitting out for so many years with no use. Yet, it was still in pretty decent shape. Purple Power degreaser on the outside! Clean lights and replaced bulbs. Still needs one new jack and a screen door. Hopefully we can find that this year!
First things first... get rid of the old mattress! You just never know... Found that the top front floor was in extremely poor condition and there was no way to replace the wood, metal, etc. so I vacuumed out all of what I could and filled the holes with expanding foam. Ha, talk about strength! Worked wonderful!
Started sweeping out all the yuk, going through the cupboards, etc. Still found it all in solid shape!! Yay!!
I removed the cushions and the covers were in excellent shape so I steam cleaned them all. Air dried in the sun. The best way!
Made sure the toilet still worked (hooked up to a small battery) it works!! So needless to say A LOT of bleach!! Flushed out the tank a few times.
Pulled all the cupboard doors and used green chalk paint on them. Clear coat when they dried and added the same wall covering in the middle as what is on the walls by the bed.
Cleaned and prepped. Painted with KILZ first. Then a simple white semi gloss on all the lower walls. The ceiling was in excellent shape so degreaser on it and white as new!
I didn't want to pull the old linoleum so I decided to just use the self stick tiles but I did use some liquid nails to make sure they stayed in place. I also place them on the small wall under the window and added a piece of the same carpet as what is in the bed area.
Same floor in the bathroom. Covered the back wall with paper and sprayed these doors with texture paint in speckled brown. I also did the bathroom door in the same paint.
Because the floor and top front window by the bed were in such bad shape I spray painted the window green and just covered it with the carpet that I laid on the whole area. Nice and cozy!
Hung new homemade curtains from my Mom (the best) added some décor. Decided to add simple battery operated push lights for when we aren't around electricity. I used a brighter battery powered light inside above the back door and also as the back porch light.
Added self adhesive tin tiles to the back and side walls in the little kitchen. And use gloves as they will cut you up! Learned that the hard way! LOL ;) I also place a towel rack behind the stove to hold the spices in place when traveling.
Purchased a standard mattress (fit width but a bit short on length so I roll up extra blankets at the bottom of it. We sleep like babies in here!!! So cozy!
Clean cushions!!! A touch of home!
Last was the quote on the front above cab window!! "What Happens at the Campground Stays at the Campground!" We still have to work on the kitchen sink and oven but I wanted to go camping and let me tell you... comfy, relaxing and fun!! Worth all the work! Total cost of the whole project? Approx. $400!!!
Enjoyed the project?
Published March 25th, 2015 1:32 PM
Comments
Join the conversation
2 of 188 comments
-
 Shi21950216
on Mar 28, 2023
I love what you’ve done. One question: are the windows over your bed larger enough to escape if there should be a fire?
-
-












Frequently asked questions
Have a question about this project?
Do u know if a septic has sold poo hasn't been used for years if he should replace it
Did you have to repair the metal on the base?