Hang Outdoor Holiday Lights Quickly Tutorial

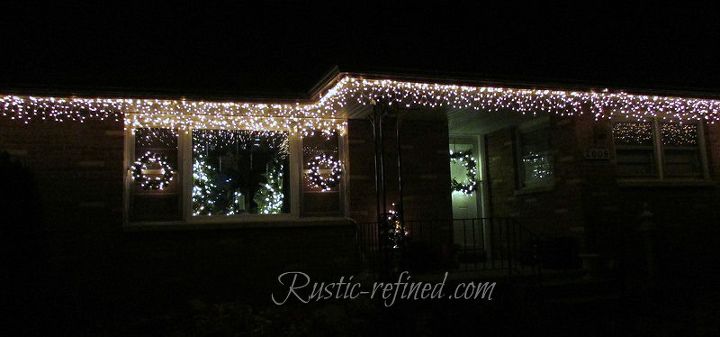
No one likes hanging outdoor lights. Do they?? Especially in Northern climates? So I couldn't blame my husband when he said he was NOT going to spend hours or days hanging Christmas lights outside. So I had to get creative and find a way to do it quicker and make sure they are straight! And believe me I found a way....To watch my YouTube video click the link
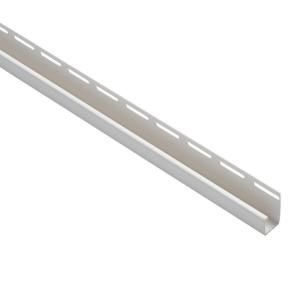
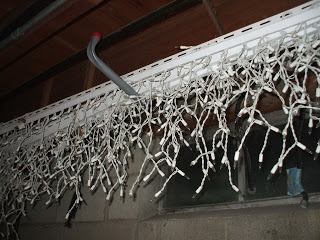
In any home improvement store in the aluminum siding aisle you will find "J Channel". It's the channel that goes around windows to secure your siding.(about 4 bucks for a 12' long piece) Well, see the slotted holes already provided? We use those holes to secure it to the soffits right underneath the gutter. Notice the bottom of the J Channel...we drilled holes 2" apart all the way down INSIDE the J channel. Those holes, we inserted our icicle lights and pulled them thru so just the "icicle" part was hanging down. The existing holes provided by the manufacturer we used to secure to the house with stainless screws.
To get started on this project you are going to have to measure length of your house you want to light and decide how far apart you want your lights placed inside the J channel. (so it takes a bit of math but no trigonometry I promise!) I went with a 2" spacing because I like a fuller look, but you can just insert your lights with the spacing the mfg provide if you like. Also you do not have to use just icicle lights. You could use those big beautiful C9 holiday lights. Just unscrew the bulb from the socket, insert the socket inside the J channel and screw the bulb through the BOTTOM of the channel to secure it.
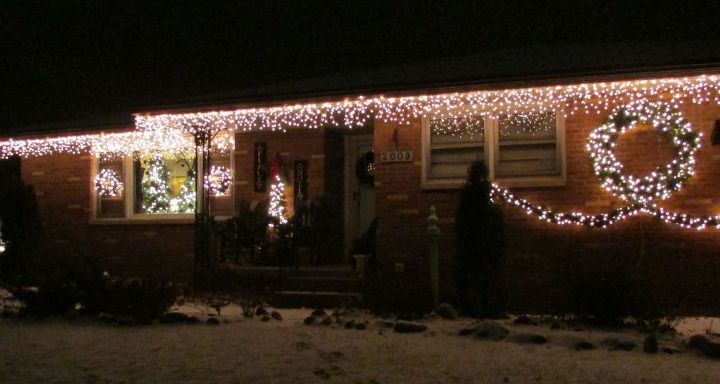
To string the lights INSIDE the J channel.... took us about 2 hours (we did this in the basement). But we only have to do that part ONCE. We keep the lights inside the channel year round, fold them accordion style and hang them off of hooks in the basement when not being used.These lights you see, we did back in 2010 and are getting ready to be hung again for the 4th time.
The front of house has a jut out that covers the porch. So we measured, and created a diagram of the front of the house and noted where cuts in the J channel were going to need to be made to accommodate any turns or corners this light string would need to make.
This method works for us, it withstands very high wind gusts and we never have to go back outside to fix lights that fell down or are not straight especially in the winter time!
Hanging the J channel itself along the front of house takes literally 20 minutes every year (just for the front of the house. No lie! No screwing in 50 screws, no clips every 4 inches...none of that mess! Using rust proof screws, we use the slotted holes (already provided in the "J" channel) and screw them in just underneath our gutters. We get a perfectly straight line every single time.
Another version you can do....using large C9 lights.
There is now a video that shows them being hung up on my blog. The link is posted below, enjoy!
DIY Christmas Decorations
Enjoyed the project?
Suggested materials:
- Vinyl J Channel (Home Depot)
- Stainless steel screws (Home Depot)
- Christmas Lights (Home Depot)
- Ladder

Comments
Join the conversation
-
 Millies_mom47
on Dec 04, 2019
I LOVE THIS IDEA!!!! We have a flat roof so no gutters to clip to and we were going nuts trying to think of a way to hang the lights and this is a FANTASTIC idea!! We don't like (well hubby) taking the lights down and then back up so we'd put them up and leave them up. The fact you have the picture with the C9 lights hanging upside down would protect the lights from the weather. Keeps the bulbs from getting broken by hail, or by high winds, and from getting the color peeling away from the bulbs from the snow and rain washing it away or wearing it away as it washes over the bulbs. I hope that my C9 bulbs will work as these new ones are plastic and I don't know yet if they come apart so we can put the bulbs on the bottom and the bottoms on the inside of the channel. I may have to change it a bit if the bulbs don't come apart.
-
-
 Janice Howe
on Dec 29, 2020
I do something similar with C6 led lights zap strapped to 1/2 inch PVC plumbing pipes ( 10 foot lengths) using S hooks to hang off gutters. It takes me about 20 minutes to put up 60 feet almost alone. ( I do have my husband hold the ladder for 2 sections over a sloped area). Also fold up accordion style to put away secured with mini bungees. If I did not have a large basement for storage I might be inclined to cut the pipe in half or thirds so it could stand on end.
-
 Kimberly Bracero-Jones
on Sep 13, 2021
Hi Janice, do you have pics of your set up? I like the pvc idea.
-
-













Frequently asked questions
Have a question about this project?
How did you drill the holes in the J channel...I am having a hard time!!
The idea is great but I wonder if there are more pictures. I can't see how the spacers connect or how the lights are actually threaded through the channel. Thank you in advance if yo can provide larger more detailed pictures.