DIY Sharpie Marbled Ornaments

by
Marybeth Santos
(IC: blogger)
4 Materials
$15
5 Minutes
Easy
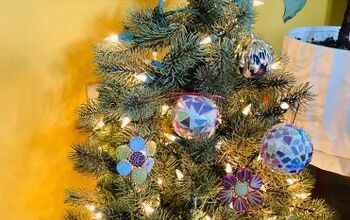
I was in a making kind of mood today and I just so happened to have 20 clear plastic ornaments that I bought on sale at Michaels a few weeks ago. You won't believe what I decided to do with them. I did my old faithful, sharpies and rubbing alcohol to transform them from blah to groovy. Or psychedelic as one enthusiastic viewer described them. Guys, these are so easy, you need five minutes, some sharpies, some rubbing alcohol, q-tips and the clear plastic balls and you would have one gorgeous tree!
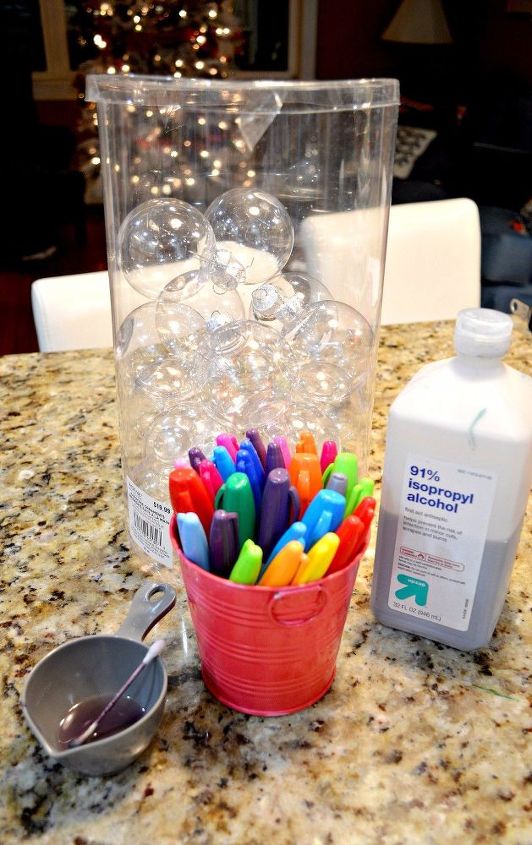
The materials for this one are very basic. You need clear, plastic ornaments, (I got mine from Michaels), Sharpies, 91% Rubbing Alcohol and a Q Tip.
Color in your ornaments with the Sharpies. Coordinate colors, or don't. Pick two colors. Or five. It's totally up to you. There is almost no way to mess these up. They are truly art because they go beyond the maker's own ability to make something beautiful. Also, if you mess up, I'll show you how to fix it in a second.
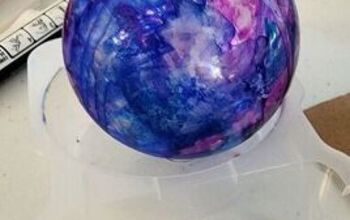
Drip rubbing alcohol on your ornament. I use the q tip to do this. Dip it into the rubbing alcohol and then let it sort of drip onto the ornament. You can start to twist your ornament so that the alcohol sort of meanders around the ornament. Keep dripping and turning until you're satisfied. I also did some dabbing with the q tip to smoosh the colors around. I especially like to dab at any straight lines that are still remaining from coloring in the ornaments. Sometimes the dabbing of the color removes too much color, which leads me to the next step.
If all of your dripping and dabbing has left some bare spots on your ornament, have no fear. Let it dry a little and then go back at it with your Sharpie and repeat the process. You'll start to get a really nice depth of color by doing this, so even if you don't mess up, you might want to add more colors just for fun.
Add a hanger to your ornament and let it dry! You can pop it right on the tree and let it air dry there. Yes, that is the end of the process. It wouldn't be a terrible idea to seal these with a little Krylon sealer, but as long as you don't get them wet, they'll be fine. If you pull them out of storage next year and they are a little dinged up, you can add some more sharpie and alcohol and you're good to go!
It's only a few days til Christmas, so if you're really dying to make something, this is a good one to try! You probably have everything besides the ornaments and I wouldn't be surprised if those are on sale right now!
Enjoyed the project?
Resources for this project:
See all materials
Any price and availability information displayed on [relevant Amazon Site(s), as applicable] at the time of purchase will apply to the purchase of this product.
Hometalk may collect a small share of sales from the links on this page.More info

Want more details about this and other DIY projects? Check out my blog post!
Published December 15th, 2017 9:22 PM
Comments
Join the conversation
2 of 4 comments
-
 Fan142531405
on Dec 22, 2024
😁 just tried it on glass and it works! You can control the drip a li'l by blowing on it.


-
-
 Fan142531405
on Dec 24, 2024
I coated the inside with white acrylic paint, then used your method but instead of dabbing with a q tip, I used an unused mascara brush and flicked the alcohol with my finger across the bristles!

-








Frequently asked questions
Have a question about this project?
Can I use glass balls for this project?
What would you use to apply the Krylon so it doesn't mess up the Sharpie art? Really appreciate your project!