How to Make a Festive DIY Ornament Ball in a Few Easy Steps

Discover the joy of crafting your own festive decorations with a step-by-step guide to creating a DIY ornament ball. This cute piece of holiday decor is easy, quick, and cheap to make. You can also expsteriment with different shapes, colors, and styles. Let's get crafting!
This post was transcribed by a member of the Hometalk editorial team from the original HometalkTV episode.
Tools and materials
- Large Christmas ornaments
- Small Christmas ornaments
- Hot glue skillet
- Long stick
- Styrofoam ball
- Gold wire
- Wire cutters
- Gold thread
Steps
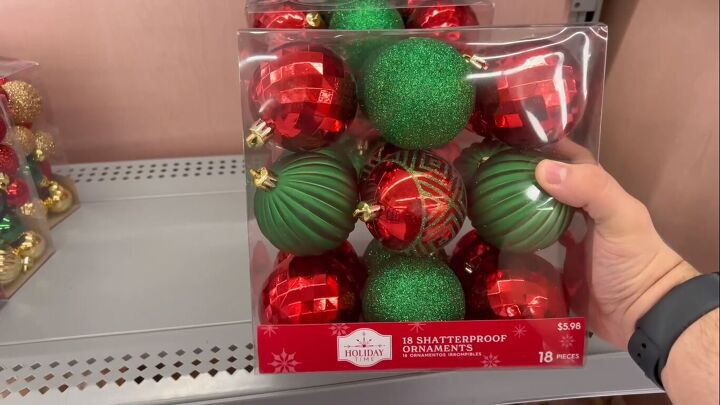
I went to my local Walmart and I found these ornaments. I really like the red and green. I think it's traditional Christmas and these are going to be perfect for creating a hanging ornament ball.
1. Secure the tops of the ornaments
Take the ornament, make sure all of the tops are secured and if they're not, you can just come back in with a little bit of hot glue. I'm just going to dip that ornament top into the hot glue skillet and that's actually going to secure it even more so.
2. Stick the ornaments in the styrofoam ball
Poke it right into the ornament.
3. Alternate between colors (optional)
All we have to do is just alternate between each color. The cool thing about this ornament ball is that you can do it in whatever color scheme you like. There are so many different colored ornaments out there and so many different choices and selections; you can also use unusual shapes as well.
I'm just alternating so we have somewhat of a pattern but if you're only using the smaller ones, it doesn't really make a huge difference.
Tip: I actually poked some holes into the ball first. So what I did is I just took the ornaments and poked them throughout. That way we have our guidelines and we don't have to worry about doing it as we add each ornament.
4. Glue the final ornament on a stick first
We have one final ornament left to add but it's not going to fit perfectly in between. So we need to add an artificial stem. You could also do this to every single one. Let that sit for a minute or two while it hardens up, then poke that right into the styrofoam.
5. Add smaller ornaments in the gaps
Now we're going to fill any of the little gaps that we have in between the ornaments. Go through each and every little section and add the smaller ornaments where it's necessary.
If there are glue strings, you can always pull them off after they've hardened.
6. Make the hook
Now I have a little length of wire. I'm just going to fold that so that we create a U or a pin. You could also use a floral pin for this if you choose. Then just snip the ends slightly at an angle.
7. Tie the string onto the hook
Create a little knot and tie off the string. You want to tie it a couple of times to make sure. Pull it really tight, make sure it's not going anywhere. Take your scissors, and snip off an excess. Cut yourself a nice long wire to be able to hang it from a tree, a shepherd's hook, or a lamppost.
8. Insert the hook
Now that we have our little hook, we're going to close that up by pinching the ends together. Dip it in the glue skillet and find a little opening. Make sure it goes into the styrofoam and there you go.
DIY ornament ball
Here is how the DIY ornament ball turned out. I absolutely love it. You could also place this on a pole and create a topiary.
We kept it in a traditional color scheme, which just screams Christmas to me. So we used the golds, the reds, and the greens. Thank you all so much for watching. I hope this video and tutorial inspired you.
What do you think of this DIY Christmas ornament ideas? Let me know in the comments below.
More Christmas ornament ball ideas
I also made another Christmas ornament ball using ornaments of all the same size and color, which you can see here:
Enjoyed the project?
















Frequently asked questions
Have a question about this project?