Room Paint DIY: Drippy Wall

by
Homeology.co.za
(IC: blogger)
7 Materials
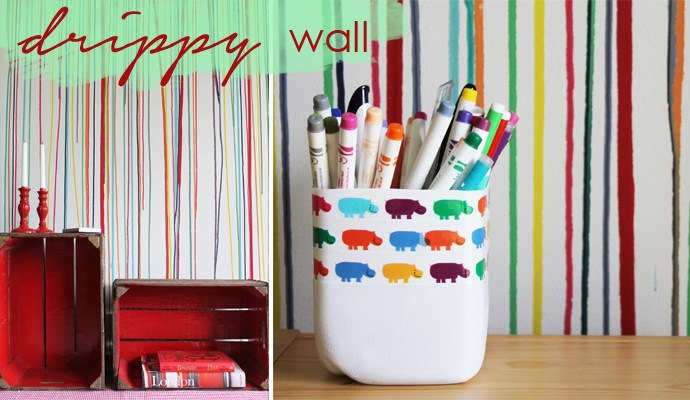
We have been doing some very exciting paint projects behind the scenes these last few months, and this one has to be my favourite.
It's a very simple project although it takes a bit of planning, but once you get it right, it's great fun. Try your own room paint DIY this Spring with a riot of colour!
You will need:
How to:
Then it’s really as simple as sucking the paint into the syringe (don’t dilute it),
I finished one colour at a time, keeping the lines dense and long on the one end and making them gradually more sparse and shorter toward the other end of the wall.
It’s amazing to see what the paint does: some of the lines run perfectly straight down, others have a mind of their own and go off in their own direction (the fan that we turned on at some point may have had something to do with a few of them taking off diagonally!). Some of the lines even merged to form new and interesting colours of their own. So all in all, every wall using this method will be entirely unique!
We’d love to see what you do with this, so choose a wall, get your paint out and get creative. Please send us your pictures!
Enjoyed the project?

Want more details about this and other DIY projects? Check out my blog post!
Published January 29th, 2016 12:00 PM
Comments
Join the conversation
2 of 95 comments












Frequently asked questions
Have a question about this project?
Could this be done on a concrete floor by just swirling the different colors around out of a syringe? Same type of paint???
Why chalk paint???
I would like to try this on a bathroom wall. Would some type of sealer need to be used for cleaning?