Knock Off Pottery Barn Driftwood Gray Paint Finish

Can't afford Pottery Barn furniture in that gorgeous gray wash or driftwood finish, but love the look? I've found an easy way to transform any piece of furniture to give it that coastal beachy vibe for next to nothing!
Hometalk Recommends!
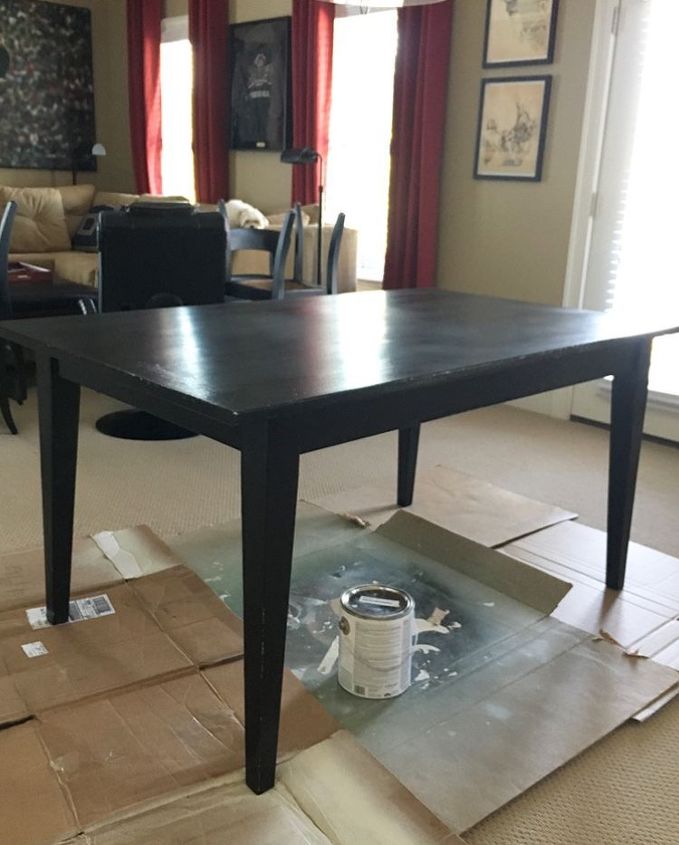
Here was what I started with a plain black table that had previously been painted. Ironically it's from Pottery Barn circa 1998 and used to be maple!
PLEASE READ THE FULL TUTORIAL ON MY WEBSITE, below are the basics to get you started.
So you understand the layers of paint you will be applying:
- 1st layer is the base coat color that is the lightest
- 2nd layer is the faux wood grain pattern
- 3rd layer is the wash that creates the look of boards and blends the colors
- 4th layer is a protective clear coat
Step 1:
Apply the base color Light Raffia. If you are going over a dark color or stain, please start with bonding primer.
CLICK HERE for a full tutorial on painting with cabinet enamel. I like the hard finish to work from, when creating the faux finish.
Step 2:
Using the color Sable Evening (dark gray) mix it with the clear mixing glaze in a 25% glaze to 75% paint ratio. I "eyeballed it". Stir until fully combined. The glaze helps you have more "working time" to wipe or manipulate the paint for different looks or if you make a mistake you can wipe it off!
Step 3:
Dip the tips of the softening brush, which is VERY soft itself, lightly into the Sable Evening glaze mixture. Blot Excess on a paper towel.
Step 4:
Using an EXTREMELY LIGHT touch drag the brush to create what looks like wood grain. PRACTICE on cardboard FIRST to make sure you like the look.
Work in sections at a time and DO THE TOP of the table LAST, when your technique is perfected :)
You can see I am barely touching the surface and skipping along to get the spaced look.
If you over apply or overlap sections like I did, wipe off the excess with a damp rag immediately.
When you are finished, the base "wood grain" should look something like this. I wasn't very careful and did some overlapping to create more dimension.
Step 5:
Wash out the brush with soapy water and let the brush and glaze dry OVERNIGHT!
Step 6:
Using the color Arid Plains (grayed brown) mix it with the clear mixing glaze in a 50% glaze to 50% paint ratio. I "eyeballed it".
Stir until fully combined. The glaze helps you have more "working time" to wipe or manipulate the paint for different looks or if you make a mistake you can wipe it off!
Step 7:
With the softening brush, dip the tips into the Arid Plains Glaze mixture. No need to blot excess. In CONSISTENT strokes to give the appearance of wood boards, with a medium touch, brush on the glaze.
It is important to WORK fast and keep moving. Go back and forth, back and forth using both sides of the brush.
Don't overlap the paint much...keep adding more glaze as the brush begins to not apply consistent color.
Step 8:
Let dry overnight and then clear coat with a polyurethane to protect the finish! I applied 2 coats of polyurethane for protection.
COMPLETED!
Here is what the final driftwood gray finish looks like on the top of the table.
Enjoyed the project?
Resources for this project:
See all materials









Frequently asked questions
Have a question about this project?
Is your table bar height? I’m just wondering because not only awesome job on the table, but where did you find the chairs? I love them, the whole table was completely transformed!
Why did it cost $35?
I love this look!. We painted our awful wooden floors BLACK a few years ago. Now we have a white dog and they are always full of hair. Would you ever try this technique on a floor?
The clear mixing glaze you recommended is no longer available. Can you suggest another brand? Thanks you!