


This Cute DIY Birdbath is Guaranteed to Attract a Few Feathered Friend
Birds will flock to your garden when you create this cute DIY birdbath.
So, if you love relaxing in your backyard, watching the birds and critters go about their day then this is the perfect DIY. With just a few flower pots, paint, and sea glass you can create this gorgeous basin.
This post was transcribed by a member of the Hometalk editorial team from the original HometalkTV episode.
Hometalk Recommends!
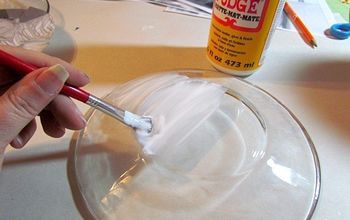
1. Seal the terracotta pieces
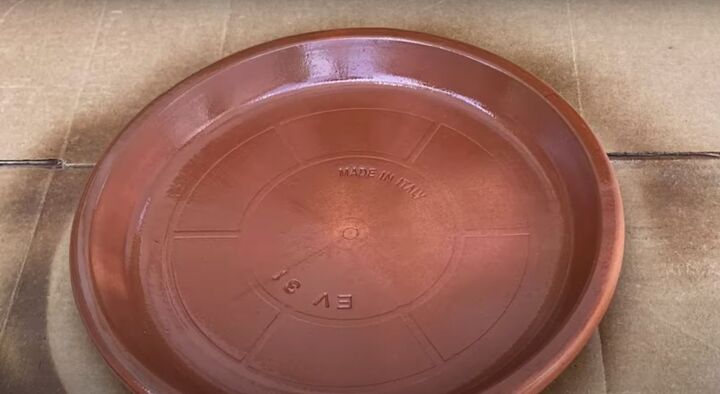
I am going to use a couple of terracotta flowerpots and a base for the DIY birdbath. Terracotta is porous so it needs to be sealed. I sprayed two coats of triple-thick, clear glaze protectant all over the pots and base to prevent any water from seeping out.

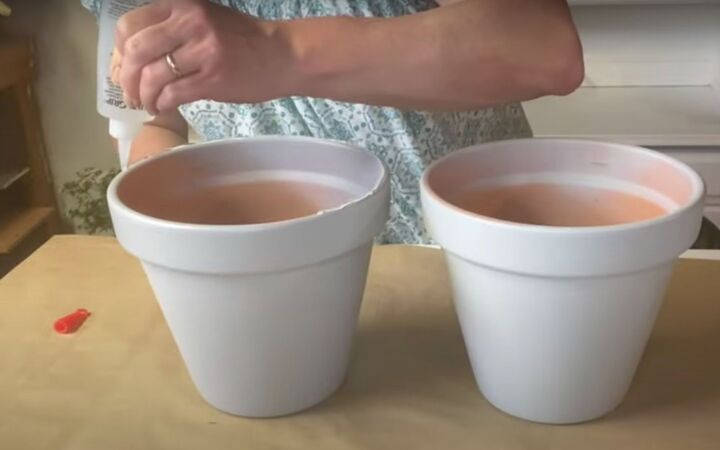
2. Paint the flowerpots
Next, I sprayed the outside of all three pieces with spray paint in a light gray color. I gave each piece two thin coats.
3. Form the base of the DIY birdbath
Once the paint is dry add glue to the rim of one of the flowerpots. You need to use strong glue made for marine use so that the seal is watertight.
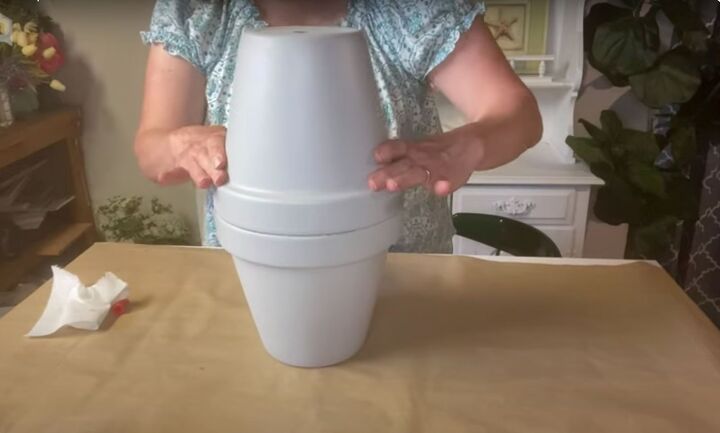
I then placed one pot on top of the other and formed the base of my DIY birdbath.
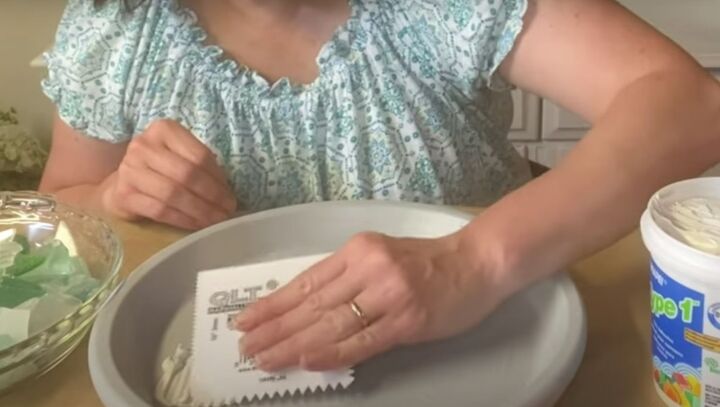
4. Make the bath piece
While the glue was drying on the base pots, I worked on the bath part of the project. To make the top that will form the birdbath I lined the large shallow terracotta base with tile adhesive.
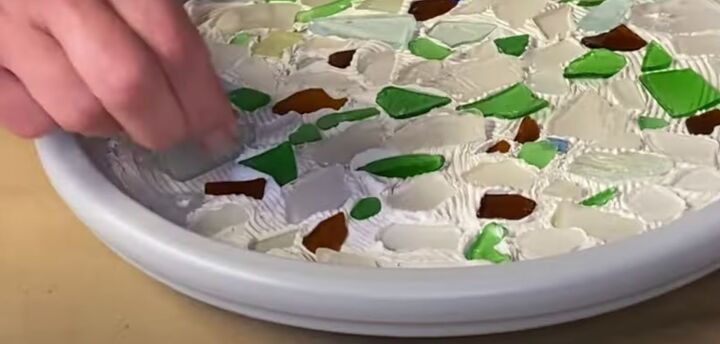
While the adhesive was still wet, I pushed in pieces of sea glass of different shapes and colors until the space was filled. Once I had all the glass in place, I let it dry overnight.
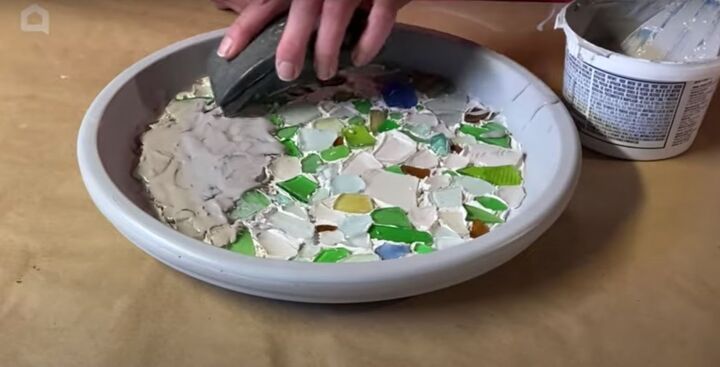
With the tile adhesives set and dried, I added some grout over the sea glass to seal it all. I made sure to wipe away any excess before it dried.
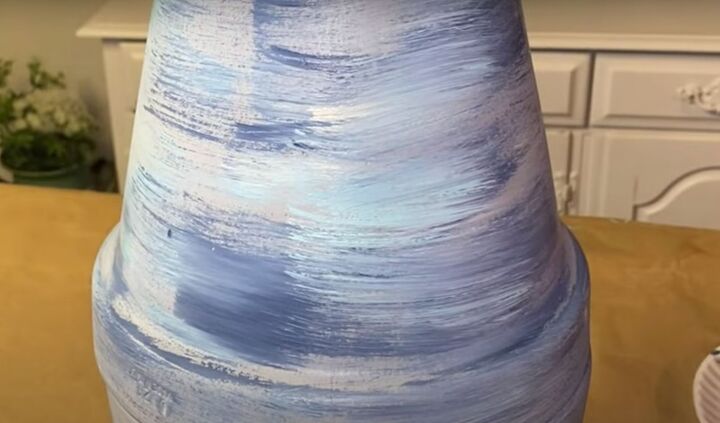
5. Paint the base
To brighten up the base of my birdbath I decided to add a little color. I dry brushed light layers of paint all around the base with a chip brush.
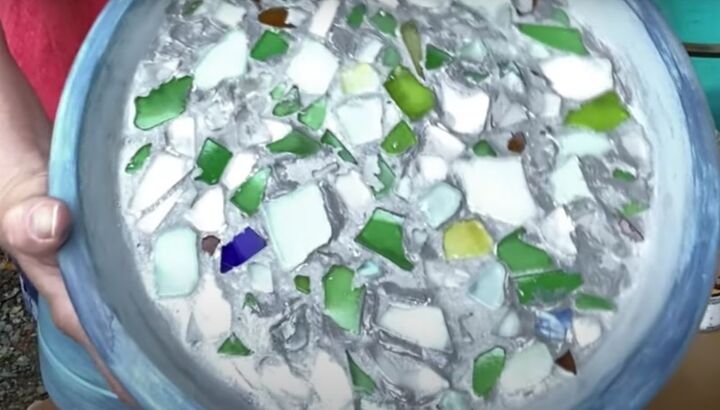
6. Coat the base and bath in glaze
Once everything was nice and dry, I gave both the top and bottom of the birdbath a coat of the clear glaze I used at the beginning and then placed the top on the base.

7. Place the DIY birdbath in the garden and add water
Now it’s ready to be nestled in a spot in your garden for the birds to enjoy.
More Outdoor Projects
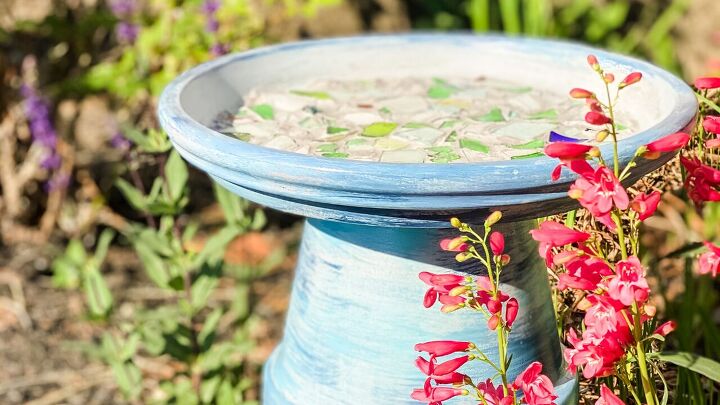
Isn't it so pretty? The birds are going to love it!
DIY birdbath tutorial
This cute DIY birdbath is guaranteed to attract a variety of feathered friends to your backyard and it is so easy to make. I hope you enjoyed this project as much as I did. I would love to hear your thoughts in the comments
Resources for this project:
See all materials


Comments
Join the conversation
-
Looks great, but I spoke be very careful with the adhesives & sealants used. Wouldn't want to make birds or other wildlife sick using harmful chemicals for this!
-
Beautiful! Going to try this


Frequently asked questions
Have a question about this project?
Could you place your pots bottom to bottom (for a sturdier base at ground level)? Have you made one like that?
It’s a very beautiful bird bath. I also am wondering if connecting the pots on their bottoms would give it more stability, but if no one ever goes around it, I suppose it wouldn’t ever get tipped over. Very pretty.
Are the products used safe for wildlife?