How to Build a Crib Mattress Porch Swing

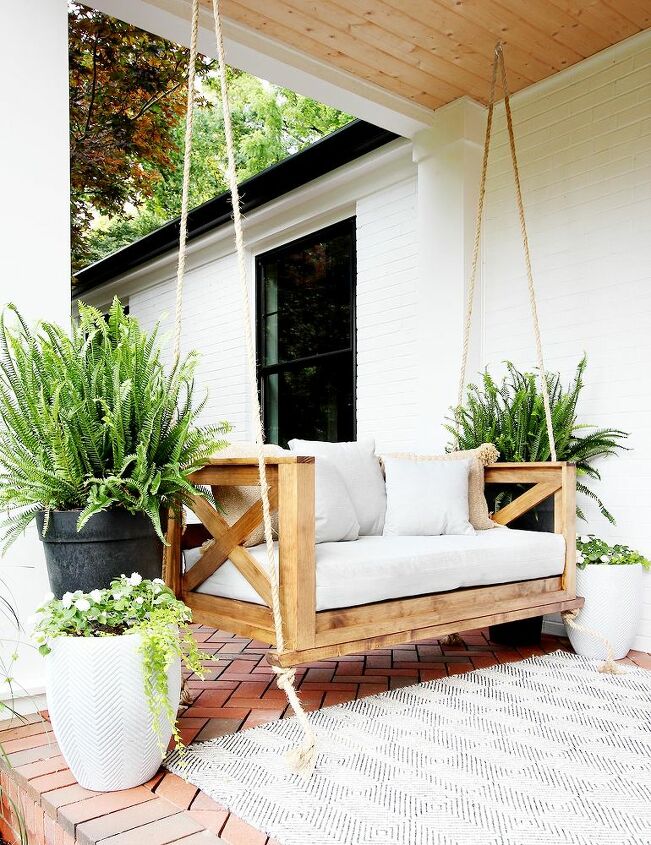
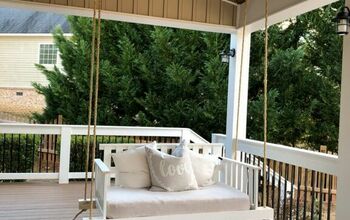
Since posting my original porch swing bed tutorial, I’ve gotten a lot of requests for a smaller version. Bed swings are large since they are made to fit a twin mattress, and they do take up a lot of room on a porch. So it’s understandable that someone would rather have a smaller swing.
My sister-in-law has also been wanting a swing for her front porch, and after measuring, it’s not quite deep enough for a bed swing. So this was a good opportunity to kill two birds with one stone. I could build a swing for my sister-in-law, and document the process for a tutorial.
Let’s get started. Here’s what you’ll need:
- Finish Nailer
- Tape Measurer
- Wood Glue
- Wood Stain
- Wood Filler
- Miter Saw
- Sand Paper
- 1 1/4″ Finish Nails
- 2″ Finish Nails
Wood
- 4 pieces of 1″ x 4″ x 8′ clear pine
- 6 pieces of 1″ x 3″ x 8′ clear pine
- 3 pieces of 1″ x 2″ x 8′ clear pine
- 4 pieces of 1″ x 6″ x 6′ clear pine
- 2 pieces of 2″ x 3″ x 8′ framing lumber
As always, I try to keep my DIY tutorials simple so they’re easy for anyone to do. All joints are butt joints using wood glue and finish nails.
Step 1: Build the Bottom Frame
The first step is to build the frame out of the 1×4’s. Here I used the 2″ finish nails.
Next, I added 2 pieces of the 1×2 to the inside of the frame on each end. I placed these 3/4″ from the top as seen in the diagram below.
Then I added a 1×3 in the middle. These three pieces will support the boards that form the seating underneath the mattress.
I then cut 4 pieces of the 1×6″ to 50 1/2″ in length and glued and nailed them onto the seat supports.
Step 2: Build the Posts
I cut 8 pieces of the 1×3″ to 20″ in length to make the posts for each corner of the frame.
Two pieces make up one post. I applied a bead of glue down one edge.
Forming an “L” shape I placed the other piece of 1×3 on top of the piece with the glue. After making sure the edges were perfectly lined up, I nailed the two pieces together with 2″ nails.
Once I had all four posts made, I glued and nailed them to the frame using 1 1/4″ nails.
Step 3: Add the Top Rails
After all four posts were nailed and glued in place, I added the top rails. These are cut from the 1×3’s. See the image below for placement and lengths.
Step 4: Make the X's
Making the side X’s was the most difficult part of building this swing, but having me provide the angles and measurements should make it easier for you.
Each X is made of 3 pieces of 1×3.
The first piece is the longest. I cut each end of this piece at a 59 degree angle as shown in the diagram below.
The next two pieces are identical. I cut one end at 59 degrees and the other at 31 degrees.
After I cut all six pieces, I glued and nailed them in place as seen below.
Step 5: Add the Back Rails
Next I added the back rail, which I cut from a piece of 1×4.
Step 6: Add Back and Side Caps
I then cut all three pieces for the top caps for the sides and back of the swing. For this I used 1×3’s. I cut the ends where they meet at a 45 degree angle. See measurements and placement below.
Step 7: Add Trim and Back Support
For some added detail, I added trim around the bottom of the swing. I cut four pieces from the 1×2 and glued and nailed them in place.
Then I added one more piece to the back for added support. I cut this piece from the 1×4.
Step 8: Add the Bottom Supports
On all the other swings I’ve built, I’ve always used eye screws to connect the rope. But I thought I would try something a little different for this one. Instead of the eye screws, I used two 2×3’s nailed and glued to the bottom of the swing as shown below.
Then using a 3/4″ drill bit, I drilled a hole though each one for the rope to run through.
After I drilled the final hole, I sanded and stained the swing.
I hope you enjoyed this tutorial and found it helpful! And by the way, here are instructions on how to hang a swing.
Enjoyed the project?

Comments
Join the conversation
-
-
 Mtu67597849
on Jun 24, 2022
Where did you get the crib mattress? I'm not finding any crib mattresses smaller than 51 3/8 inches.
-















Frequently asked questions
Have a question about this project?
I dont have a question just a comment: OMG! THANK YOU for sharing this. I cannot wait to try my hand at this. I love the country look and this will look AWESOME on our front porch. Much nicer than standard porch swings!!
Where did you get the rope?
What color stain did you use? I love how yours turned out and want to match it!