


This One Trim Trick Makes Builder Cabinets Look Expensive

This article is sponsored by Titebond.
A bland laundry room doesn’t have to stay boring.
With a few trim details, fresh paint, and updated hardware, you can completely transform builder-grade cabinets into a custom-looking feature.
This makeover turned a plain beige laundry room into a moody emerald space with vintage-inspired charm.
Table of contents
- Tools & Materials
- Step 1: Assess Your Space and Take Measurements
- Step 2: Empty the Cabinets
- Step 3: Remove Cabinet Doors
- Step 4: Cut Trim Pieces
- Step 5: Attach Trim to Cabinet Doors
- Step 6: Paint the Cabinet Fronts
- Step 7: Paint the Back Side of Doors and Shelves
- Step 8: Color Drench the Laundry Room
- Step 9: Reinstall Cabinet Doors
- Step 10: Install New Hardware
- Step 11: Paint Final Touch-Ups
- Final Reveal
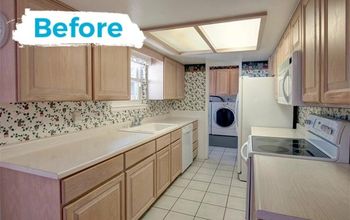
Before


Tools & Materials
Tools
- Measuring tape
- Pencil
- Miter saw or circular saw
- Paint sprayer (optional)
- Paint roller (fine nap)
- Paint tray
- Clamps
- Screwdriver or drill
- Paintbrush (for touch-ups)
Materials
- Pre-primed wood trim
- Cabinet paint
- Wall paint
- Titebond Quick & Thick Multi-Surface Glue
- Cabinet hardware (handles or pulls)
- New doorknob (optional)
- Sandpaper (optional for prep)

Step 1: Assess Your Space and Take Measurements
Start by evaluating your laundry room and deciding what you want to change. In this makeover, the cabinets felt flat and uninspired, so the goal was to add character with trim and bold color.

Measure the cabinet doors carefully, noting:
- Door height
- Door width
- Trim dimensions for each edge
Write these measurements down before moving forward.
Step 2: Empty the Cabinets
Remove everything from inside the cabinets so you have a clean workspace.
This also makes the cabinets lighter and easier to work around during installation and painting.
Step 3: Remove Cabinet Doors
Take the cabinet doors off their hinges.

If your doors are large or heavy, get help—cabinet doors can be surprisingly awkward to remove alone.
Set the doors in a safe workspace where you can measure, cut, and paint them.
Step 4: Cut Trim Pieces
Using your measurements, cut trim pieces to fit around the edges of each cabinet door.

Pre-primed wood is a great option because it reduces prep work later and saves time during finishing.
Before gluing, lay all trim pieces on the doors to confirm fit and spacing.
Step 5: Attach Trim to Cabinet Doors
Apply Titebond Quick & Thick Multi-Surface Glue to the back of each trim piece.

This glue works especially well for:
- Porous surfaces
- Semi-porous materials
- Slick cabinet fronts that regular glue may struggle to grip

Benefits include:
- Strong initial tack
- Fast drying time
- Clear finish
- Strong bond

Position each trim piece carefully and clamp it in place.
Allow the glue to fully cure before removing clamps.
Step 6: Paint the Cabinet Fronts
Once the trim is secure, it’s time to paint.

Using a paint sprayer gives the smoothest finish and creates a clean, factory-like look.

Spray the front of each cabinet door evenly, using thin coats for best results.
Allow the doors to dry completely between coats.
Step 7: Paint the Back Side of Doors and Shelves
Flip the cabinet doors over and paint the back side along with any shelves.
You can use:
- A paint sprayer for the smoothest finish
- or
- A fine-nap roller for faster setup and easier application

A roller may leave slightly more texture, but that’s usually fine for interior cabinet surfaces.
Don’t worry if the paint looks patchy while drying—uneven drying often creates temporary blotchy areas that disappear once fully cured.
Step 8: Color Drench the Laundry Room
Now paint the room itself.
For this makeover, the entire laundry room was color drenched in a rich emerald tone—walls, cabinetry, and trim all in the same color family.

Color drenching creates:
- Depth
- Drama
- A cozy, elevated look
This is especially effective in smaller rooms like laundry rooms, powder rooms, or offices.
Step 9: Reinstall Cabinet Doors
Once everything is dry, reattach the cabinet doors.
Heavy doors may require two people for easier installation.

Take your time aligning them evenly—small hinge adjustments can make a big difference.
You may need to:
- Tighten hinges
- Adjust door spacing
- Reposition slightly for perfect alignment
Step 10: Install New Hardware
Add updated cabinet hardware to complete the new look.

New pulls or handles can instantly make cabinets feel more custom and polished.
This step often makes the biggest visual difference.
Step 11: Paint Final Touch-Ups
Check for any missed spots, especially:
- Door edges
- Corners
- Around hardware

Use a small brush for touch-ups.
Even if you forgot a few spots during painting, careful touch-up work can make everything look seamless.
Step 12: Upgrade Small Details
Finish the room by replacing smaller details like the doorknob.

Even small upgrades help tie the entire design together and make the room feel intentionally styled.
With just a few upgrades—trim, paint, and hardware—you can completely transform plain builder-grade cabinets into something custom and high-end.


This laundry room makeover proves that:
- Bold color can dramatically change a space
- Trim adds instant character
- Small details create big impact
The result: a moody emerald laundry room with vintage-inspired charm and a completely elevated feel.
Comments
Join the conversation
-
Too Many Ads!!!
-
I've added trim to doors for probably 20 years (made closets in our old 1800's house that had no closets). A lot of people don't have a paint sprayer and the cost to rent one kind of defeats the purpose of diy so I'd say to use a foam paint roller. It gives a smooth finish if you take your time and don't speed over the doors like it's the Indy (this makes air bubbles). I'm not a fan of the monochromatic look - nothing stands out, it just all blends together.
















Frequently asked questions
Have a question about this project?