

How To Create a Stunning Wood Slat Wall With Led Lights

A slat wall accent is an easy way to add character to a space.
After seeing different designs, I decided to take my slat wall to the next level by extending it onto the ceiling and adding LED strip lights. The process was simple, and the result completely changed the look of the room.
If you’ve been thinking about adding a wood slat wall, this guide will walk you through each step so you can create one yourself.
This post was transcribed by a member of the Hometalk editorial team from the original HometalkTV episode.
Tools and Materials
- 1x2 wood boards (amount depends on wall size)
- Wood stain
- Gloves and a cloth for staining
- Measuring tape
- Saw
- Level
- Nail gun with nails
- LED strip lights with adhesive backing and remote control
Hometalk may receive a small affiliate commission from purchases made via Amazon links in this article but at no cost to you.

1. Measure and Cut the Wood
I started by measuring my wall to determine how many 1x2 boards I needed.
After marking the measurements, I used a saw to cut the boards to size.

2. Stain the Wood
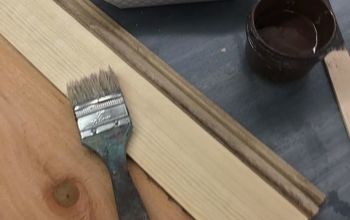
Staining the wood was quick and easy. Wearing gloves, I used a cloth to apply the stain, letting the color soak into the wood.
The rich, dark color looked great. Once all the boards were stained, I let them dry completely before moving on.

3. Attach the Slats to the Wall
I made sure the first board was plumb (which means perfectly vertical—something I recently learned!).
Using a nail gun, I secured it to the wall.

From there, I used another 1x2 as a spacer to keep the gaps even and attached the next board. This made the process much faster.


I continued until all the vertical slats were in place.
For my wall, I used 13 slats, but you can adjust the number depending on your space.

4. Extend the Slats Onto the Ceiling (Optional)
Many slat walls stop at the top of the wall, but I wanted a bolder look, so I continued onto the ceiling.
I secured each board tightly against the next one. If you prefer a more seamless finish, you can miter-cut the edges.

I also made sure to cut the slats around the outlet, leaving space so they wouldn’t interfere with anything plugged in.

5. Add LED Strip Lights
This is where the project really got exciting!
I used LED strip lights with an adhesive backing, so installation was simple.
I removed the backing and pressed the strips onto the wood, running them up the wall and onto the ceiling slats.

For a cool effect, I placed the lights in alternating gaps. You can adjust the pattern based on your preference.
When I turned them on for the first time, the room instantly changed! The lights have different color options, and my favorite was the cool blue.

6. Style the Space
To complete the look, I added shelves in a matching color, curtains, and a bed.
The finished slat wall accent made the room feel modern and unique.
Looking for another creative slat wall idea?

DIY Wood Slat Wall With LED Lights – Easy Accent Wall Project
Adding an accent wall using wood strips was a simple way to upgrade the space. Whether you keep it just on the wall or extend it to the ceiling, the result is stunning.
The best part? It’s fully customizable! Choose different stains, adjust the spacing, or try different LED light patterns to fit your style.
Would you try a slat wall with LED lights in your home? Let me know in the comments!



















Frequently asked questions
Have a question about this project?