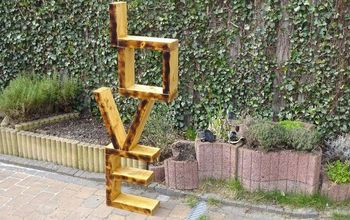
LOVE SHELF

I saw this shelf on Pintrest a while ago and wanted to make it. As soon as the season for Valentine's was coming , I started the shelf. I decided I wanted to make a few at a time. As I'm sure I'd sell or use them as gifts. I asked by Hubby to help. On Friday, I drew up various designs based off of pictures of various LOVE shelves that I had seen. Then, I decided how tall I wanted the shelf to be and came up with the other dimensions. I had a wood pallet made out of 2x4 so I did not have to purchase wood or screws. On Saturday, my hubby and I cut the boards and assembled the shelf. Then I stained some, I wanted a few different looks, so I also painted one giving it a shabby chic finish. I am very pleased with how all the shelves turned out! However it was very large so I decided to make some half the size. I will show you both below. Make whatever works for your space.
Materials
Wood: untreated 2x4 or 2x8 for best results
Wood Screws: 26, 2.5 - 4 in each
pencil
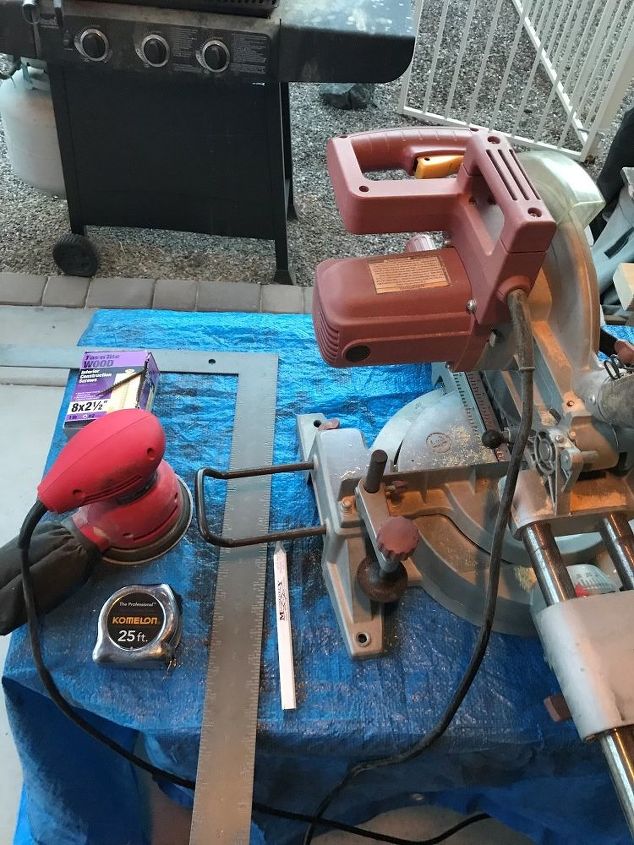
Miter saw
Tape Measure
Square
Drill
Sandpaper and Sander
D Rings (to put on back to hang)
*Paint: be sure you have both primer and paint. I used black primer and the color I used was Chalk White by General Finishes
*Stain: if you go this route I used Classic Grey by Minwax, Special Walnut by Minwax
You need to cut all the wood in these sizes
Large Shelf:
13.5" 4
25" 1
15" 1
15.5" 3 2 will have 22.5 degrees at top
19" 1
6.25" 1
Small Shelf:
7 1/2" 2
7 3/4" 2
9 1/2" 1
3 1/8" 1
12 1/2" 1
6 3/4" 4
You will want to assemble from the bottom up.
You will want to use a square to make sure that everything is squared up
Apply all with screws
the V has 4 cuts at 22.5 degree at the top and bottom of each board
After you but them together this how they should look and if done right all should stand on there own. I did three right off the bat. I think they will make great Valentines gifts
one I did in the Classic Grey stain by Minwax
One in Special Walnut by Minwax
last one I did with the Black primer and let dry then I painted with Chalk White by General Finishes. I used my hand sander and sanded so the black showed through giving it the appearance that it looked old.
again if you want to make the smaller one here is the cut list
small shelf
7 1/2" 2
7 3/4" 2
9 1/2" 1
3 1/8" 1
12 1/2" 1
6 3/4" 4
I did the smalls in the same finishes and added 2 hooks (D rings) on each along the L bottom so it huge nice and straight
I think they all turned out great and they are available Gilbert Marketplace https://www.facebook.com/groups/148871301967379/ if you'd like to order one. Happy Crafting
Enjoyed the project?
Comments
Join the conversation
-
 Marian Goetsch Martinez
on Dec 29, 2020
Very nice,I like the brown color the best
- See 1 previous
-
 Shelly L Nemeth
on Mar 29, 2021
i have a brown for my place but they all sold well
-
 Shelly L Nemeth
on Mar 29, 2021
me to that's mine lol!
-
-
 Katen
on Apr 24, 2024
Fantastic use of material and you included cut list (thoughtful). I see this in so many places I need at least a dozen! Unsure how long to make but worthy of every second of your time. Unique, lovely and heart warming. Thank you for sharing
-
 Shelly L Nemeth
on Apr 28, 2024
Well I made a ton for craft shows so it goes fast 😊
-
-









Frequently asked questions
Have a question about this project?
The cuts on the V seem like they should be 22.5 degree on the small version. Anyone else think the V is too spread out using 45 degree cuts?
Hello. Amazing job. Do you have a diagram for the small shelf?
I’m curious as too which 15.5” would you cut to 7 1/2” to make smaller version? I’m assuming the bottom board for the “O”?