How to Create a Dramatic Wall Accent Using Wood Shims

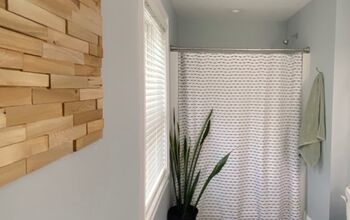
Make an impact with this dramatic wood shims wall project. This tutorial shows you exactly how to make it with tips on how to save time and money. This is perfect to add in your home entry.
If you like this project, you can see more simple DIY projects ideas on my blog, A Crafted Passion.
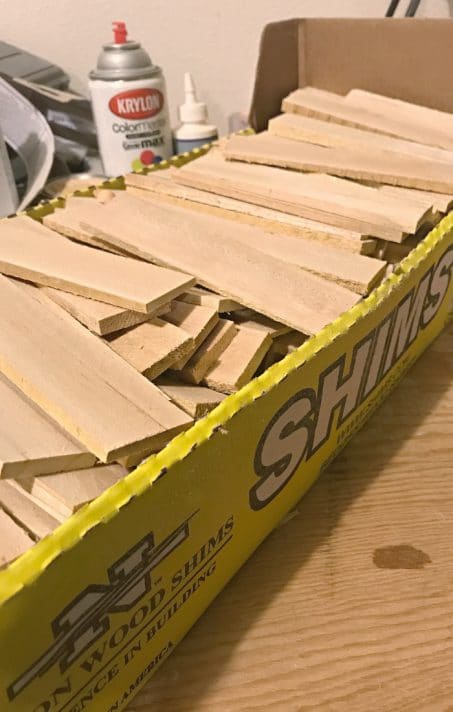
I saw some wood shims at Home Depot and figured those would be perfect to add texture to our entry wall. I figured a few hours of work and it’d be done.
If you want to create a wood shims wall, I’m here to show you how. It’s actually really easy, it just takes time.
Hometalk Recommends!
1. Guesstimate
Don’t make my mistake and guesstimate completely wrong how many shims you’ll need. Do the math and figure out how many you'll need. I needed about 540 and they came in packs of 20.
2. Cut Shims
Once you have all the shims you need, time to cut your shims down. I secured a block to the fence of my miter saw and then was able to quickly cut all the shims down to the same length.
3. Sand Shims
Now it’s time to sand your life away. I’m not going to lie, this takes a long time!
It's best to use a belt sander and sand all edges of your shims to smooth them out and get off any rough spots so that no one gets splinters when they're admiring your wall.
Once all the shims are cut, sanded, and given a good vacuum to get rid of as much dust as possible, time to move onto actually putting the wall together.
4. Cut Plywood to Size
Cut a piece of plywood to fit your wall where the shims will be going. It's better to secure your shims to the plywood rather than directly to the wall so you can more easily remove the shim wall if you don't want it later on or change your style.
5. Paint Plywood
Once it’s cut to size, I highly suggest you paint or stain the board to match what the finished shims will look like. There will be gaps in your shim rows so this helps make it all blend together.
6. Attach
Once your plywood is done drying from the paint or stain, it’s time to attach it to the wall. If possible, grab a stud finder and mark where studs are so you can attach the plywood with wood screws directly into the studs.
Alright, so this next part is KEY. Do not skip this step!
7. Layout
Working row by row, lay out your shims in a line on the ground. Since the shims are not all the same size, you need to match them up similar to a puzzle to make sure they fit together well.
8. Glue
Starting on the top row, add a line of wood glue on the back of the second shim in your row and attach it to the wall a few inches away from the edge.
Continue until all the shims are attached to the wall except the end pieces on each side.
9. Stain
Stain all the shims once they're attached to the wall.
10. Edge Shims
For the edges, you’ll need to align the shims next to each row and then mark where they need to be cut to fit perfectly.
Cut down those pieces, stain them, and then attached them to the wall with wood glue.
11. Trim
The last step is to add a piece of 1” square trim that has been stained or painted to match the wall and cut to size.
I love how this whole wall turned out and is quite the dramatic impact when people walk into our home.
What do you think? Would you ever do something dramatic like this wood shims wall in your home?
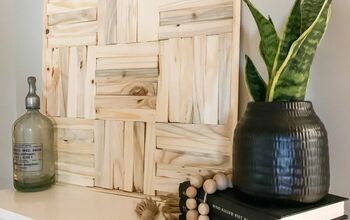
If you want another simple DIY project using wood shims, check out this Modern House Number Sign with Wood Shims
Enjoyed the project?
Resources for this project:
See all materials
Comments
Join the conversation
-
-
 1sp116693359
on Aug 13, 2024
Impressive! I would prime that though and put at least 2 coats of semi gloss or gloss to make it pop and make it less likely to hold dust. Or coat it with a gloss or semi-
gloss clear finish for the same reason. But if dust is not an issue, maybe go really matt, either with paint or clear finish to take it that extra mile and make it look even more modern. Great idea though! Well done!
-













Frequently asked questions
Have a question about this project?
I absolutely love it and I will dare to do crazy stuff to my decor as soon as we buy our forever home ! Looks incredible guys!
Doesn’t it catch the dust? Seems like it would be hard to clean!
looks good though!
Looks great, but I’m curious what you ended up paying for this wall decor. A bundle of shims in the SF/Bay Area is about $7.00, I’m not sure exactly how many shims per package, but it’s not enough to not have to pay a lot of money to complete this wall.