Family Tree

When a friend moved into a new place she wanted to have a Family Photo Wall. My daughter asked if I'd paint a family tree and I quickly agreed. I love painting on walls!
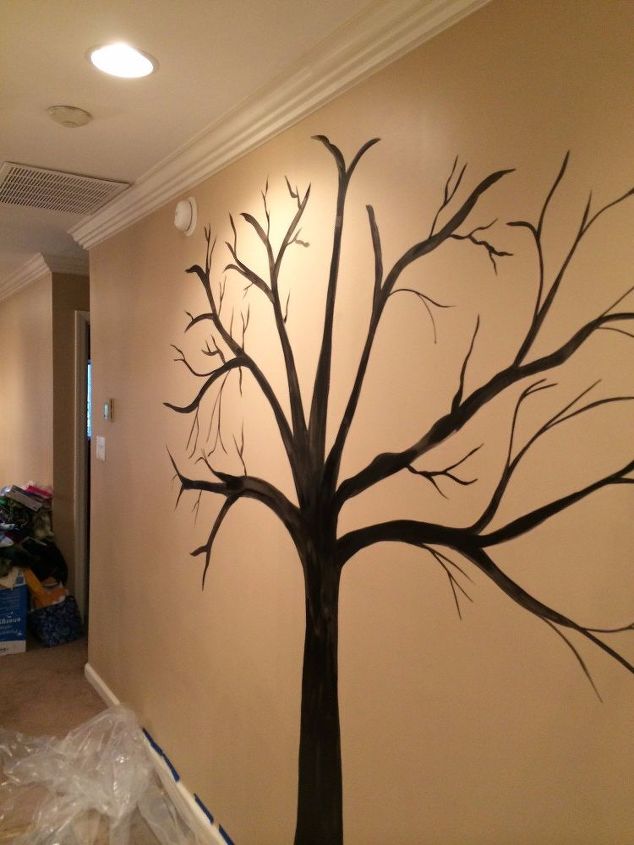
The tree was first sketched out with chalk and then my daughter and I just got to work and filled in the space with black acrylic paint. I used a one inch flat brush for most of it. The flat gives more control when making branches because it can be up on edge or tipped over for that uneven "branch" look.
Once the base was filled in it was time to get to the details.
More wiggly branch shapes were filled in with leaves still using the one-inch flat brush. These were basic heart shapes, (some more heart shaped than others!) but I wanted that little message of the "heart" to be there in the family tree.
Painting the leaves took the most time. I also used a liner brush to put in some wild lines in between to give the tree a fuller feel. If you look at the finished tree you can see the filler lines fluff it out a bit.
This took about 4 hours that included a short break for food. :) I stared at it a lot while eating because stepping back from a painting sometimes helps you see what's needed. At this point I felt it still needed some more leaves.
Looking at it from every side helps give you a feel for what's needed. Time to stop? Keep going? Decisions, decisions....
Photo frames were then placed strategically here and there on the tree. Next step? Print some photos and fill the frames!
This is a fairly easy project. Draw the tree with chalk and just wipe off your mistakes until you have a tree shape you like. When finished painting, take a damp cloth and check for chalk marks.
Tip: Print out pictures of trees to give you the feel of how the branches grow.
DIY home decor using old picture frames
Enjoyed the project?
Suggested materials:
- Black acrylic paint (Michaels)
- Chalk (Michaels)
- Frames (Dollar Store)











Frequently asked questions
Have a question about this project?