DIY Peel & Stick Vinyl Wall Planks

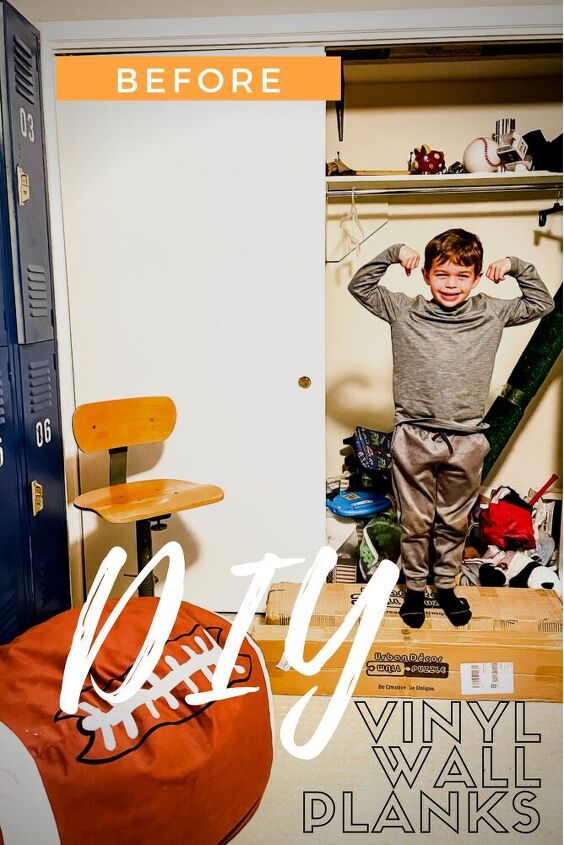
My son’s closet has always been a dumping ground for junk that really doesn’t serve a purpose. My goal for this space is to open it up and to add functional storage that will work well for a very messy 7 year old.
Best peel and stick vinyl wall planks!
Counterintuitive to the norm, I decided to take off the closet doors and to open the space up to the room. Creating what will eventually be the “dug out” in this sports themed room.
After removing the doors and doing some major cleaning I was left with a blank canvas to design a space that worked for our needs. The first task was to cover the blank walls.
After a lot of research and designing I found these vintage wood-look Vinyl Wall Planks with Removable Reusable Traceless Double-sided Tape from @urbandecor.us and I knew they would be perfect for this space!
Thanks to my sponsor, Urban Decor, for supplying the free product to help me write this post today! They are providing you with 10% off using the code DIYMOM10.
Let’s get started and I’ll show you how quick and easy the vinyl wall planks are to install.
Supplies:
This one is easy, you only need one item to get this vintage wood look and that’s the Urban Decor Vinyl Wall Panels- Vintage Wood Pattern (Cypress) With Removable Reusable Traceless Double-sided Tape. Unlike other similar products, there are no glues, or adhesives needed. The double sided removal tape makes it so easy to install.
I chose the color CYPRESS and I love the hints of browns are gray and the subtle vintage look. For reference I used 6-1/2 boxes.
PRODUCT INFORMATION
- Dimensions: 36″ x 5″ x 0.3″
- Packaging: 12 pieces/box, covers 18 sqft
- Material: High density polymer
Too(ls) Cool for School:
The tool list is so simple and you may have most of these tools on hand if not I’ve conveniently linked them for you.
- Level– You always want to start a project with a straight and level line.
- Scissors– You will need a pair of good house hold scissors box cutters. I found that scissors worked so much better!
- Speed Square– A speed square will help you get clean straight lines for precision cuts.
- Marker or Pencil – To help mark planks that need to be cut.
Now we are ready to start!
Tip
Start by drawing a level line and use this as a guide for your first plank placement. This will allow for nice level application. Remember that not all walls are created equal and don’t rely on them for being completely level.
Three EASY Steps!
#1 Cut to Size
First decide on your pattern. We used two full pieces and one smaller piece and alternated the pattern each line.
Cutting the planks is easy! First, measure your boards then use a speed square to draw a square line. Use a scissors to cut your plank.
Boom! That easy!!!
#2 Peel Back
These vinyl wall planks come with pre-attached with Removable Reusable Traceless Double-sided Tape! All you have to do is peel back the plastic strip and get ready to apply!
#3 Stick it!
Now you are ready to stick your plank to the wall! Use the tip above to start with a level line and work from there. When your plank is in place press down and smooth the plank for a good connection.
Note: The tape is STRONG! Yes, it’s removable but it may bring up some paint.
The Finished Product!
I absolutely love how this turned out!!!
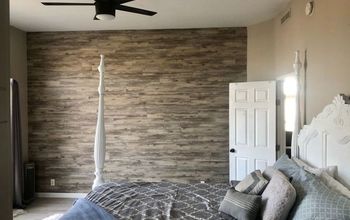
The vinyl wall planks have transformed this space from a blah and boring closet that I wanted hidden to a feature wall in his room! The product was easy to use and my seven year old helped me through the entire process, doing much of it on his own.
The only con, which could also be a pro, would be that the tape is really strong. The product claims to be removable, which it can be, but it will peel the paint from the wall. I am happy with the strength of the product as I hope this will be a feature in my sons room for a long time.
This is just phase one of this project, please come back for the rest of the transformation!!!
Enjoyed the project?
Resources for this project:
See all materialsComments
Join the conversation
-
-
 Andrea Runk
on Jan 23, 2023
It's crazy what a difference this refresh has made. I am so glad we got rid of his doors!
-
-
 Linda Ross
on Mar 24, 2023
Very nice. I didn’t do vinyl planks but cedar. It smells wonderful.
-
-











Frequently asked questions
Have a question about this project?
Where does peel off wall get from online. Can I order
Are they actual planks with some substance, or more of a thicker vinyl on a roll? I love it & could Definitely use for Many projects!! Specifically thinking for my "picture box" I'm putting together for my IG/online pics, since I don't have a large area to display my projects for pics! Thanks for your help!!
Do you know if this product will hold up on a bathroom wall (about 9’ x 15’)? Thanks!