Vintage Hankies Have Found New Life as a Handmade Baby Quilt!
All but two of these vintage hankies belonged to my two grandmothers and since they were both born in 1905, I'd estimate them to be anywhere from 70-80 years old considering when they were popular. I've had them for many years, and while I have more tucked away for my own daughter's future babies, this quilt was made for my first great-niece who was just born a few weeks ago! I am a self taught seamstress (I like sew-er better as a seamstress sounds like an occupation!) and have never made a quilt before but the internet and YouTube were VERY helpful along the way! It's certainly not perfect but it was made with LOTS of love! It's VERY important to pre-wash any fabric used to make a quilt so there are no bunching issues the first time you do wash the completed project.
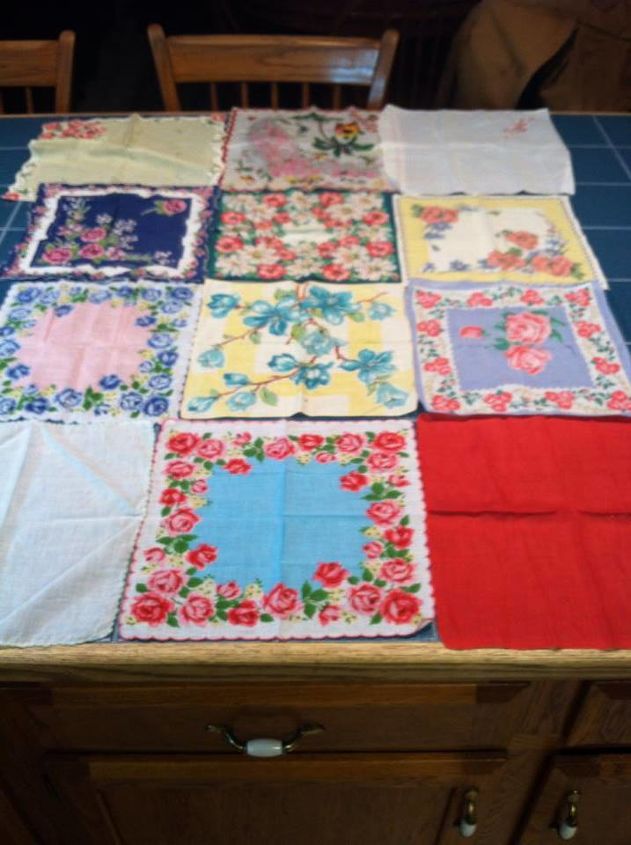
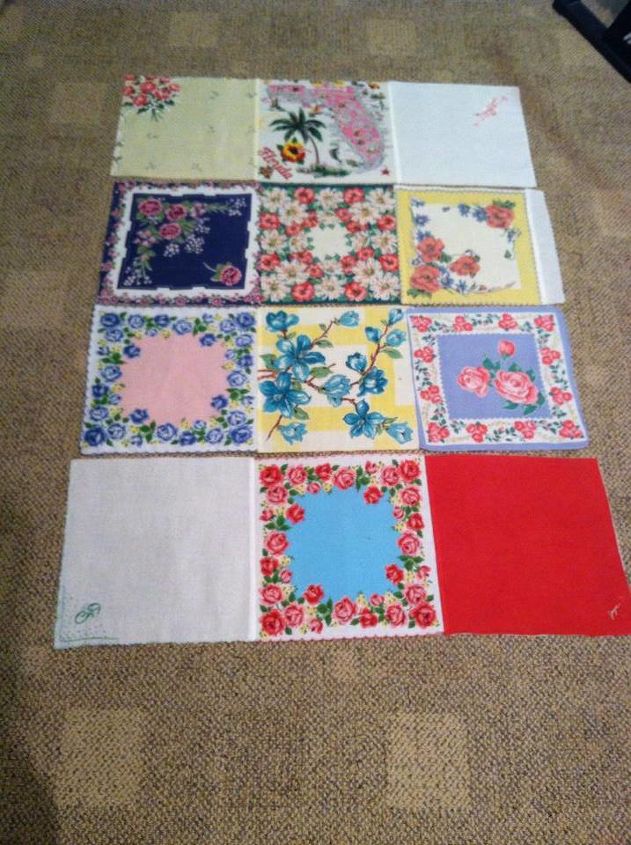
The first step was laying out the vintage hankies in a pattern to see what combination worked the best!
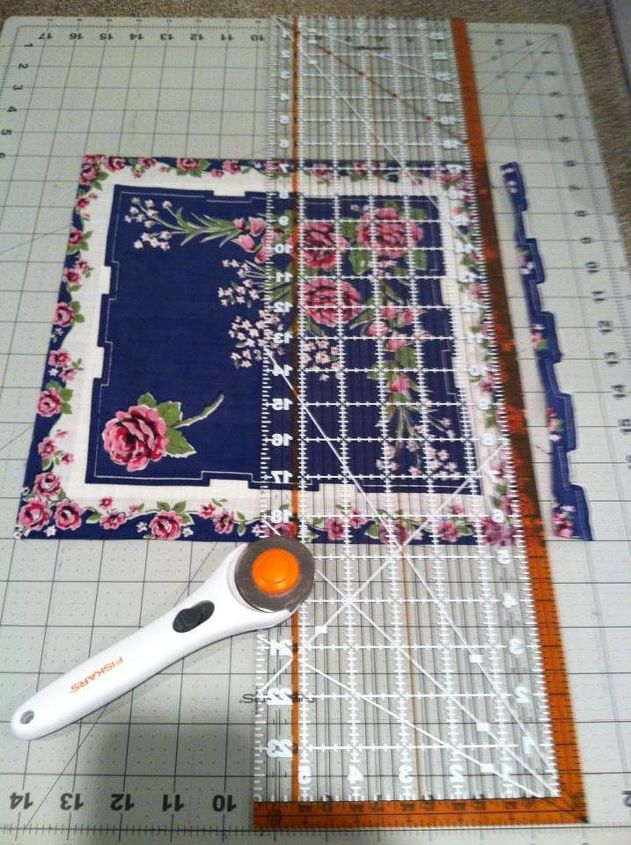
Some of the hankies were larger than the others and had to be trimmed down. I'm thankful for the rotary cutter and self-healing cutting mat as it made this so much easier!
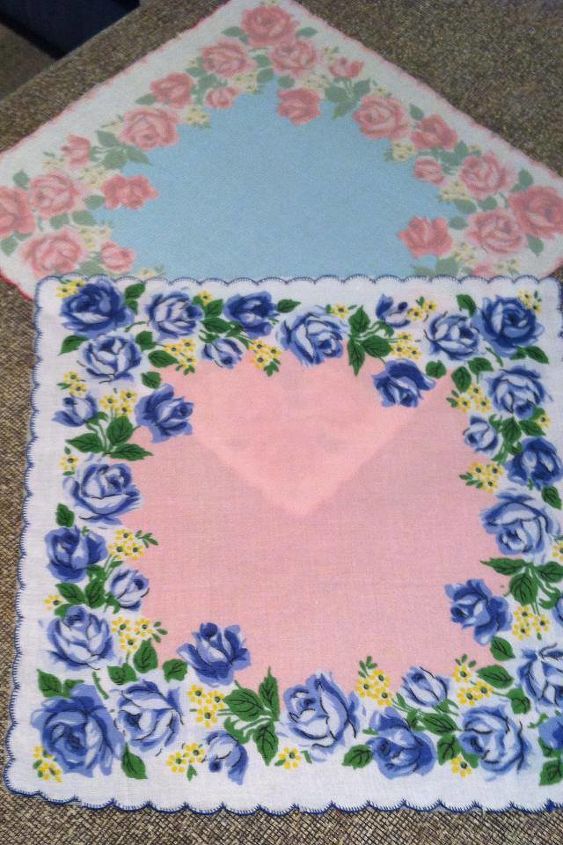
These 2 hankies have had the fusible webbing ironed on to the back. The fusible webbing gives the fabric extra support and a little stiffness to make it easier to work with, and to keep it from wrinkling up. I did use this process on all of the hankies.
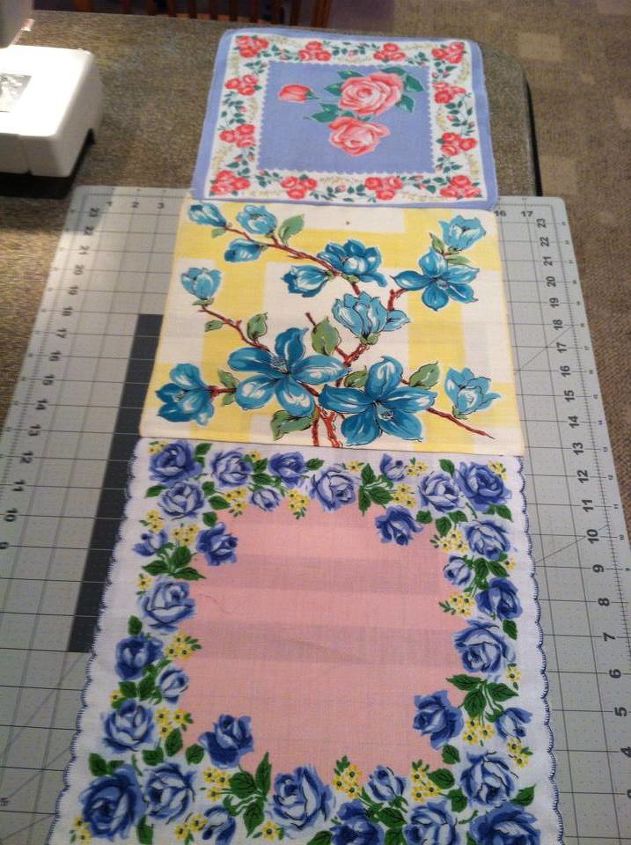
The first row that I sewed together. Being that my grandmothers were born in 1905, these hankies are probably 70-80 years old. Some of them had been washed so many times throughout the years that they weren't square anymore so I did the best I could with them!
Here are the 4 individual rows sewn together; the next step is to sew all the rows to one another! The yellow one on the right side was slightly smaller than the others so I improvised by adding in a filler strip.
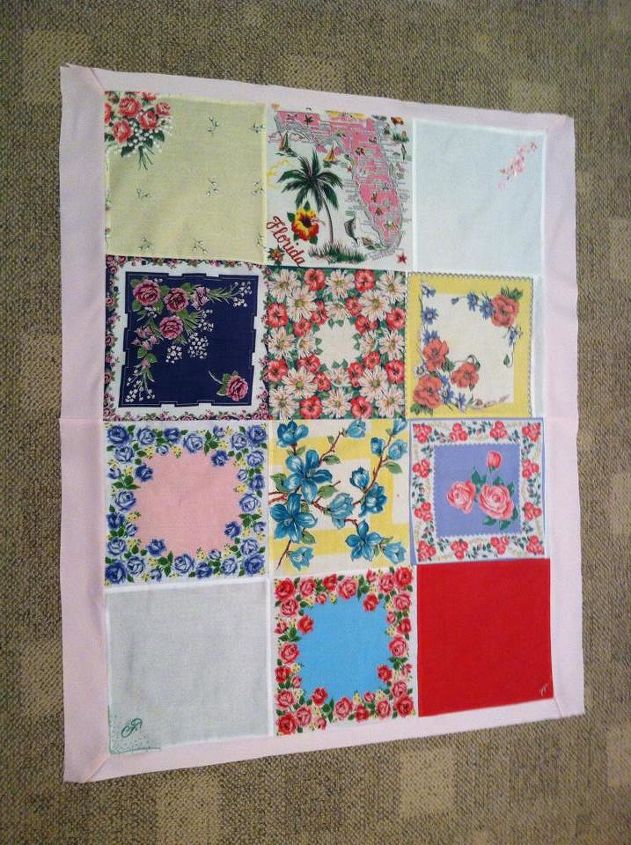
The quilt top is now picture framed with pink taffeta, which came from the full length dress that my daughter wore to the wedding of my brother and his wife who are grandparents to this baby!
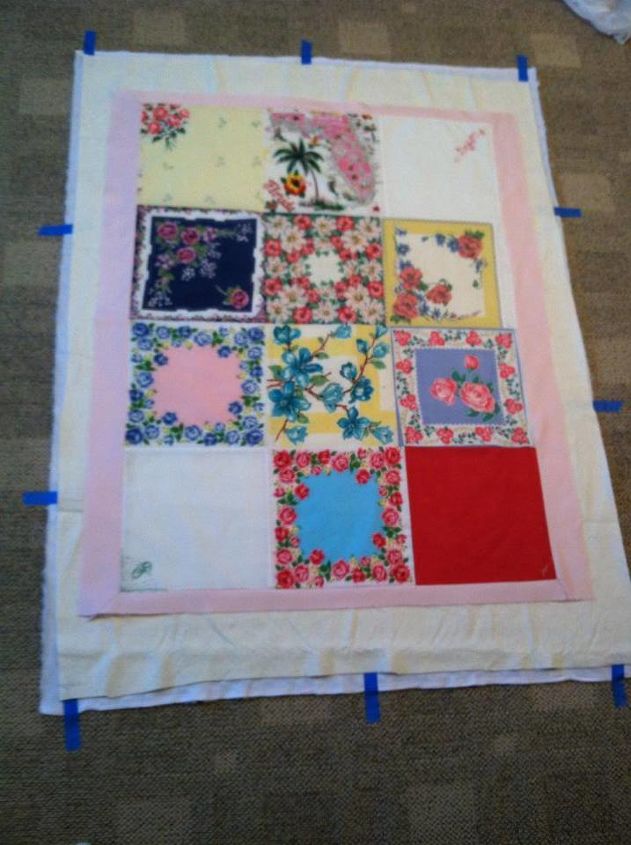
The YouTube tutorial I found gave me instructions on how to lay out the 3 layers of the quilt; the top, the backing, and the batting in between. Next step is to pin all the layers together with curved safety pins so that nothing moves!
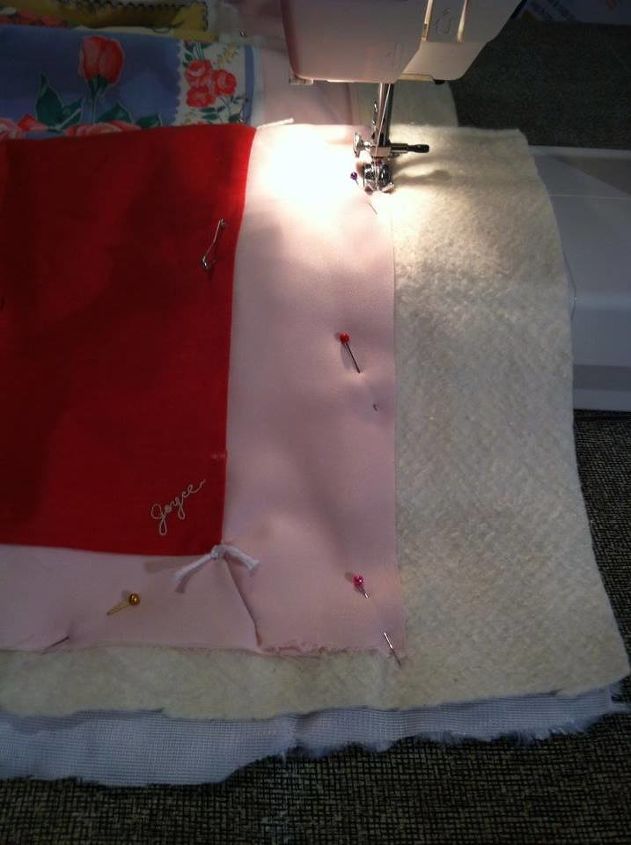
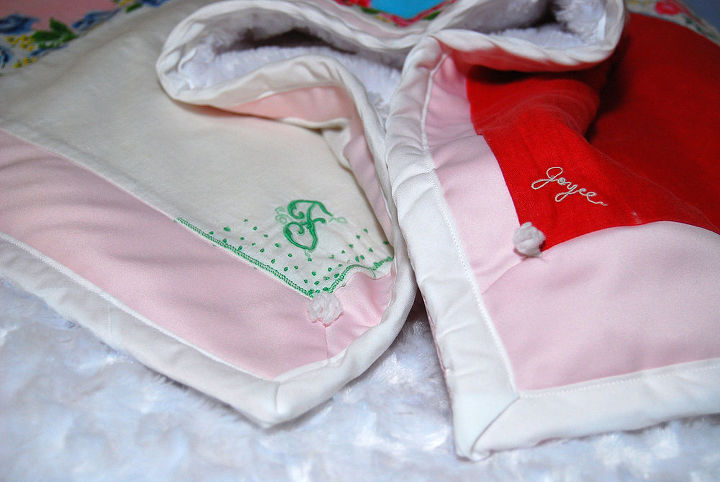
Here I'm sewing the 3 layers together around the edge. See the white yarn tie right below the "Joyce" in the red hankie? I chose to "tie" the quilt together which is an old fashioned method that seemed in line with the vintage-ness of this quilt!
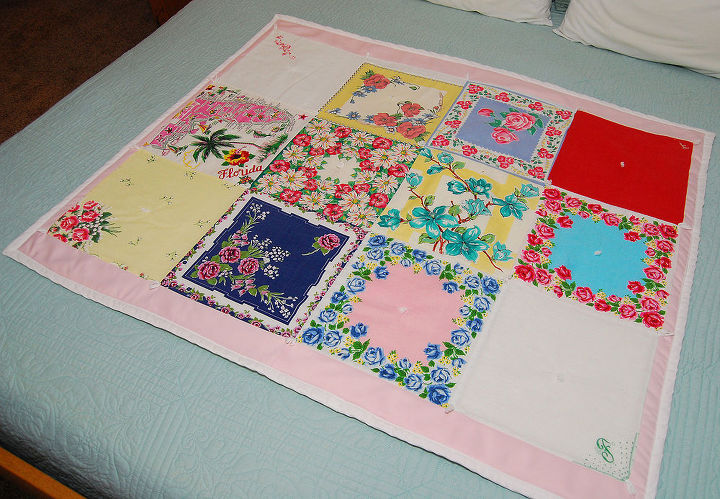
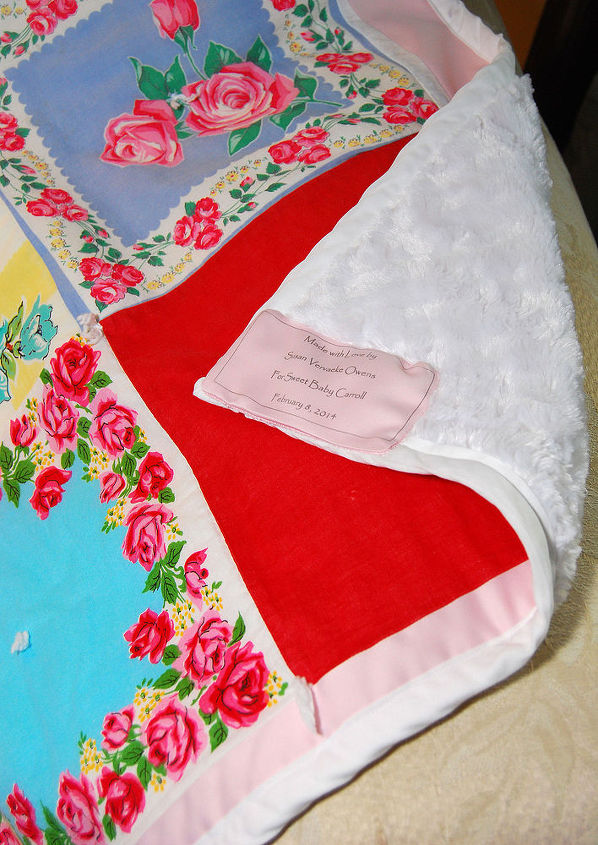
The final product! The 2 lower corners each had a personalized hankie to represent both of my grandmothers. The backing is a white rosebud minkies fabric that is SO soft!
The full view of the completed quilt!
Gotta love the internet! Found a way to make a fabric label with freezer paper! You iron the freezer paper to the back of the fabric to make it stiff enough to get thru your ink jet printer, create your label on Word, and print it out! I chose black ink as unless you have a special fabric treatment on hand to use with colored ink, the ink won't stay on. I chose to put my maiden name on the label so that if it's still around 50 years from now, they'll know exactly who made it!
DIY home decor using vintage fabric
Enjoyed the project?
Comments
Join the conversation
-
 Mily Sharko
on Sep 08, 2021
HI! SO beautiful, is that YouTube tutorial still available? I would love to try making these!
-
-








Frequently asked questions
Have a question about this project?
How can we order labels like the one you show. I have handmade items from ancestors as well as myself that I have always wanted to label. They would be perfect :) Great project as well!