How to Dye Wood Flowers - Dip Dye Method

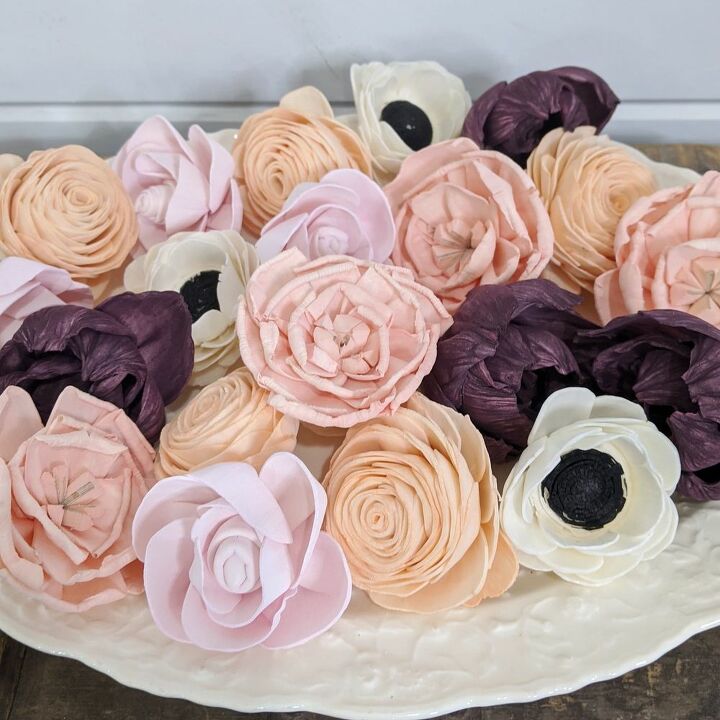
There are a lot of reasons to choose wood flowers for your crafting and wedding projects. Probably the most exciting is because you can dye them any color you want! There are no limitations on what you can create. In this tutorial, I will show you the first skill to learn - the dip dye method.
- wood flowers from www.ohyourelovely.com
- craft acrylic paint or latex paint in your chosen color
- warm tap water (preferably in a bowl or plastic container that can get stained with paint)
- a fork (note this will be used to mix paint so it probably won't go back into the rotation in the silverware drawer!)
While I haven't noticed a big difference in water temperature, I prefer either room temp or slightly warm tap water when I dye my flowers.
You can use all sorts of different paints and inks to dye wood flowers. My go-to is craft acrylic paint. It can be found at your favorite local craft store and has a large color selection.
You want about a 2:1 ratio of water to paint. I like to experiment so instead of measuring the water and paint, I squeeze in a bit of paint into the water, mix it up, and dye a flower to see if I need to adjust my ratio (more on that in a second!).
My favorite way to mix the paint into the water is to use a trusty fork and start whisking. *Note* - Be sure to get the paint that settles to the bottom of the bowl for best paint saturation.
Once the paint is fully mixed in the water grab your wood flower and drop it in!
You can use your fork to fish the flower out and flip it in the paint/water mixture but I like to use my hands (I’m a messy, crafty gal and a little soap and water cleans my hands right up after!). You can also wear gloves. Just saying.
If the paint saturation seems a bit too light, add more paint to your mixture, whisk in the new paint and dunk your flower into the mixture again. If the paint seems to be very thick on the flower, you want to add more water to your bowl to thin the mixture out. *Recommendation* - mix the paint/water mixture after dyeing every 3-5 flowers. Sometimes the paint will settle to the bottom of the bowl.
I like using cardboard egg cartons to place my flowers in while they dry but you can also set up parchment paper on a tray. Most flowers will take around 24 hours to dry. Set them aside in a place with good air flow and wait until the flowers are dry to the touch.
Once they are dried you are ready to work on whatever wood floral arrangement or fun DIY project your heart desires! If you have any questions please leave them in the comments and until next time, happy crafting!
-XO Stefanie
Enjoyed the project?

Comments
Join the conversation
-
 Johanne Palange
on Jul 04, 2021
Love the pink dog vase. Where did you get it?
-
 Stefanie -Oh You're Lovely
on Jul 05, 2021
I think that was a Target find from a few years ago!
-
-
-
 Susan Litt
on Feb 28, 2022
Love the look of these sola flowers, and Stephanie's posts are always inspirational. Thanks for sharing. Do you happen to recall what colour paint you used for the aubergine/eggplant/deep plum flowers in the mixed bunch picture? They really grab the eye and I'd love to duplicate.
-








Frequently asked questions
Have a question about this project?
Do you ship to Canada or have a Canadian supplier? Your flowers are absolutely gorgeous!
Using the acrylic paint and water mixture, can you still see the wood grain when it dries?
the top pink flower in the dog vase looks like it has aged a little like cut flowers do. I love it. Did the flower start out with rolled edges or did that happen after the dip dye?