How to Create a Faux Concrete Paint Finish

Have you seen the popular concrete decor? They can expensive to buy, and you may not want to tackle making a DIY concrete project. But here’s how to make an easy faux finish concrete that anyone can do!
Recently I needed a big planter for my new tree. It needed to be a really big pot for this tree!
I was looking online at large concrete planters when I realized I actually had a lightweight fiberglass planter in the basement that was just the right size. The thing was, it is red, and I wanted something more neutral.
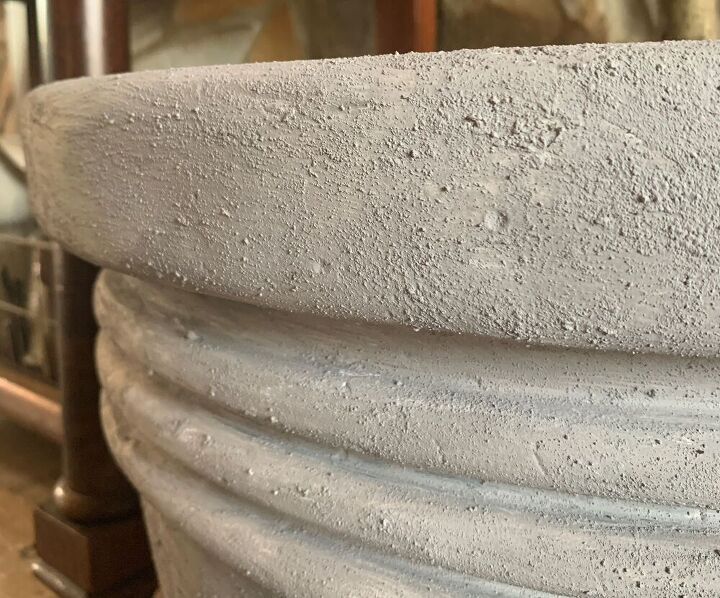
I thought about just painting it gray, but then the wheels started turning and I thought maybe I could make it look like concrete if I could give it some texture.
Recently I tried to add texture to paint using some glitter in the paint. It worked to create texture, but it needed several coats of paint to stop the glitter from sparkling. This time, I decided to try mixing some sand in the paint. It absolutely worked! Here's how I did it:
Materials Needed
- Gray chalk paint
- White chalk paint
- Paper plate
- Medium sized paint brush
- Sand or dirt
Where can you find free sand or dirt? Anywhere! Raid your kid's sand box, grab some dirt at a park or from your yard. You can even sweep up some off of a sidewalk if you live in the city. Just make sure it's clean of debris. I only used about a half cup of dirt for this project.
The Painting Process
1. Prime coat
Because the red color was so dark, I gave the whole pot a prime coat of white chalk paint. This also gave the second layer with the sand in it something to stick onto.
2. Sanded paint coat
It only took one coat of the gray chalk paint to cover well.
I used a paper plate to pour out my gray and white chalk paint. Then I added dirt. Yes, just some dirt out of my yard.
I added it and mixed it to a consistency that was thick with dirt but also still easily spreadable. If I added to much dirt and the paint was too lumpy or dry to spread well, I added some more paint to the mix.
I used a combination of all gray paint in some areas and gray lightened with some white to get the variation in color.
I brushed the paint on in most places, but I also kind of dabbed the paint on in others to get some variations in the texture. And since my planter already had the little holes that concrete planters can have, I went light on the sanded paint on them. I didn’t want them to get filled up or covered over.
I painted the inside of the planter down enough to be convincing. I stopped at the lip of the planter.
It dried fairly quickly since it’s chalk paint. I let it sit overnight just to make sure it was all dried and set. The next morning, I was very happy with it in the light of day. I think it looks pretty convincing as a concrete planter and I love the texture it has!
Now I'm looking around the house to find more things to give a faux concrete paint finish to. Planters and flower pots, vases, bottles, lamps, and candle holders are all good options for this finish.
Thanks for stopping by and checking out my project! If you'd like to sign up for my email newsletter to get all of my latest DIYs and projects, click here.
Enjoyed the project?
Resources for this project:
See all materials
Comments
Join the conversation
-
 Ann Dougherty
on May 23, 2023
Wow, Well done!
This is pretty amazing.
-
-













Frequently asked questions
Have a question about this project?
Very nice. If you ate using the plzn
If you are using planters outside will this chalk paint stay on the planter?
I have wondered on these projects if after a while there is a problem of the paint/dirt sticking on the plastic? Has it been pretty durable? Just wondering if you have gotten any chipping or peeling?