How to Bleach Pinecones Tutorial

Chanda and I are both suckers for Scandinavian inspired Christmas decor. From the fine lines and details to the color scheme and natural inspiration- we often find our selves diy-ing decor that falls under this category. So here I find myself again friends. Bleaching pinecones! I love pinecones because I love fall and winter, I also love that they are free and can get you outdoors to collect and scavenge, but I also have to admit I use them year round to decorate! I am just a sucker for nature elements in my home- plus you can add a few essential oils drop and make them smell great! This project is perfect if you want that winter wonderland look but want to avoid flocking or glitter!
Photo Cred: Anya McInroy
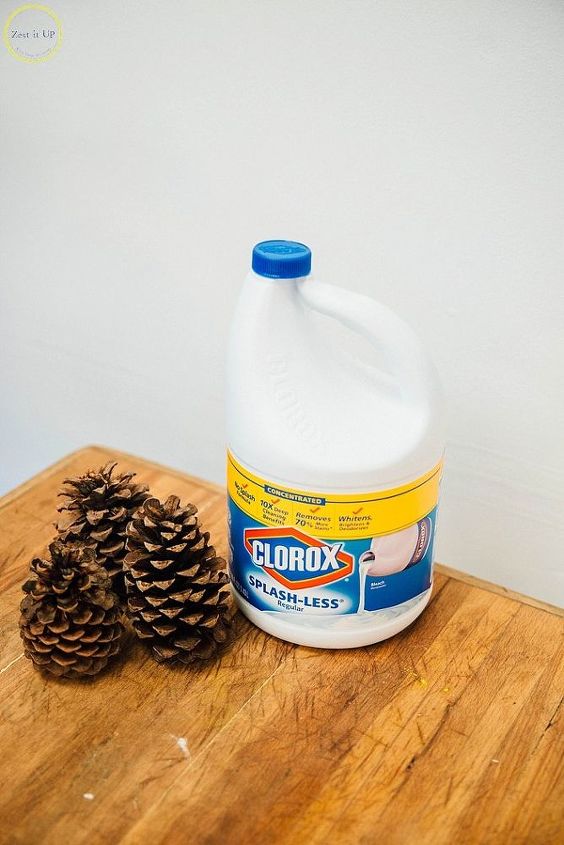
Supplies:
- pinecones
- bleach
- water
- bucket or pot
- heavy weight (brick, plant saucer, rock, etc)
- foil
- baking sheet
First things first, you will need to collect your pinecones! Go on a little walk and collect more than you think you will want- not only will you LOVE these and might want to mix some bleached with non-bleached for decor but these would also make for great gift wrapping garnish- so festive! Next you will want to wash your pinecones off, simply get all that dirt or bugs off by running them under the sink in all the crevices. You can also dry out your pinecones to ensure you take care of any critters in there as well as sap. All you have to do is pop your pinecones in the oven at 350 for three hours on a foil lined cookie sheet.
Next fill a pot or bucket with equal parts water and bleach. Don’t worry those pinecones will want to float but we will take care of that.
To make sure your pinecones are fully submerged take a brick, rocks, or in my case some terra cotta saucers- really anything heavy that you don’t mind getting bleach on- to ensure those pinecones are fully submerged.
Let the pinecones sit soaking for 24 hours. Once to your desired shade, rinse and let your pinecones air dry for a few days. When I originally pulled my pinecones out one of them shrunk- but over time it opened up, as if a flower blossoming!
I am in LOVE…I want to make more! ah!! I love the contrast of the white on the dark wood or green, as if these pinecones were doused in snow- the perfect winter wonderland right in your home!!
You could easily add some fishing string or yarn and make these ornaments! Happy Decorating!
xo
Sam
DIY Christmas Decorations
Enjoyed the project?

Comments
Join the conversation
-
-
 Anna
on Dec 15, 2022
I have been collecting pine cones for awhile. Never sure what I will do with them, but always know something brilliant will come to mind. And then, you show up! Thank you for this "how to". Most likely, after they are bleached, I will glue a sparkle stone here and there. Thanks for the idea!
-














Frequently asked questions
Have a question about this project?
Should all pinecones be soaked in bleach & water? or is it to give a white color to the cone?
I soak my pinecones in vinegar water for 20 minutes and let them dry but they still have a white paste on them how do I get it off
I would love to try the idea, but why bake in oven for 2 hours. I would think the bleaching should take care of any stowaways...am I parchally right? Thank you.