8 Simple Steps to an Easy and Creative Christmas Topiary

Are you looking for a cute and clever way to decorate your porch for the holidays? Then today's DIY will most certainly interest you!
We will be making a unique Christmas topiary out of an unusual item.
Head to the home improvement store for the supplies you’ll need and let me show you how to make a topiary tree for the holidays.
This post was transcribed by a member of the Hometalk editorial team from the original HometalkTV episode.
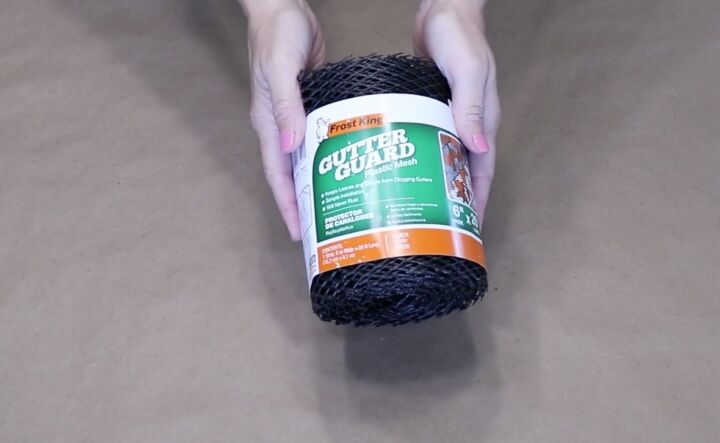
This is Gutter guard. It is a plastic mesh material that is used to protect your gutters from leaves but we're going to use this to create a topiary.
1. Roll out a long strip of gutter guard
I first want to roll out a big, long length of the gutter guard and cut it off.
2. Spray paint the gutter guard
This gutter guard happens to be black, so I'm going to spray paint it white. To do that, I'm laying it out flat and securing the ends with some heavy objects. Then I'm just spraying one side of it white.
3. Find a pot and fill it with some dirt
I need a base for my topiary, so I am using a red pot I have. I'm going to leave the dirt that's in there from when I pulled the plants out.
4. Place a piece of cardboard on top of the dirt and cut a hole in the middle of it
Next, I'm putting a piece of cardboard on top so I have a nice flat base and then I'm cutting a slit in the middle of it with a craft knife.
5. Stick a pole into the hole in the cardboard base
I grabbed this metal pole that I had in my basement, you could also pick one up at the hardware store, and I'm going to stick it through the slit in the cardboard. I am pushing it all the way down into the dirt, so it's nice and secure.
6. Weave the gutter guard onto the pole
Now that the gutter guard is dry and the pot and the metal pole are all ready to go it’s time to put my topiary together. I’m going to start by weaving the gutter guard onto the pole so it looks like a tree.
I'm going to continue this way, doing a z-fold with the gutter guard and making the layers a little bit narrower as I go to the top.
7. Hot glue parts of the gutter guard to the pole
I'm adding a little bit of hot glue to the spots where the gutter guard touches the pole. You don't need to glue the whole thing, just a few places to ensure that it stays in place.
8. Decorate the Christmas Topiary
Now it's time to decorate. I'm covering the cardboard with greenery and then I'm going to add some ornaments as well.
I'm just placing them in here, but once I get everything arranged just how I want it, I am going to use a little bit of glue to keep these in place. I intend on keeping this topiary outside, so I want everything to stay put and not blow away.
I also found some cute mini ornaments, and I'm hanging these on the topiary. You can get really creative with this. You can use any color scheme, any color pot, and really make this match your home décor.
8 simple steps to an easy and creative Christmas Topiary
It was so much fun creating something using nontraditional supplies and I love how pretty this Christmas topiary looks on my porch.
Have you made any holiday decorations using unusual items?
Enjoyed the project?
Suggested materials:
- Gutter guard
- Ornaments
- Metal pole
- Plant pot
- Spray paint
- Faux greenery
- Dirt
- Hot glue

Comments
Join the conversation
-
 Diana Deiley
on Dec 18, 2022
Very nice! Great job. Thanks for sharing.
-
-












Frequently asked questions
Have a question about this project?
Are you pushing the metal pole through the mesh as you fold it?
How come there isn't a picture of the whole thing?