


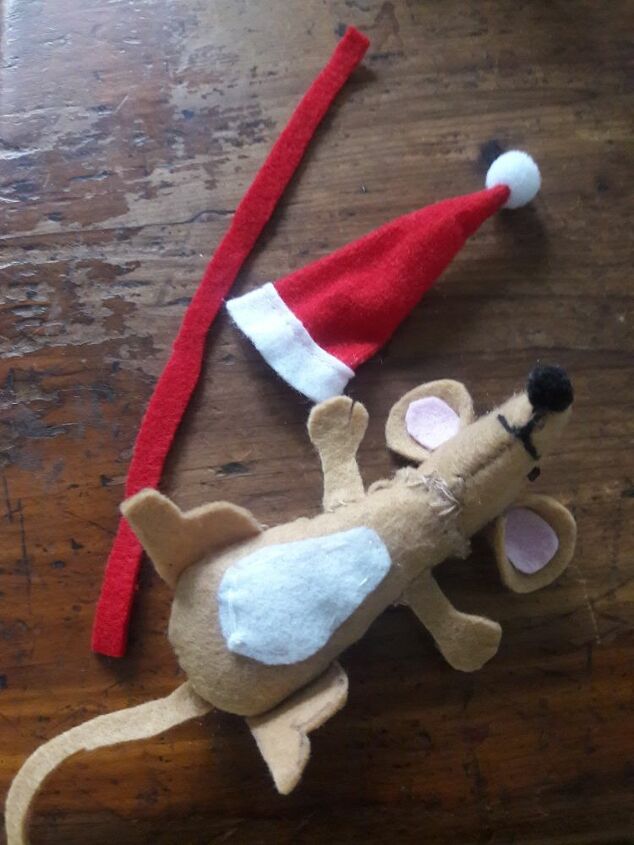
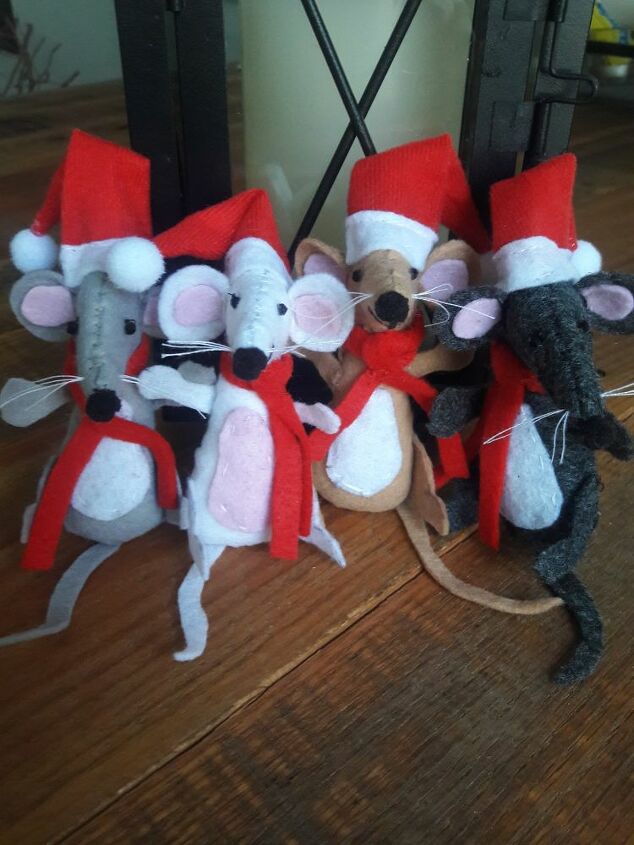
Christmas Mouse Ornaments

Every year I make my granddaughters a new Christmas tree ornament . This year I decided to make them a cute Christmas mouse !

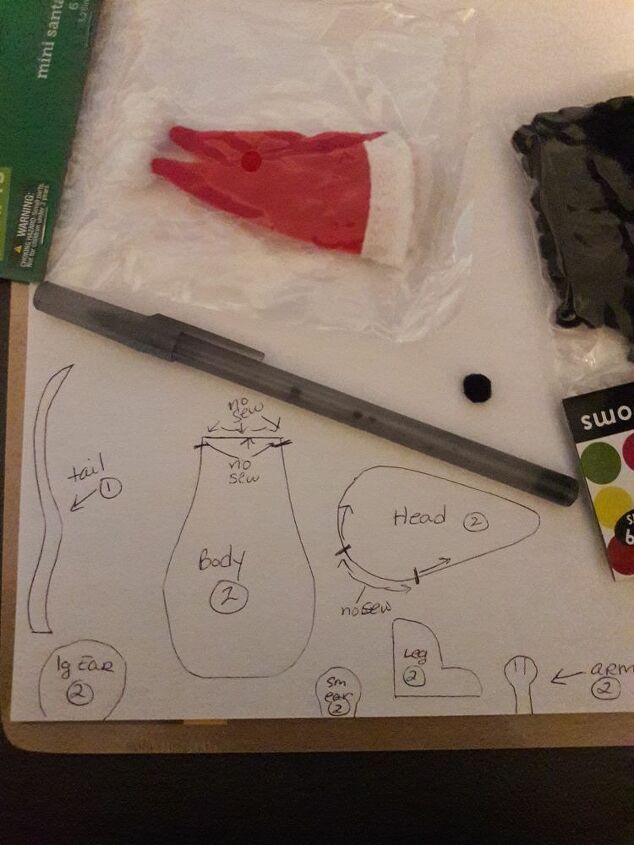
To start , I made my pattern .
Here is what it looked like .
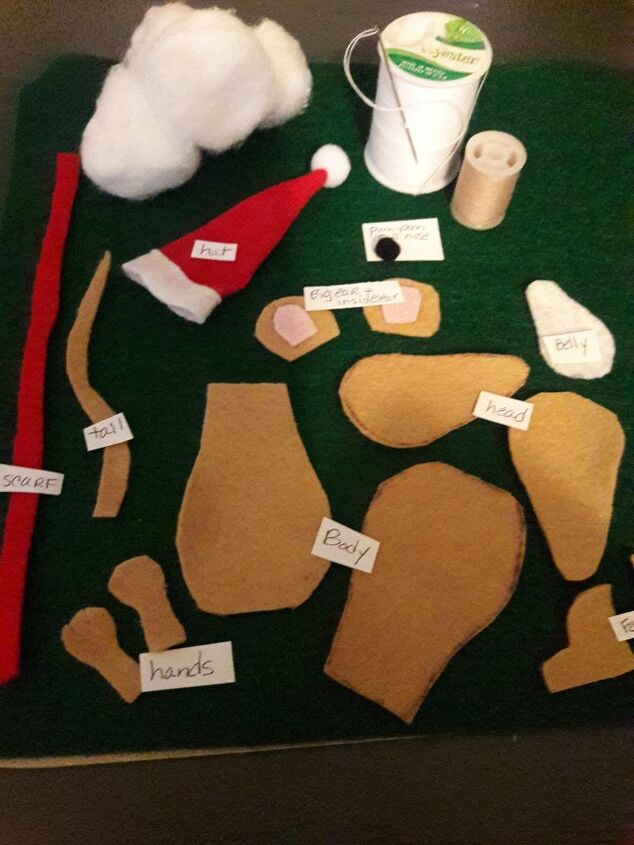
The materials needed :
Felt squares in the color of your mouse , pink , red & white .
Get lightweight felt or the thinner type , it is easier to work with !!! And cheaper !!!
Matching Thread & needle
Fiber fill or cotton
Mini Santa hat ( optional )
Mini black pom poms ( optional)
2 Small beads for eyes ( opt )
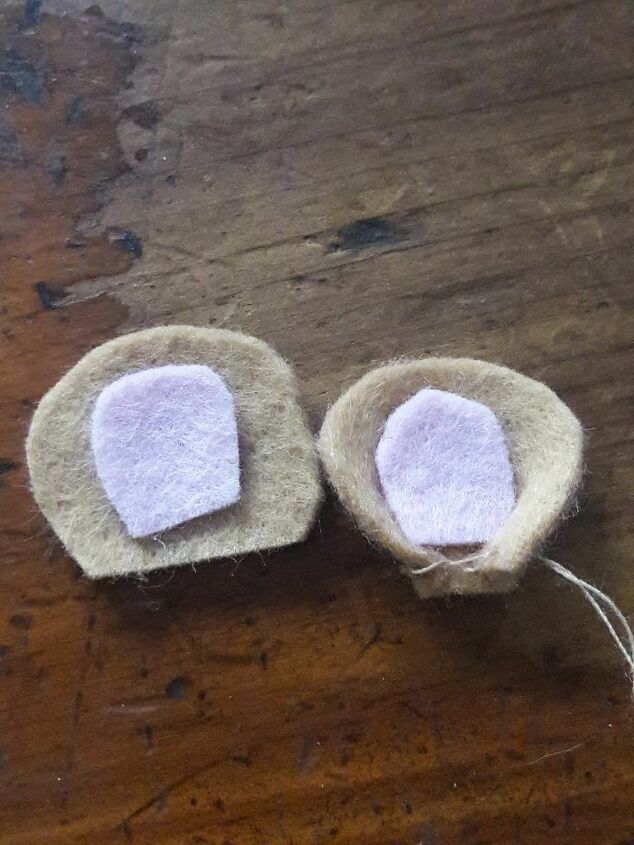
First cut out your felt pieces. Then , glue the pink inside
( small ) Ear to the larger ear piece . Do not glue the bottom edge of the small ear to the bottom edge of the big ear. Lift it slightly . You can see a picture later in the post , where I sew the ears on .
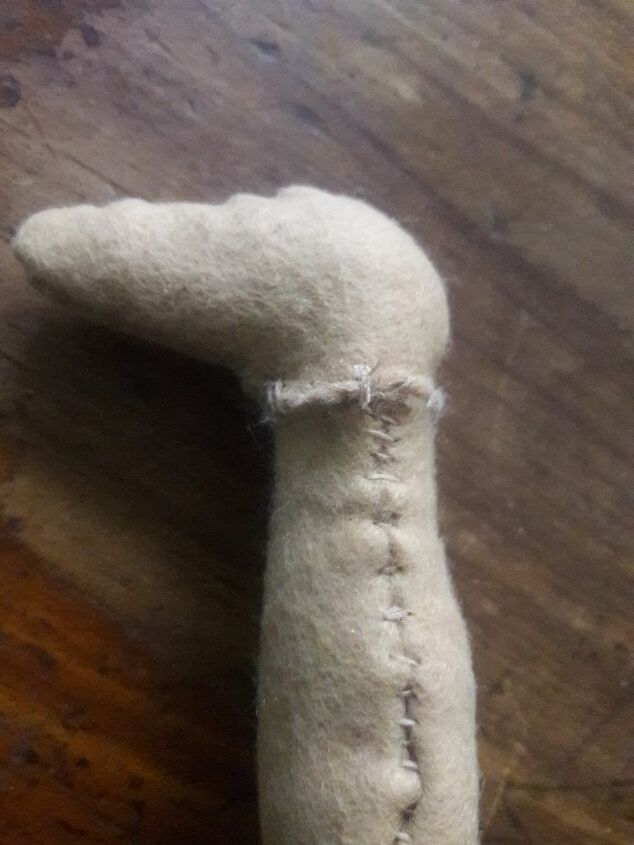
Next , sew the 2 head pieces together , leaving the area open where it is marked on the pattern , do the same with the 2 body sections leaving the neck section open .
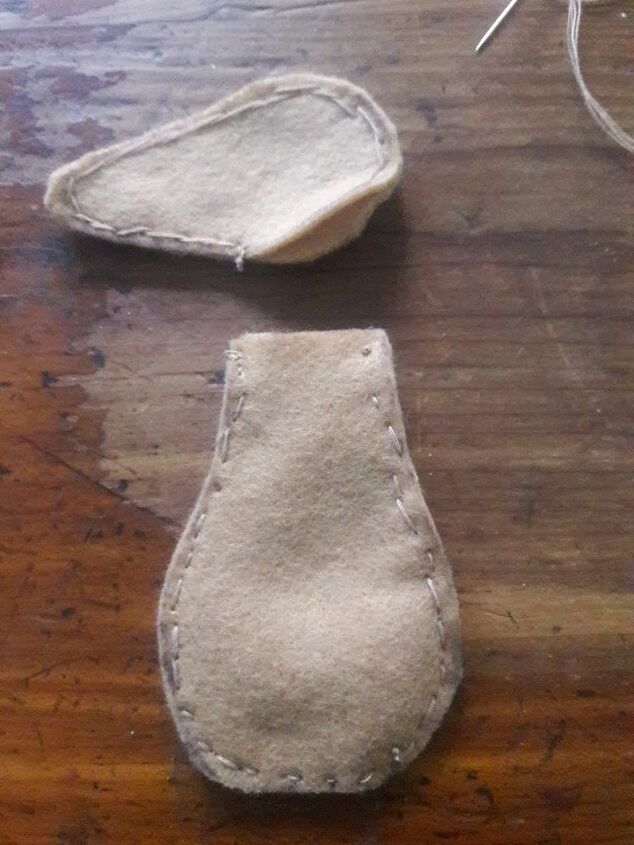
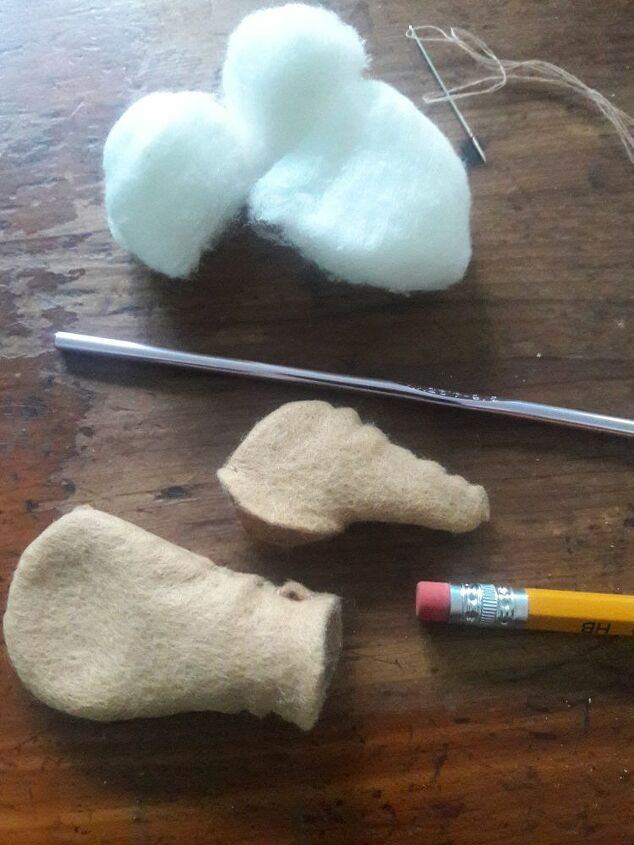
Now , carefully turn them inside out . This can be difficult, use a blunt end of something narrow like a crochet hook , also the eraser end of a pencil can be helpful. Once this is done , fill it with your stuffing .
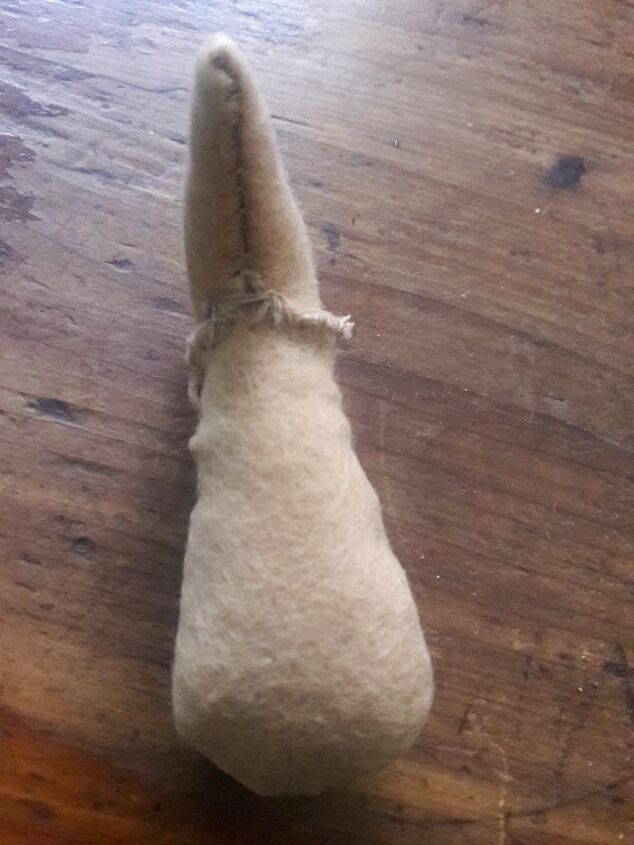
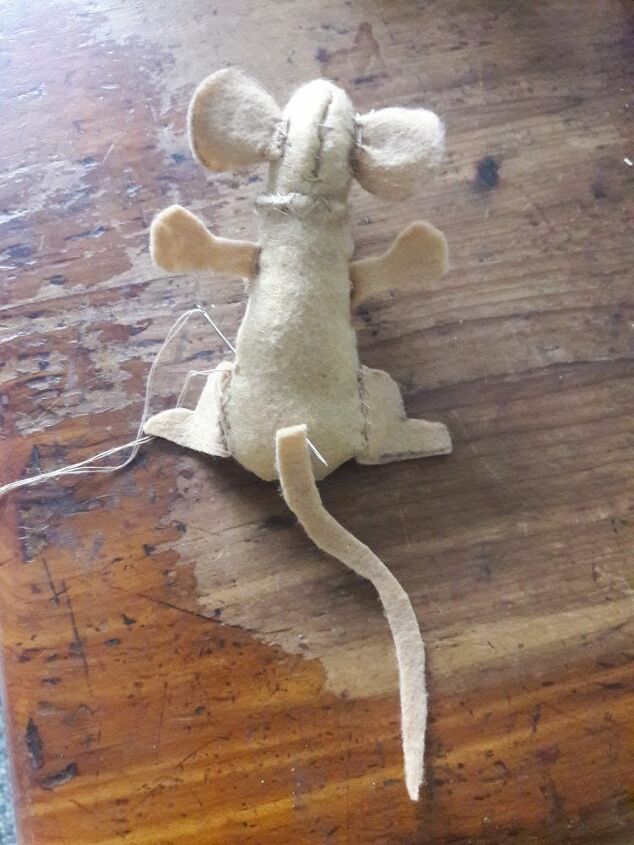
Once filled , sew the head to the body . Don't worry if it doesn't look too neat , we will wrap it with a scarf at the end !
Another view ...
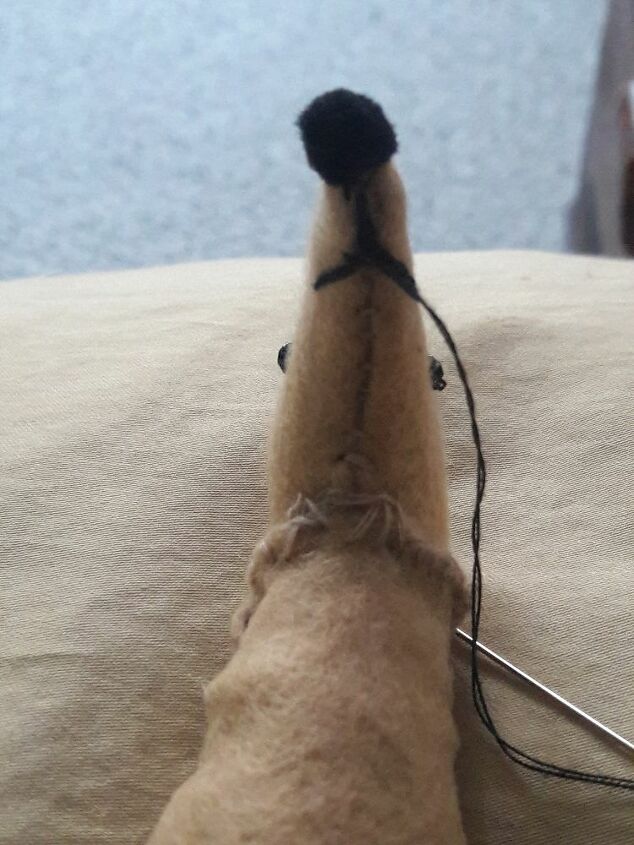
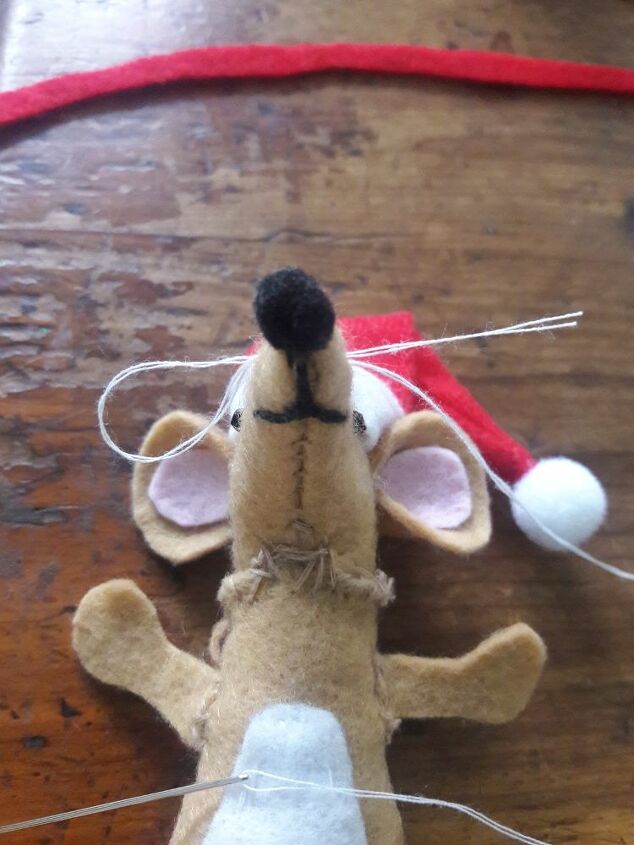
Now , you can hand stitch the eyes , use little beads or goggle eyes , whatever you want . Then hand sew a nose or use a mini pom pom .
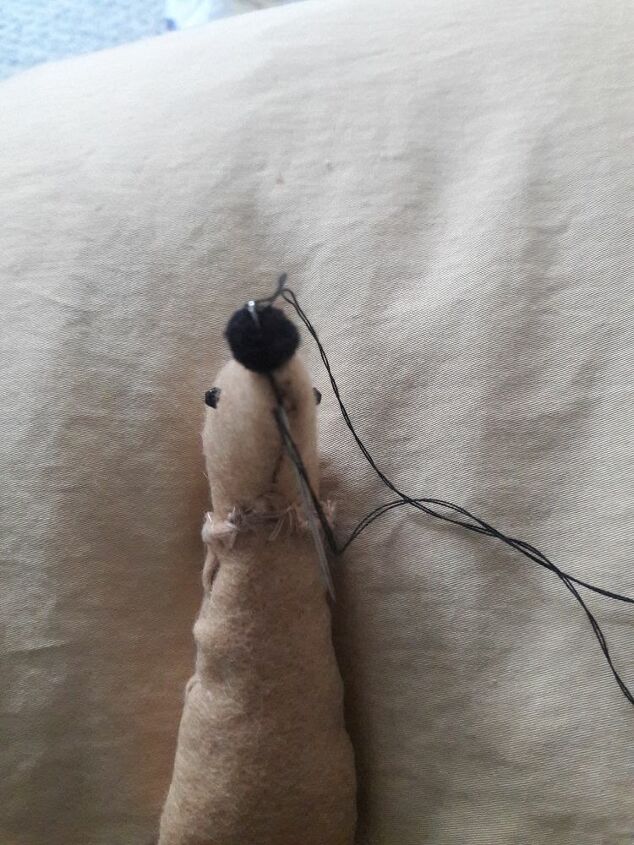
Once you have the nose secured , don't cut the threads yet ! Continue on , to sew the mouth . First , sew a tiny straight line down from the nose then sew a slight upward smile on each side of the mouth
Now we work on the ears . Notice the pink part is not even with the bottom , it is slightly raised . Take your needle and thread and do a running stitch ( in & out ) and pull to gather the bottom , knot it , don't cut it !
Now , attach both of the ears . Don't put them too close to the top of the head , you want them off to the sides a little , to allow room for the hat you will be adding later on .

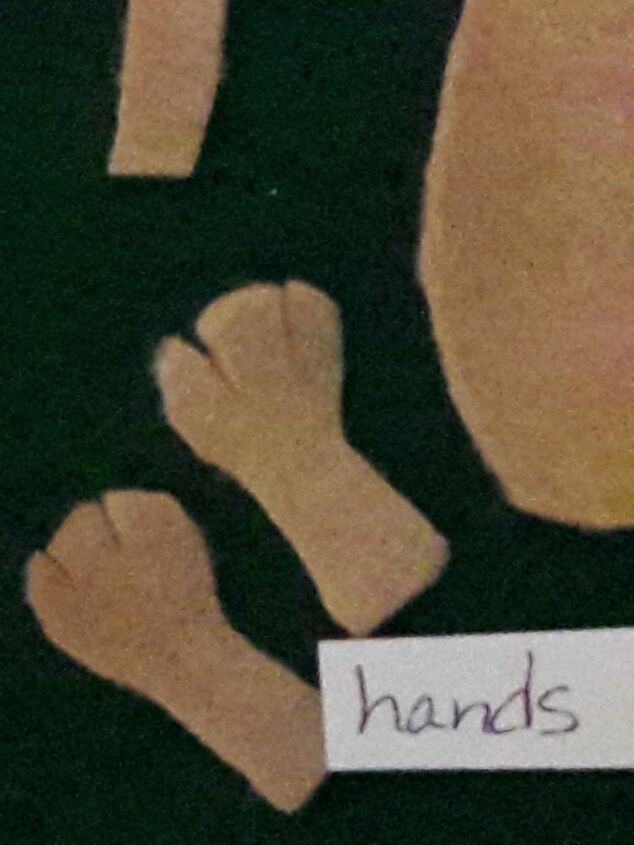
Now , attach the hands and feet
Shown in the picture below , is the placement . Sew them on the side seams .
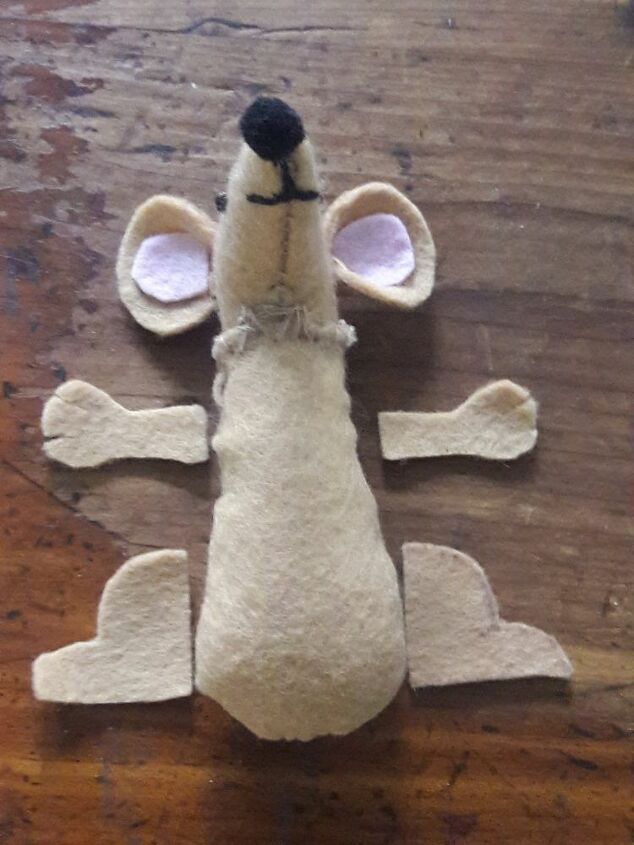
Notice I put 2 tiny cuts on each hand .
Next sew on the tail .
Next sew on the belly . I did it in white on this mouse , but you can use any contrasting color . On my white mouse , I used a pink belly .
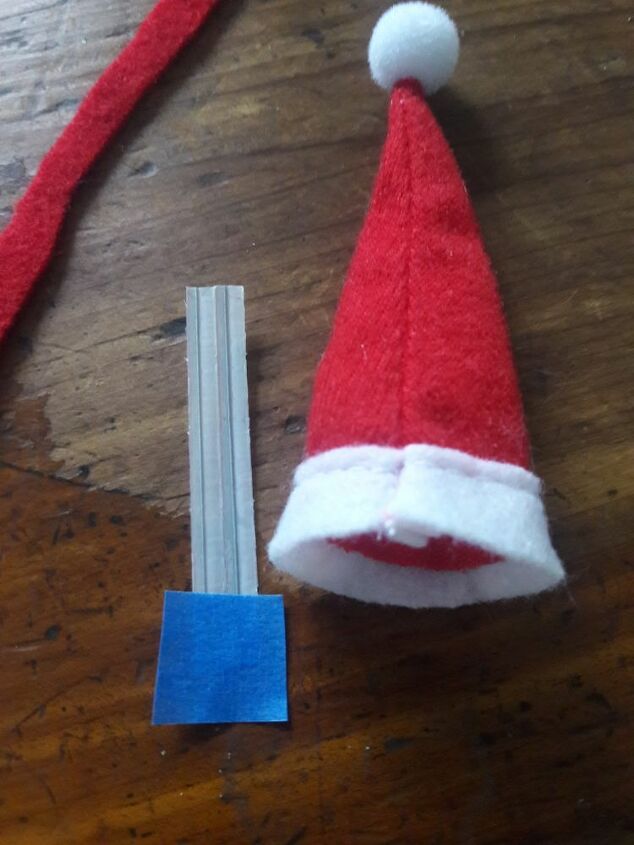
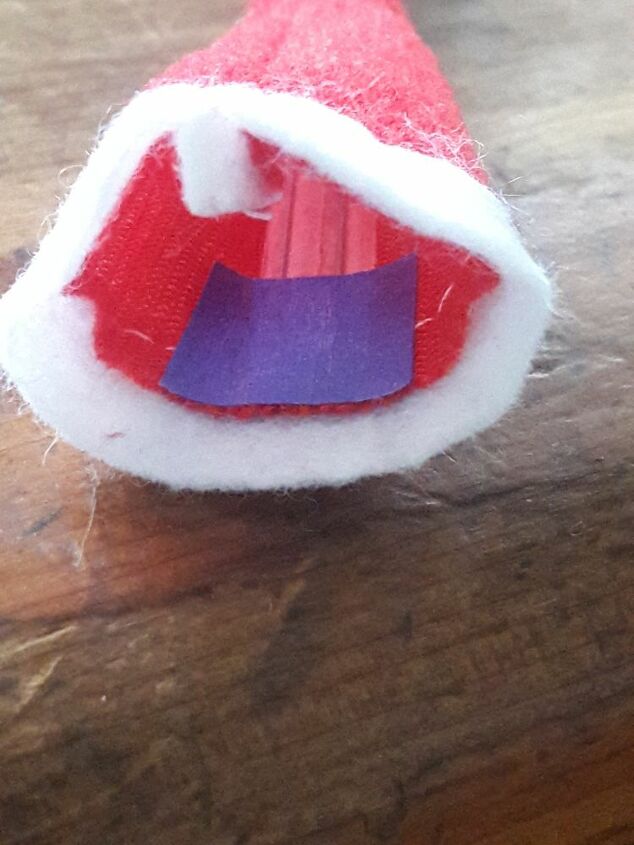
For the hat I used 2 pieces of twist ties . I cut them to fit about 3/4 of the way into the hat and just taped it to the inside of the hat .
How I placed it
I set the cap on the mouses' head , centering the back seam of the hat on the back of the mouse's head . As you sew on the hat , if it is a little too large , as mine was , just adjust it as you sew . Once the hat is on , you can bend it half way in a downward bend in whichever direction you want .

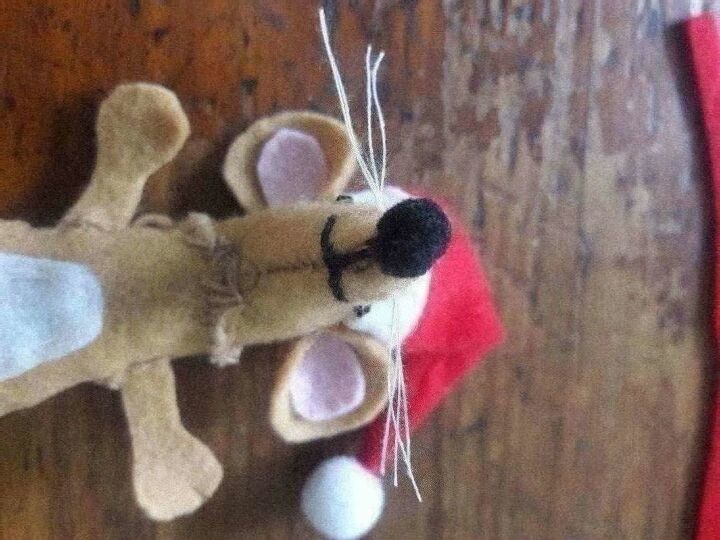
Now , is when I add the whiskers . They are totally optional ! I used white thread , you can also use black ... these are not attached !!! I used a double threaded needle ( as I did through out my whole project )
I just pulled it most of the way through , leaving about a half inch of whisker on the one side , then looped the needle back through again getting close to the whiskers . I cut the loop on the one side and the thread on the other side . Now each side has 4 whiskers .
Here's my mouse with whiskers !
Now to cover the messy looking neck , I used a thin strip of red felt and tied it over the neck seam and sewed it down .
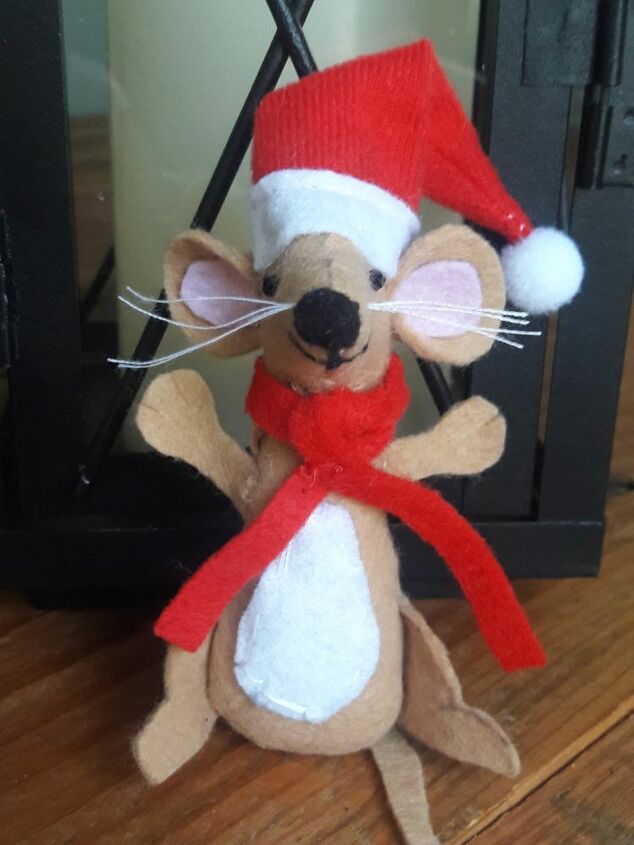
That is how I made my Christmas mice . You can put a tree hanger through the scarf to hang it on the tree . Or make a small mitten to put your mouse in and use the mitten to hang it from the tree . You can even put the year on the mitten with glitter glue , if you date your ornaments .
Now I have one more to make !
It's for my cat , and I will fill this one with catnip ! I will skip the whiskers and hand sew the eyes, for safety reasons .
DIY Christmas Decorations


Comments
Join the conversation
-
They are so cute. Good share and great job.
-
These are so cute!!


Frequently asked questions
Have a question about this project?