Marbling Fabric Napkins: How to Make Bespoke Table Decor

Hosting holiday dinners like Thanksgiving is all about adding a personal touch to every detail. If you want to make your table settings truly one-of-a-kind, marbling fabric is the way to go.
I'm going to walk you through the step-by-step process of marbling your dinner napkins. This fun and creative craft will transform plain white napkins into bespoke pieces that reflect your personality, ensuring your table settings are as special as the occasions you're celebrating.
Materials and Tools You'll Need
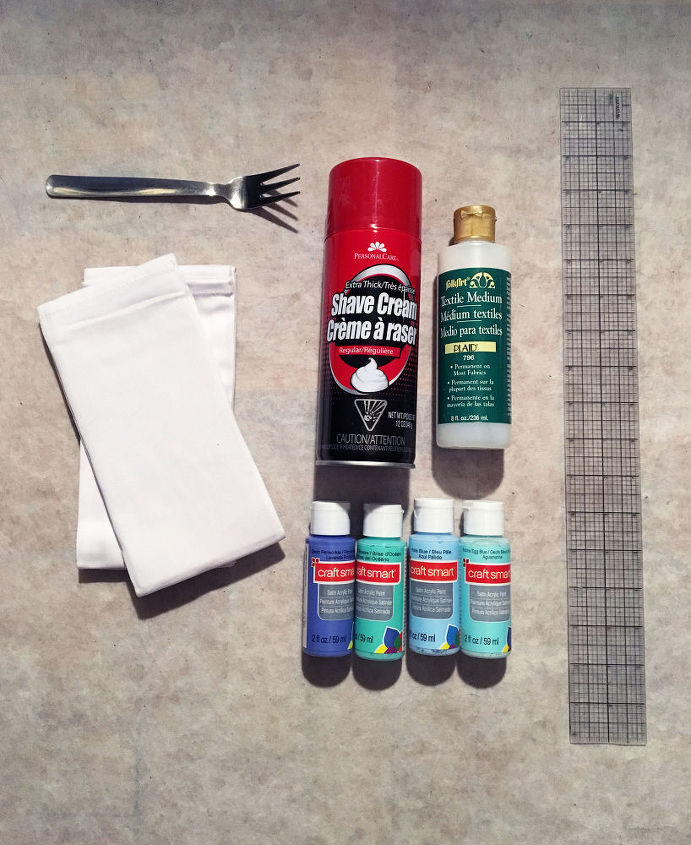
Before we dive into the steps, make sure you have the following materials and tools at your disposal:
- Acrylic Paints
- Fabric Medium
- White Cotton Dinner Napkins
- Shaving Cream
- A Mixing Tool (e.g., a fork, a pencil)
- A Plastic Ruler or a Scraping Tool
Hometalk may receive a small affiliate commission from purchases made via Amazon links in this article but at no cost to you.
1. Prep Your Paints
Let's start by turning your regular paints into fabric-ready acrylics.
Grab a Styrofoam plate or tray and mix each of your acrylic paint colors separately with the fabric medium. This step ensures that your paints are suitable for marbling on fabric.
If you have fabric paints, feel free to use them. But if, like me, you have a wide collection of acrylic paints, this step allows you to make the most of them for your marbling project.
Most fabric medium bottles come with mixing instructions, making the process a breeze.
2. Spray the Shaving Cream
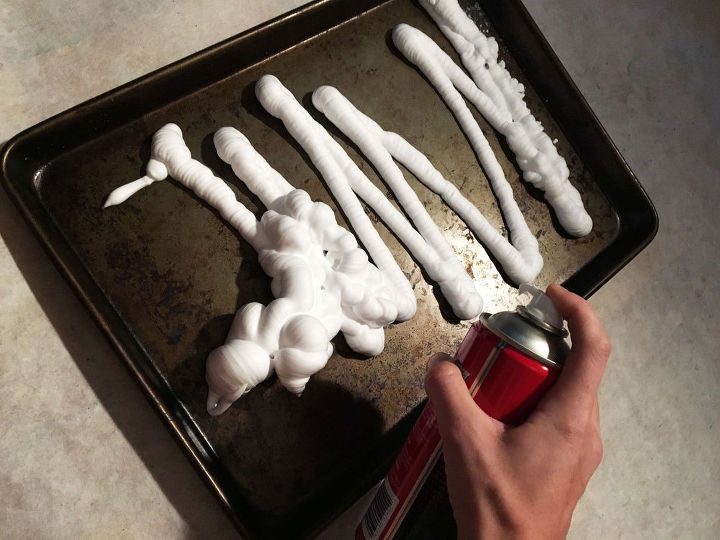
Next up, grab an old cookie sheet or an aluminum tray and spray a layer of shaving cream along the bottom.
3. Spread It Evenly
Spread the shaving cream into an even layer, ensuring it covers the entire surface.
4. Add the Paint
Now comes the fun part! Drip splotches of your acrylic paint onto the shaving cream. I chose three colors and applied them randomly. You can get creative with your color scheme if you like.
5. Create the Marbled Effect
Using a mixing tool, gently swirl the paint drops into a mesmerizing marble pattern. This step is where you can let your creative juices flow and experiment with different designs.
6. Place Your Napkin
Take one of your dinner napkins and carefully place it face down on top of the shaving cream and paint mixture.
7. Scrape and Reveal
After a few moments, remove the napkin from the shaving cream tray. Using your plastic ruler or scraping tool, carefully scrape off the shaving cream onto a trash bag or a piece of newspaper.
Remember to wipe the scraping tool clean before repeating this step.
8. Dry and Set
Allow the marbled napkin to dry and set. You can choose your preferred heat setting method – I simply put my napkins in the dryer for 40 minutes at medium-high heat.
Alternatively, place a sheet of paper on top of your fabric and use an iron on a dry setting for an equally effective outcome.
If you want to create more marbled napkins, repeat the entire process rather than reusing the painted shaving cream leftovers.
More Thanksgiving Table Decor Ideas
Marbling Fabric Dinner Napkins Tutorial
With this simple technique, you can infuse your personality into your table settings and make your gatherings truly unique.
So, why wait? Grab your supplies, start marbling fabric, and watch as your dinner table transforms into a work of art.
We'd love to hear about your marbling adventures and any tips you have – don't hesitate to share your experiences in the comments below.
Enjoyed the project?
Comments
Join the conversation
-
 Linda Abate
on Nov 27, 2022
Love this idea. Nice thing is that you can coordinate with your holiday decor. Thanks for sharing.
-
-
 PaperCutPlace
on Mar 19, 2024
Very clever!
-














Frequently asked questions
Have a question about this project?
Wondering how these would do when needing washing. Would the pattern wash away?
Did you do both sides of the napkin?
Thank you for sharing love the look !
This looks great! My daughter is getting married next summer and I was wondering if we could do this to table clothes? Or a runner?