How to Build a Half Wall at Top of Staircase
A couple of years ago I found a very good deal on a condo - no more renting apartments! The unit was in very good shape already (aside from minor repairs like a broken outlet or two, replacing some bathroom hardware, etc.) but now it's time to start making it "my own".
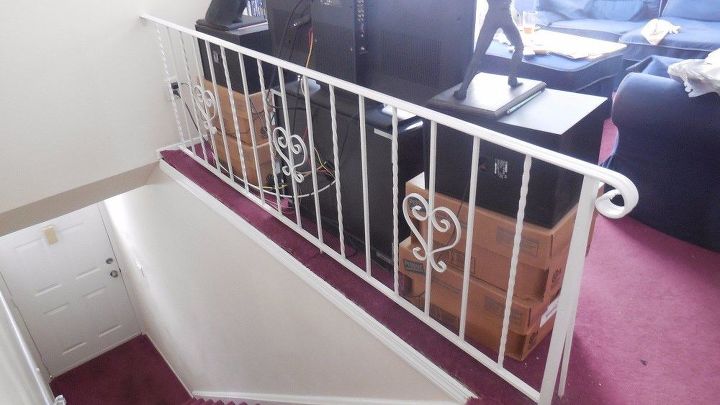
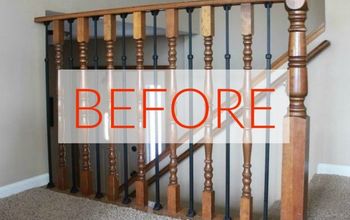
There was a banister next to the stairs and I decided to replace the banister with a half wall. The railing was in decent enough shape, not rusted or damaged, it's just too "country" looking - not my style. (Forgive my cardboard box speaker stands! Temporary solution until I buy better entertainment furniture.)
Step 1: Remove Railing and Trim
The first step to building a half wall at top of the stairs was to remove the railing. There were a half-dozen or so bolts attaching the railing to the floor so it came off without a fight. I also removed the piece of trim molding that finished the top of the staircase wall where it met the floor.
Step 2: Plan
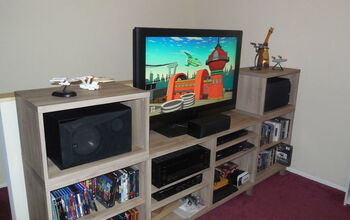
Planned out the wall in the computer. (Note new entertainment furniture in the layout.) There was talk of just making it a simple 4' x 8' wall and being done with it. That didn't work for me because then it wouldn't match the opposite wall of the staircase at the top - I needed 8'6" - but I didn't want to have to buy a whole piece of sheetrock just for that extra 6" of length. The solution - make the wall 42" high and salvage that 6" of sheetrock for the extra length.
Step 3: Install Wall Framing
The wall is in place. That black strip at the far end is duct tape temporarily holding it up as I still needed to trim away a small bit of floor molding for the new wall to meet the existing wall flush.
Step 4: Secure Wall Framing
The wall needed to be secured down solidly. 4 1/2" lag bolts with washers and metal plates were driven through the bottom beam, the sub floor and top beam of the staircase wall. These were put in between each set of vertical beams and really strengthened the entire build.
Step 5: Secure Outlets and Wiring
Two outlets installed.
Branched off the nearest existing outlet. Luckily, the outlet box was plastic so I was able to simply drill right through it and the beam it was mounted to, then just curve the new wiring and thread it through.
Step 6: Install Sheetrock
I installed the sheetrock to this side first as it was easier to lean the sheetrock against the wall structure and outline the outlet locations from the other side. You can see now how the 6" salvage piece idea works.
Step 7: Add Metal Corners
Metal corners added. I also ran lengths across the top to create a clean edge for spackling.
Step 8: Spackle and Add Molding
Spackling started. This went on for several days, coat after coat, sanding, thinner coat, sanding again...it's a slow process to get it right.
Spackling finally finished! I also installed the floor molding and trimmed the carpet. Luckily, the carpet tackless strip was already in the right position so as to not interfere with the new wall. Started the paint cut in around the edges and outlets. You can also see the 1x6 board cut to length for the top.
Step 9: Paint
Final (sort of) paint. I picked up a can of beige for touch-up work elsewhere in the place and used it to finish the wall for now. The 1x6 top will eventually be painted white to match the moldings but I'm waiting on that as I'm considering repainting the whole room a different color anyway. It will be easier to finish the top piece after that's done rather than having to mask it off. I'm also going to eventually replace the hand rail in the staircase as it was made to match the metal railing. I worked on this a bit here and there as spare time allowed over several weeks. If you had all your material handy and did it all at once, from removal to construction to sheetrock would only take a single afternoon. Spackling is where the project will slow down, but if you can keep on top of that, even that part should only take you a few days to a week.
Enjoyed the project?
Suggested materials:
- 2 x 4's (Home Depot)
- 1 x 6
- Sheetrock
- Spackle
- Outlet boxes
- Outlets
- Wiring
Comments
Join the conversation
-
 Mary Skurat Dobrynski
on Dec 08, 2017
My husband did this in the kitchen of our first house. The kitchen had the same type of rail where the floor stopped and there was drop to the basement stairs (just as the picture above shows). Then he added shelves to hold small appliances and a base cabinet and counter top for extra storage and work space.
-
-











Frequently asked questions
Have a question about this project?
I have a question...where you put the metal edge pieces on - how did you get the spackling so smooth and still manage to cover the metal? We moved a fridge in and of course it chipped the side....so now I have to repair it and have no idea how to do it! Any suggestions would be GREATLY appreciated!
so what stops this wall from being wobbly
The lag bolts you used, did you drill into the subfloor and insert an anchor for the lag bolts to grip?