Easy Fence Board Planter Box

I wanted a large planter box for under a garage window and this DIY was an easy and affordable solution.
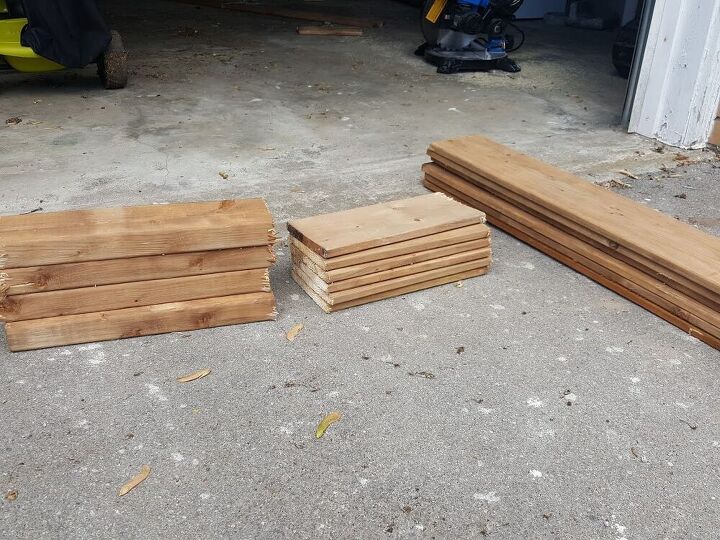
First cut your lumber to size;
6 fence boards at full length; 6ft (no cut required)
6 fence boards at 2ft length
4 2x4 at 15in (make sure your lumber is pressure treated)
Next, pre-drill your holes. I didn’t want the screws to show in the front of my planter box so I used pocket holes but this isn’t a necessary step. I did a dry fit and marked where the pocket holes would go into the 2x4.
I used my Kreg bit and a vice to drill the pocket holes into my 2x4.
Make sure to test the length of your screws and adjust your hole depth accordingly.
Time to assemble. Dry fit first, then screw together using outdoor screws. You can see my 2x4 is shorter than the total height of the planter box. I purposely left space so the 2x4 wouldn’t be as noticeable when the box was assembled.
If you don't have an extra set of hands to help hold the boards in place while you screw, you can also use clamps.
For the back side, I screwed the fence board straight into the 2x4 (no pocket holes required). You can use this method on the front as well if you don't have a Kreg jig.
I bought potted plants and propped them up to the correct height. I may line the inside with plastic and add soil in the future but so far, this has worked well!
Enjoyed the project?
Comments
Join the conversation
-
 Carol Harris
on Jul 01, 2022
I love it
-
-
 Joanne Giddings Pittman
on Jul 02, 2023
Beautiful! Great job.
-













Frequently asked questions
Have a question about this project?
Would you not need 9 fence boards at full length? 3 for the front, back and bottom?