


DIY Nightstand: How to Build a Stylish Bread Box Table
Ready to revamp your space with a unique touch? Well, this project is going to blow your mind!
Today, I’ll show you how to turn ordinary wooden bread boxes into a stylish DIY nightstand.
Say goodbye to bland furniture and let's dive into a fun and budget-friendly project that brings personality to your home!
This post was transcribed by a member of the Hometalk editorial team from the original HometalkTV episode.
Tools and Materials:
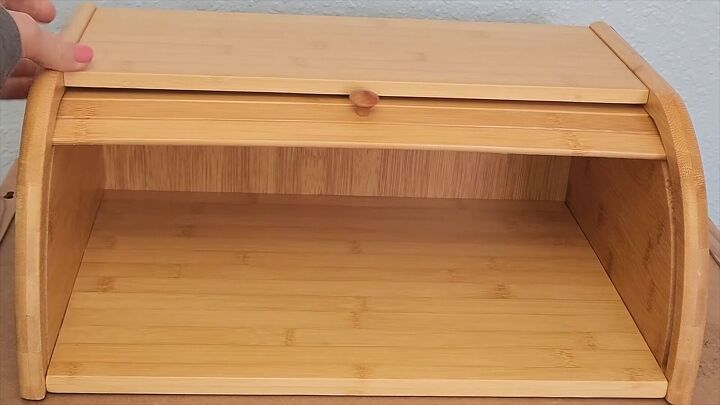
- Two wooden bread boxes
- Furniture paint
- Gold paint for handle
- Small pieces of wood (for legs)
- Wood glue
- Clamps
- Screws (optional)
Hometalk may receive a small affiliate commission from purchases made via Amazon links in this article but at no cost to you.
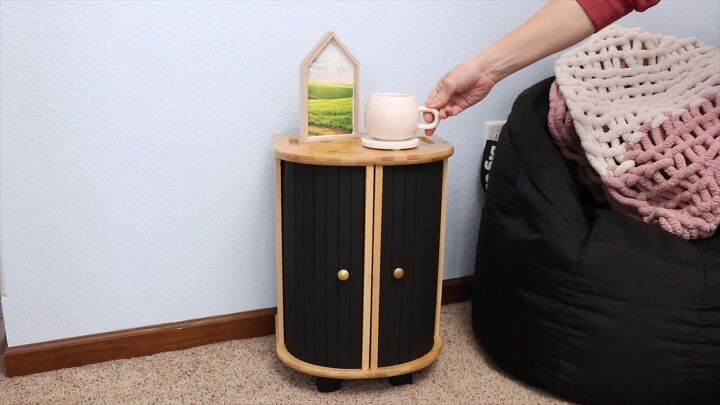
1. Add Dimension with Paint
Begin by keeping the sides and top of the bread boxes in their natural wood color. However, add dimension by painting the door black using black acrylic craft paint.
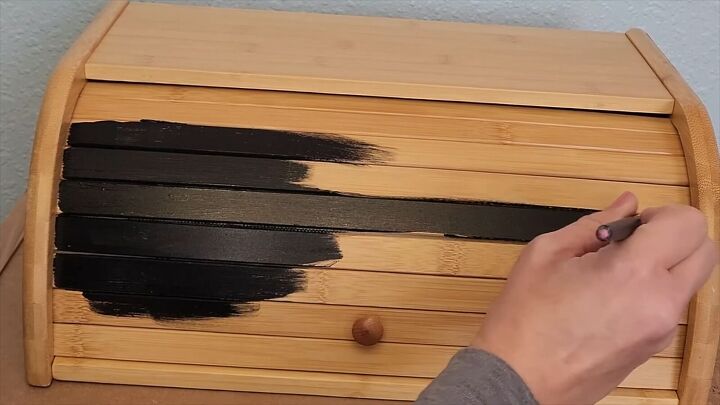
Apply two coats for optimal coverage.
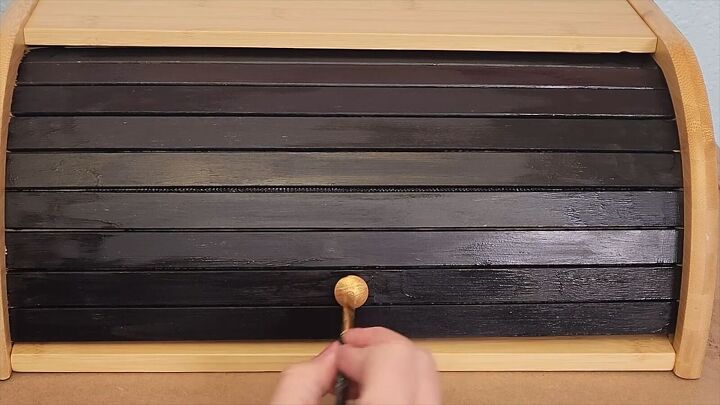
Additionally, paint the handle gold for a stylish touch.
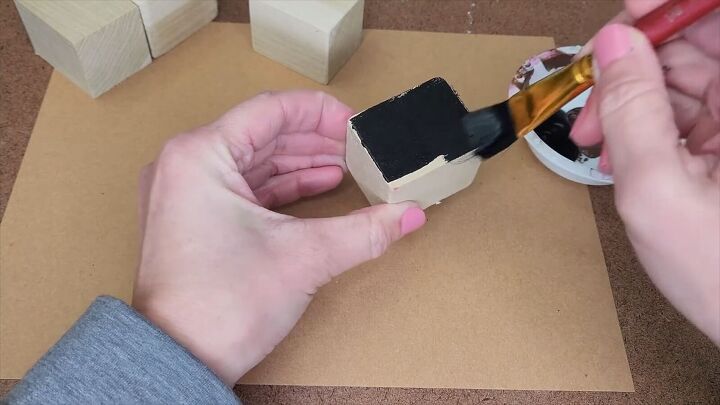
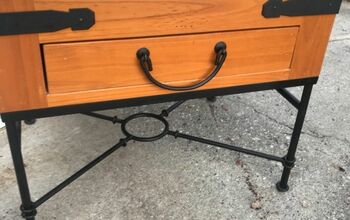
2. Craft Wooden Legs
Create small legs for your nightstand by cutting two-inch blocks from wood.
Paint these blocks with the same black craft paint used on the door. This will tie the entire piece together seamlessly.
Alternatively, you could buy short furniture legs and attach them with screws.

3. Assemble the DIY Nightstand
Position both bread boxes on their sides. We will be joining the bottoms together.
Apply wood glue over the bottom of each bin.
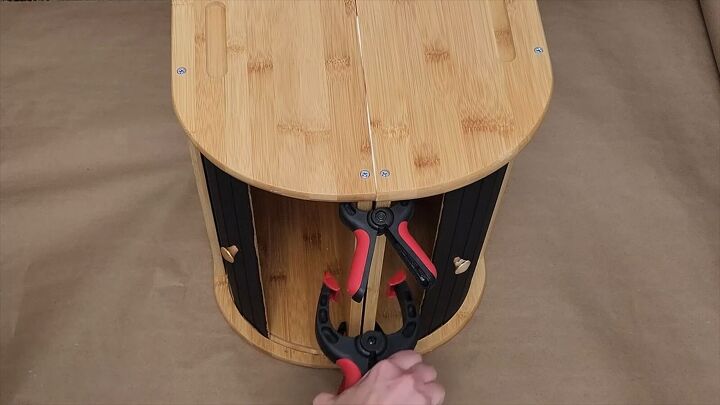
Secure with clamps.
For extra stability, screws can be attached from the inside through the bottoms of the bin, but I've found that a well-applied wood glue does the job perfectly.
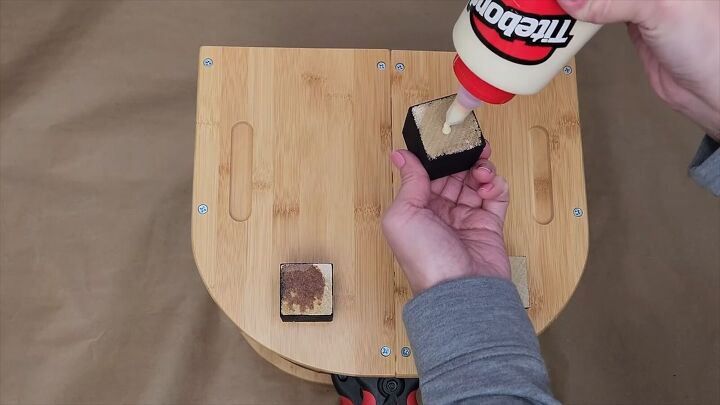
4. Attach the Legs
Apply a generous amount of wood glue to each wood block and stick them to the bottom of the nightstand.
To ensure a strong bond, place a heavy object on top and let it dry for a full 24 hours. This step is crucial to ensure the wood glue sets firmly.
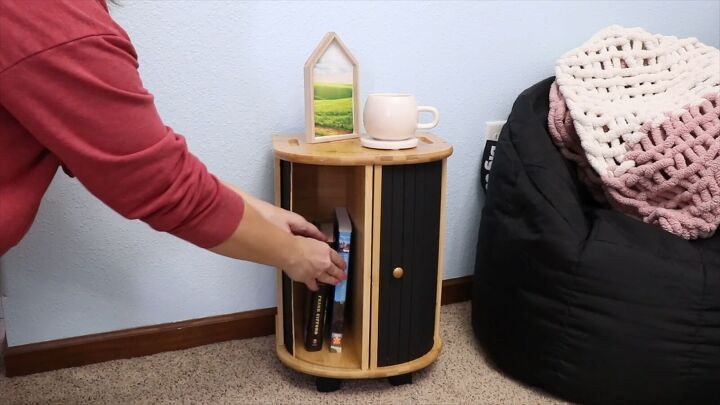
5. Enjoy Your Bread Box Nightstand
After the glue has dried, flip the nightstand upside down, and you're ready to use it!
More Upcycled Furniture Projects
DIY Nightstand: How to Build a Table Using Bread Bins
Congratulations! We've turned ordinary bread boxes into a functional piece with character.
I hope this simple and affordable transformation adds a unique touch to your home.
Share your creations in the comments.

Comments
Join the conversation
-
You're genius!
-
Very cool!


Frequently asked questions
Have a question about this project?