DIY Epoxy Bar Top Using Reclaimed Wood That GLOWS

In this HT post, I show you how to make a glow in the dark epoxy bar top using reclaimed wood with embedded blue fire glass.
Reclaimed Sinker Cypress Wood
First, I used reclaimed sinker cypress wood for this epoxy bar top.
Obviously, I fell in love with the beauty of this reclaimed wood, which is pulled from the river bottom all along the gulf coast.
I contacted a local Sinker Cypress Logger to purchase a slab for this live edge epoxy bar top using reclaimed wood.
Ultimately, I decided to buy the live edge slab directly from the source for price reasons and to meet the logger in person.
As I expected, he was very knowledgeable and the inventory of sinker cypress in his backyard was beyond impressive.
Sinker Cypress Slab
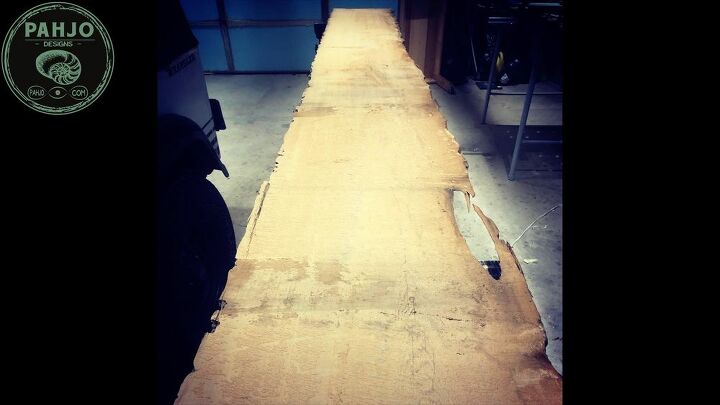
The slab I chose was 14′ long, 28 inches wide, and 2.5 inches thick.
I hauled the slab home in my truck without issue. However, I forgot my bed extender which made the 30 minute drive home a little nerve wracking.
Sanding and Clean Up
I begin most of my projects with rough sanding to remove loose dirt, expose the grain pattern, & reveal the overall condition of the wood.
For this live edge sinker cypress slab, I started with 40 grit sandpaper & my rotex sander in rotary mode.
Furthermore, I bought this Festool RO125 about a year ago to reduce the amount of time I spent on sanding. It was expensive; however, it is worth its weight in gold. ‘Buy once, Cry once” definitely applies in this situation.
An orbital sander will work just fine. It just may take longer.
I flipped the log over and sanded the top down to 80 grit.
Clean Live Edge with Grinder
I carried the slab outside to reduce the amount of dust in my workshop. This sinker cypress slab was absolutely beautiful!
I shaped and cleaned the live edge on both sides of the reclaimed wood with my grinder and kutzall extreme shaping disc. Also, the kutzall extreme shaping disc proved to be very effective to shape the live edge.
As a side note, the small holes in the sinker cypress slab were filled small crab shells. They must have burrowed a hole in the soft spots of the wood.
Then, I flipped the table over and cleaned up the spots I couldn’t reach with my rotary sander while rough sanding.
Cut Wood Slab in Half
For this epoxy bar top, my customer requested one live edge face the pool and one straight edge facing the bar.
Sadly, I was forced to rip it down the middle since this slab has 2 live edges. Customer is always right even when they make me cut a 200 year old slab in half. 
Carve Resin River
I chose the best side of one part of the reclaimed wood slab for the live edge.
Next, I sketched a winding river with a pencil.
I used my jigsaw to cut out the river.
Secure with Steel Rods
To reinforce the middle of the table, I used square steel tubing.
First, I flipped the table so the underside faced up. Next, I spaced the 2 parts of the epoxy bar top apart so that the table was roughly 20″ apart.
I marked the lines by using the steel tube as a guide.
Next, I used my router & a jig I built 5 minutes before to route a channel a little wider and deeper than the tubing.
After I routed the channels, I secured the steel tubing in the channels with bondo. As you can see, I had a very special helper for this part of the project – my daughter. :)
First, we mixed the bondo according to the instructions.
Next, we put a little bondo in the channels and placed the steel tubing on top. Then, we covered the steel tubing with bondo.
After the bondo dried, I sanded away the excess.
Resin Mold
Once the bondo dried, it was time to construct the resin mold.
First, I decided to use styrofoam insulation due to the size of this table.
Next, I placed 3 sheets down on the slab and secured them to each other using silicone tape and packing tape.
Then, I covered the entire side with packing tape then vaseline to serve as a release agent.
I flipped the mold over, clamped it to the slab, and flipped the entire thing over.
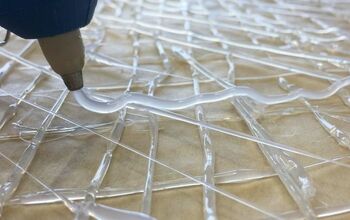
I sealed the entire table with hot glue - all along the edges, ends, and inside the middle.
Epoxy Glow Powder Pour
After I mixed the resin and glow powder, it was time to pour the resin.
First, I poured the resin on one end of the table and moved my way down to cover the entire bottom.
The steel bars prevented the resin from running down the length of the river, so I had to pour equal amounts in each section.
Additionally, I only used glow powder on the bottom layer for this table. This allows me to embed objects in resin for the upper layers.
Next, I used my heat gun to remove the air bubbles.
Then, I turned off the lights and tested the glow powder with a black light.
Epoxy Resin Pours
Once the resin cured, I cleaned & dried the blue fire glass. I find a strainer works well for this.
First, I spread enough fire glass to cover the bottom resin layer, but allowed enough space for the glow powder to shine through.
Also, this is my third table with fire glass embedded in resin.
Additionally, I made sure the glass is below the river bank so it doesn't protrude from the top.
Once the fire glass is in place, I made sure the table was level.
First, I took my time and filled the river with multiple layers of resin and removed bubbles after each layer.
Ultimately, the goal here is to fill the table with resin without going over the top edge which causes unnecessary work.
Also, I used casting resin which allows for deeper pours. This saves time and increased consistency.
In fact, it is better to come up a little short of the edge and sand down rather than vice versa.
Trim Ends
After the resin cured, I removed the resin mold and used my track saw to trim each end of the table down to the final size.
First, I made a straight mark across the table with my T-square.
Next, I used a very old blade to cut each end using multiple passes. I had to cut through a small amount of fire glass b/c I didn't leave myself enough room when spreading the fire glass.
Sanding Flat
After I trimmed the ends, I took the table outside to clean up the bottom with my grinder & a 50 grit metal sanding disc.
I sanded the entire table with a soft sanding pad and 100, 120, 150, 180, 220, and 320 grit sandpaper. I checked each part of the bar top where the resin river meets the wood to ensure it was flat.
After the table was flat, I used my trim router with a 1/2" roundover bit on the straight side of the bar top.
Final Coats
I asked my wife to help me on the first seal coat and she was nervous to mess up.
So, I took the opportunity to emphasize the importance of this step in the project. :) . I poke fun at her in the video, so be sure to watch it.
The purpose of the seal coat is just as the name implies - it's meant to seal the surface.
First, my wife spread the material with a squeegee back and forth and let a bead of material drip over the edge. There formula for seal coats is 1 ounce per square foot of surface area.
Next, I used my torch to remove air bubbles. I wiped the edge about once per 5 minutes to prevent dripping.
After the first seal coat cured, I sanded the entire table with 320 grit sandpaper and repeated the process for the second and third seal coats.
After I sanded the final seal coat, I mixed 3 ounces per square foot for the flood coat.
Next, I used a 1/8" square notch trowel to move the resin across the bar top at a consistent depth.
Then, I used a brush to chop the material to facilitate proper blending.
Finally, my torch removed the air bubbles and help flatten out the material.
I repeated this process for the 2nd flood coat.
After the bar top cured for 6 days, I flipped it over and sealed the underside with oil and urethane.
This is not necessary for this type of wood, but it just made me feel better since the bar top would be outside.
Glow in the Dark
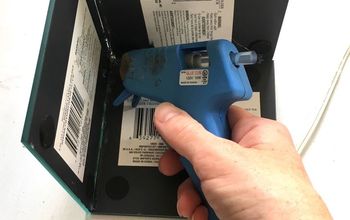
First, I used hot glue to secure a string of black LED lights under the river.
Also, this is not necessary because the glow powder is charged by sunlight or artificial light.
The black lights will charge the glow powder if the bar top is not exposed to the sun or lights.
Conclusion
In summary, I hope you enjoyed this project and it brought you some form of value.
Be sure to visit my blog to find out how I transported this table and for more details on this project.
Please consider subscribing to my YouTube channel for more DIY project videos.
DIY home decor using reclaimed wood
Enjoyed the project?
Resources for this project:
See all materials
Comments
Join the conversation
-
 Kaz
on Aug 18, 2019
Just beautiful. Have just subscribed to your utube channel 😊
The written tutorial was great..really thorough thanku.
Living in the aussie bush and many years ago working for the local forestry dept I got some beautiful Jarrah burls..its a stunning red hard wood native to West Aus where i live. I also have a beautiful old slab of Black Butt about 3mtrs long and approx 2ft wide and live edges on both sides. It was cut down on the property I had at the time...its been moved around to various properties over time and now sits in a large hay shed up in the Perth hills. Ive got a lil experience working with wood and power tools and building our own home in the bush from local rock and wood really helped to teach me how to use the tools and begin my love of wood and creating small rustic pieces. Have always loved the resin rivers in the slabs of wood so maybe..hahaha just maybe i.ll give this a go. Big project but have a good mate with the machinery and expertise to help. Think i.ll be cooking him a heap of yummy tucker to keep him happy while he helps me out haha. Cheers and thanks for the great tutorial. Im off to watch your vidoes 😊
Kaz 😊
-
 Jeremy Hoffpauir
on Aug 19, 2019
Thank you very much and I’m happy my tutorials helped you. Visiting Australia is on my bucket list.

-
-
-
 TinaAznavour
on Oct 07, 2019
Looks amazing! The video was very descriptive. Thank you!
-












Frequently asked questions
Have a question about this project?
Your work is stunning and your video is wonderful. I would like to ask how the square metal braces look when the river is glowing. Are they visible?
Incredible project - have seen several on Pinterest but your directions are so well broken down. I would be intimidated to attempt this myself. Have seen ‘ocean beaches’ down the middle, too, but I love that sparkly blue river! So unique! How much would a large dining table run? Just curious if you custom make for others. Thanks for posting!!