


Vintage Dresser Vanity

We were planning on totally redoing our bathroom someday, but when I fell in love with this photo on Pinterest, I wanted to start this project early! We visited a gentleman who lives down the road and redoes furniture to see if he had any dressers for this project. Well, lo and behold he did- it was meant to be!
Continue scrolling for our dresser-to-vanity tutorial.
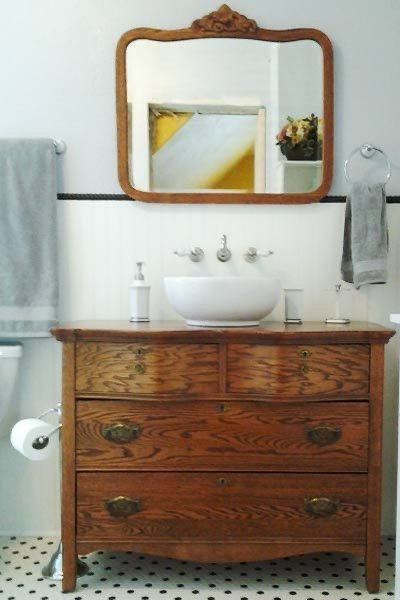
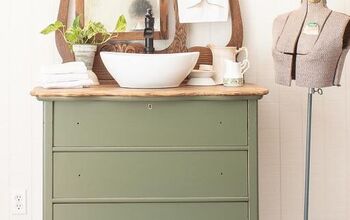
Here is the photo I fell in love with!
Supplies for this project:
- dresser
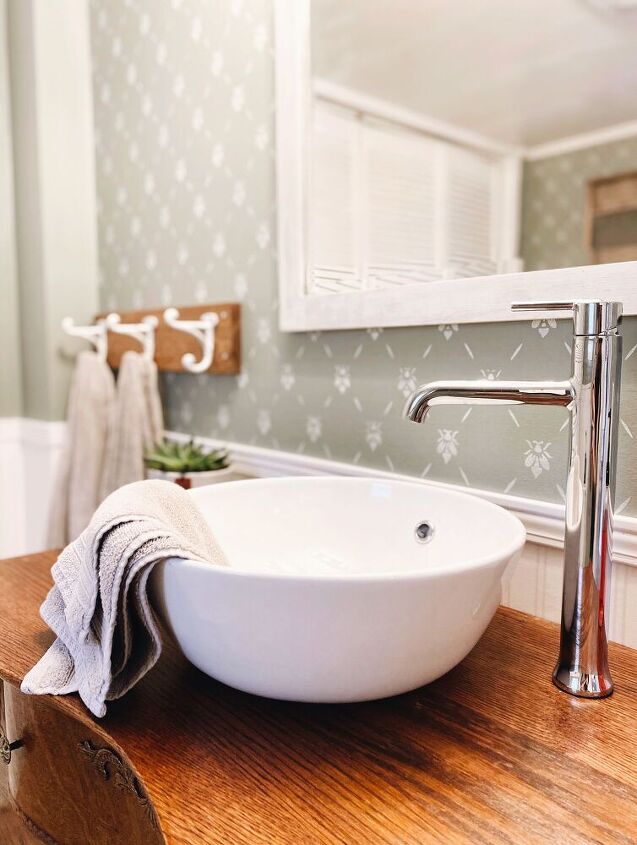
- vessel or drop in sink
- vessel or regular faucet
- stain stripper
- stain or paint of choice
- polyurethane
- jig saw
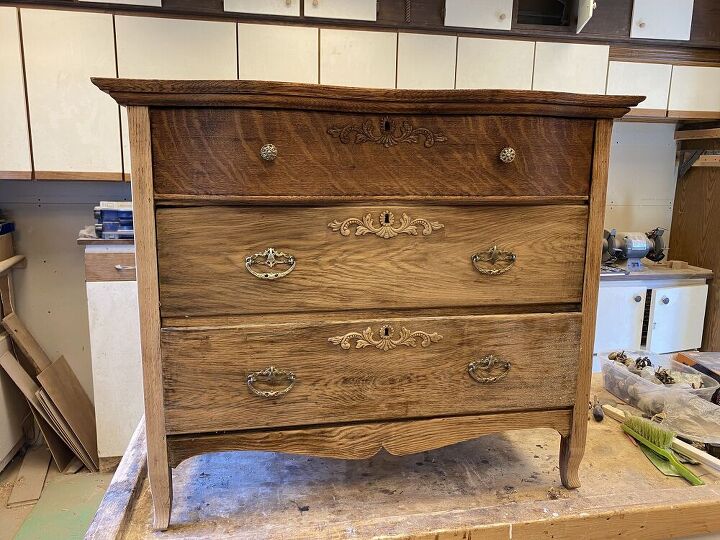
This dresser was stripped of its original stain and restained with Minwax's "Early American".
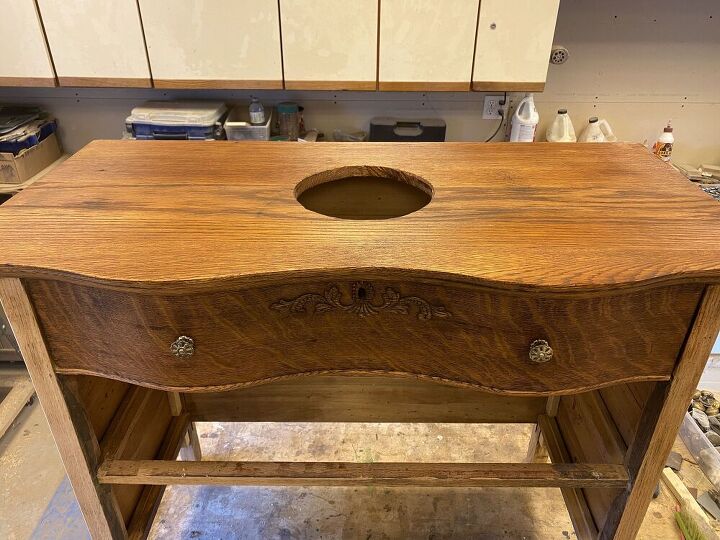
Cut out a hole for where your sink will sit. I had bought a vessel sink from Home Depot which came with a template to trace for the size of hole to make.
This top drawer was taken apart and just the front was secured back on to make room for the drain and plumbing right below the sink.
This is the dresser stripped, stained, and ready for some polyurethane.
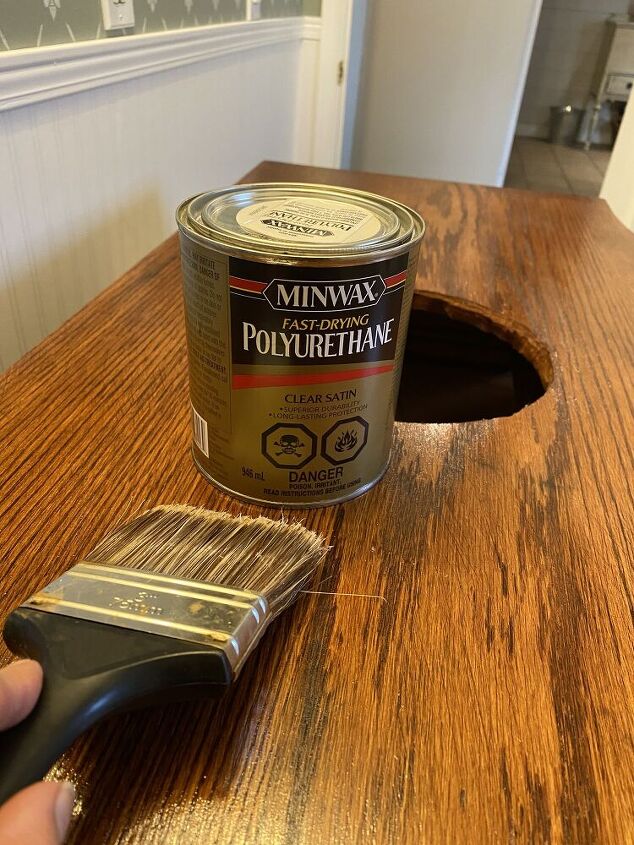
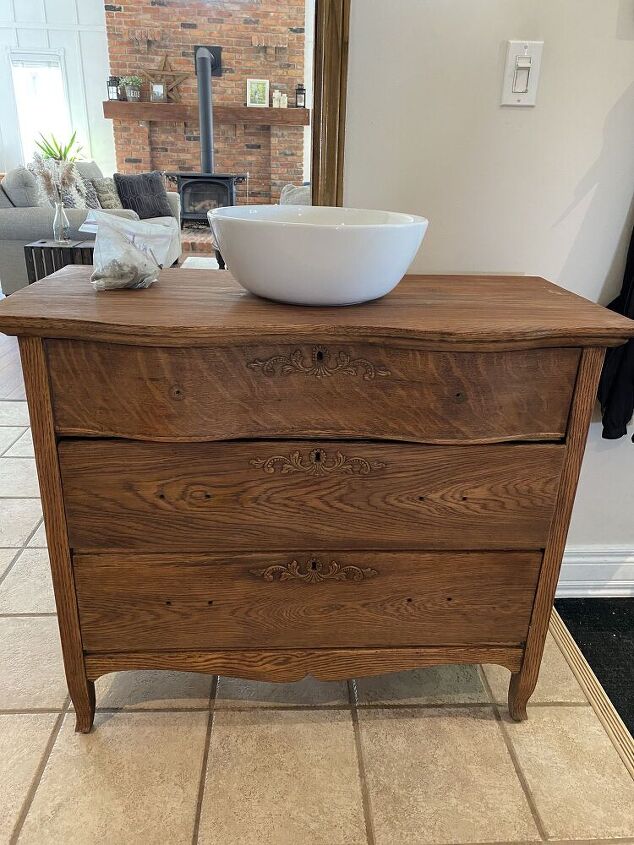
I did 2 coats with this polyurethane. Make sure to do the inside of the drawers too!
Each coat dried for at least 24 hours.
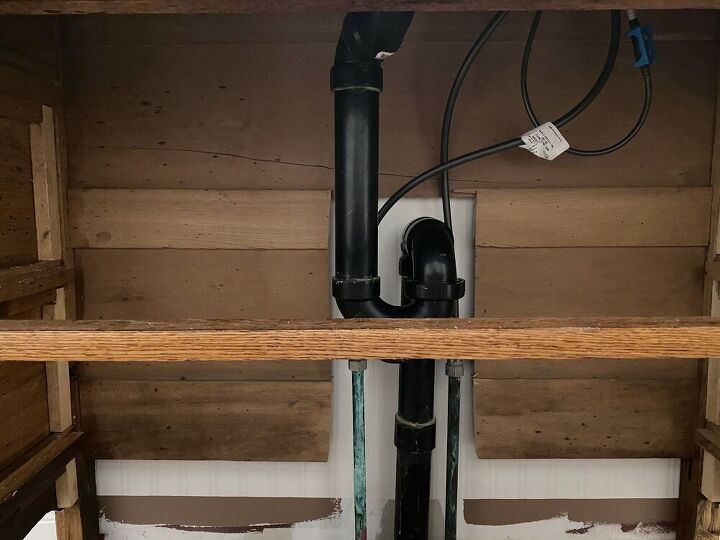
The cuts you'll need to make will be different depending on your plumbing situation. Our pipes came out of the floor, but some might come out of the wall.
This is the back of the dresser looking from the front with the drawers taken out.
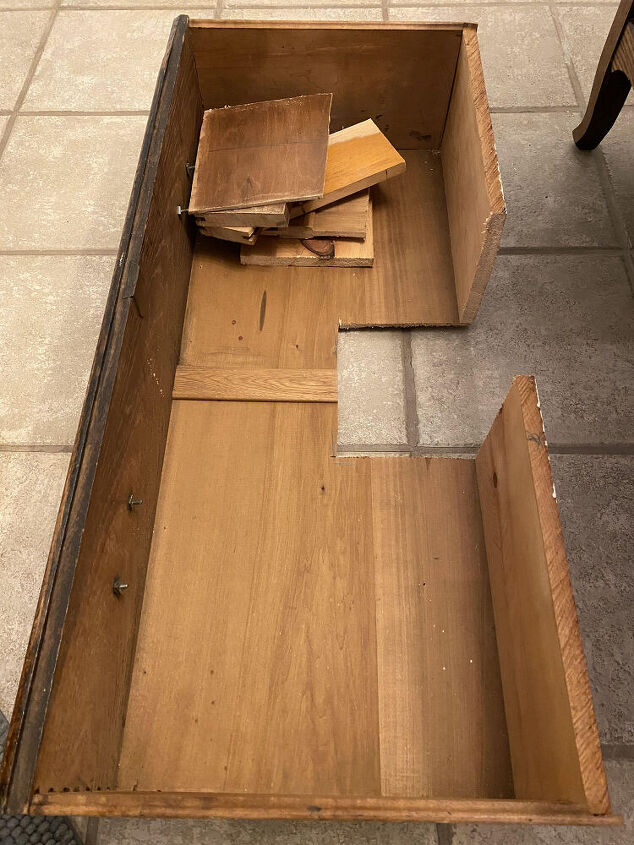
This is the middle drawer with cuts made to fit the plumbing.
Also pictured are the wood pieces that were cut out from the whole dresser which I'll make new sides with to go around the cuts.
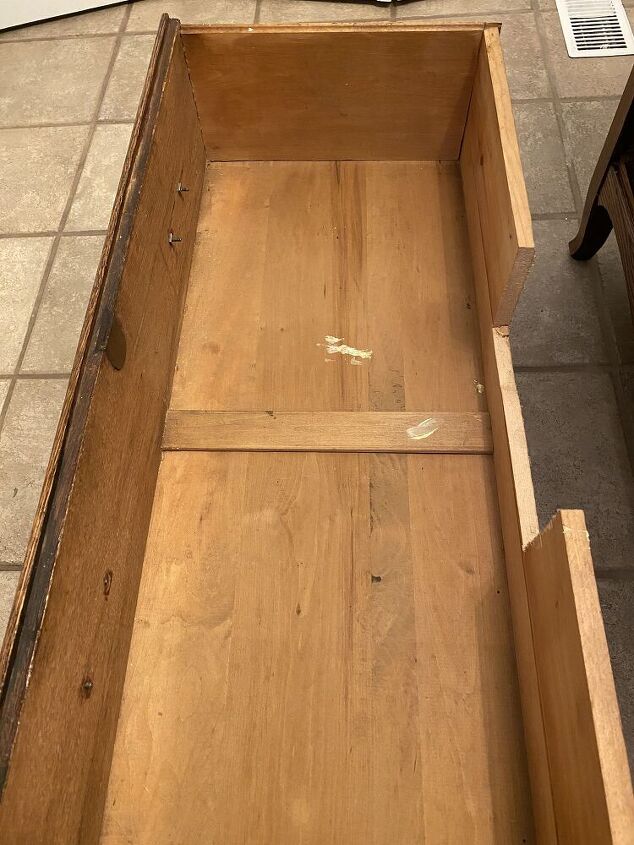
This is the bottom drawer with a bit of the back cut out to fit the plumbing.
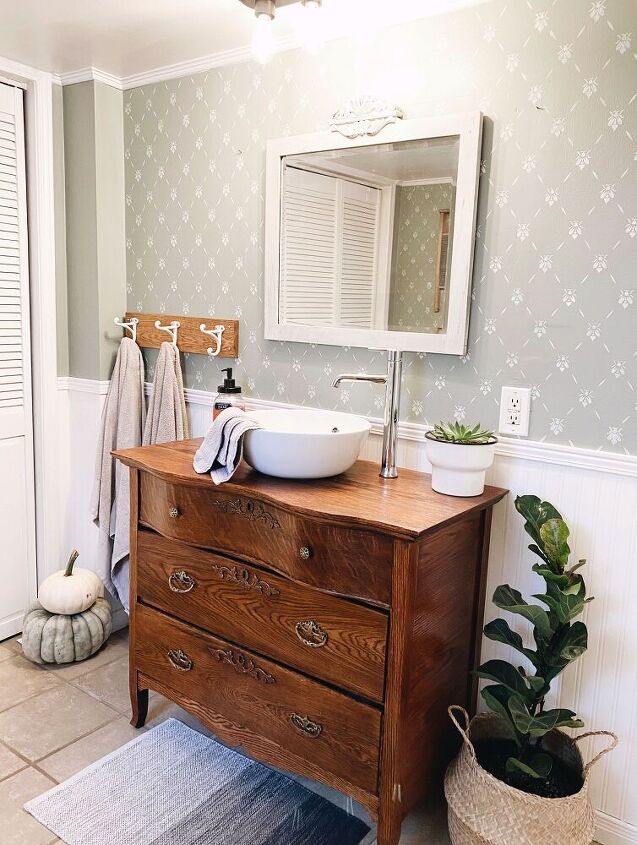
Enjoy your old but new vanity!
*Disclaimer: My dad is a plumber and helped me with all the plumbing! I'm not sure on any specifics regarding the plumbing installation.
For more ideas and ongoing projects, follow along on Instagram and Facebook!
Insta: @farmhouse.ongunnshill
Facebook: Lauren Ann Design
~Lauren 
Resources for this project:
See all materials


Comments
Join the conversation
-
Very nice idea 💡 bery ingenious
-
You did great! Result is wonderful! Thanks for sharing, it’s inspiration.


Frequently asked questions
Have a question about this project?
What is the height of the dresser from the floor to the top and the height of the vessel?
We did this about 5 years ago. Using an old desk that bought for $10 at Goodwill! Love yours too!
Really like this. Is your polyurethane enough to fend off water spots to the wood in a frequently used bath?