Custom Hand-Carved, Vertical Concrete Shower

by
Dream Home Supply, LTD.
(IC: professional)
2 Materials
$1500
2 Weeks
Medium
This is all concrete... vertical, hand-carved and textured concrete. We stepped outside of our comfort zone on this project as this was our first time utilizing this vertical concrete application technique and products.
The concrete is troweled on approximately 3/4"-1" thick and is then textured and carved to the client's specifications as to size and shape of the stones. Then each stone is individually colored and finally 2 coats of a water-based polyurethane to finish it off.
Want more linear stones... or to have no stones and look like a cave shower? Not a problem! This could even be done to look like wood planks with alternate carving and texturing methods. It's all possible, with this amazing product and our application techniques.
This same vertical concrete mix can be used for interior or exterior projects. This concrete application can cover up old block, brick, tile, drywall, cement board.... etc, and give your space an entirely new look!
Our client built the structure and covered it with cement board. Our first step was to put a scratch coat of concrete over our waterbarrier membrane.
Another view with the scratch coat applied.
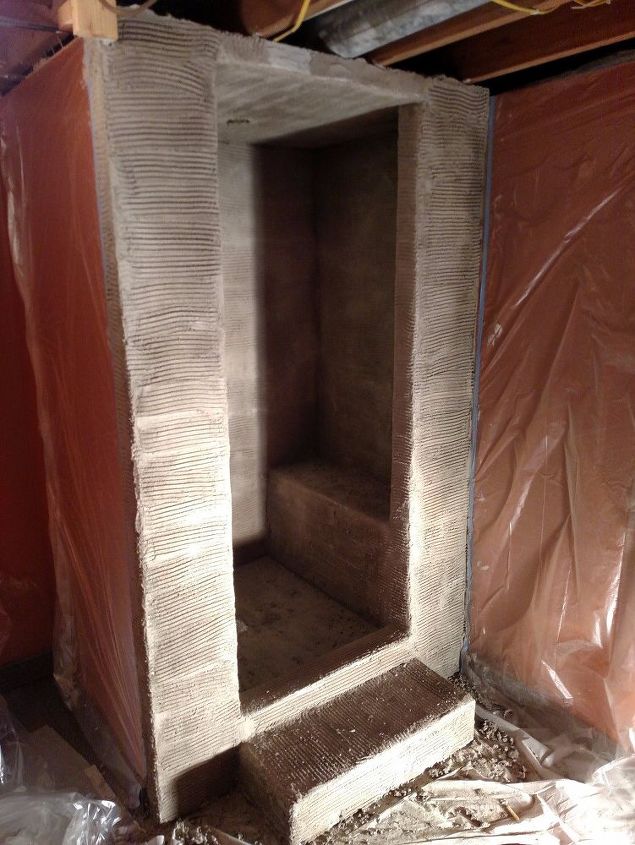
Once the scratch coat was dry, we started putting a layer of concrete on to fill the scratch coat. Next, step is troweling on about a 3/4"-1" thick coat of our vertical concrete mix. It is then textured and hand-carved to give the stones their shape and dimension.
Almost done texturing and carving... still have the bench, the floor, and the step up into the shower to finish up this step.
We took the cover for the faucet and made sure it would fit well after application by putting it in place and cleaning out any unnecessary concrete that was present in that opening.
Now comes the coloring of the stones! Of course, this can be any color palette that you choose.
A bit of a closer view of the colored faucet wall.
We even textured the floor!
The bench seat wall colored and sealed!
A close up of the bench.... We just love this seat!
Nope, that's not wood or tile! It's a decorative concrete overlay that is also hand troweled and colored right over the existing concrete floor in this basement bathroom. This process begins with a primer coat of the so-called grout line color (black), followed by a troweled on texture coat. We color the detail.... pull the tape to reveal the grout lines, and then seal it. We will do a separate post about this floor process in the near future.
We love the seat... but we think this step up into the shower is pretty cool as well!
Plumbing is installed and ready for operation!
Just need to hang the shower curtain and it's good to go!
Enjoyed the project?
Suggested materials:
- Vertical Concrete (Deco-Crete Supply)
- Decorative Floor Overlay (Daich Coatings)
Published October 27th, 2017 11:41 AM
Comments
Join the conversation
2 of 68 comments
-
 Julie Mullins
on Jan 18, 2018
Wow that is do so cool
-
-
 Ruthfinest2
on Sep 13, 2018
It’s a amazing
-












Frequently asked questions
Have a question about this project?
How much does a project as the above mentioned cost?
Do you work outside of your country
What are the names of the shades of color you have used?