


How to Refinish Wood Furniture Without Sanding
You might think I'm pulling a fast one here, but it's true, you can refinish furniture without sanding!
Product links may be affiliate links which are no extra cost to you but your purchase helps me help you with more fantastic projects!

Not too long ago, my mom moved and was looking for a way to display some of her fabulous glass objects and decorative pieces and so within that, ran across an idea online she wanted to recreate.
The idea? Reusing the top half of a wood hutch and adapting it into an updated display cabinet.
These hutches are practically a dime a’ dozen on Marketplace or Craigslist or side of the road or wherever, plenty of them free for the taking, even.

A schedule change on my end popped up so I headed out there to make the magic happen for her.
So the gist was to paint it but after further discussion, we opted for some stained areas for contrast and visual interest. Ya know, design in threes; in this case the main paint color, then the stain, and then my mom’s objects were the three.
First, off came the doors and side glass panels as she wanted a straight shot view into her art pieces and easy access. A screw driver, a screw gun, even those um pink ones which is what she had, all off in seconds.

Next up, clean the piece which I did with a TSP cleaner. Grab a spray bottle and thin the cleaner with some water then just spray it on, scrubby around, wipe or rinse it off, let it dry.

After that, hole patch time, easily done with a putty knife and some wood filler patch. Since I’m painting this, no worries if the patch was stainable or not which was great because I cannot find a “stainable” patch that’s actually really truly stainable.

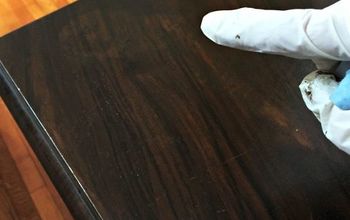
Now for the big refinish wood furniture without sanding secret: liquid sandpaper.
You can get this little bottle of helpfulness at Lowe's. Or at Home Depot. Or at Menards. Or at Ace Hardware. Even on Amazon.
So here's my very simple, very doable shopping list for this project:
TSP or TSP substitute cleaner
rags
liquid sandpaper
primer
paint
a nice angled sash brush
And then what we went on to use, because mileage may vary:
water-based stain + polyurethane
Grab a scrubby pad, splash on some liquid sandpaper, and exactly how we cleaned the piece earlier, give everything a scrub.

All righty, onto the water-based stain with polyurethane. I chose this specifically as it was a two-fold solution to the laminate back panel dilemma. Gel stain would not have worked here, plus I personally think gel stain sucks.
Want extra details, tips, and tricks about how I did all this? Swing on by the blog post on Flipping the Flip!

Next up, time to prime. Just...brush it on. Yep. That nice angled sash brush will help you reach all the tight corners, snug junctions, twists, and turns.

With the primer good to go, it’s color time. You, like me, might need two coats to ensure everything is well and evenly covered.
For all sorts of great budget-friendly DIY projects, solutions, and decor tips, come on by Flipping the Flip today!

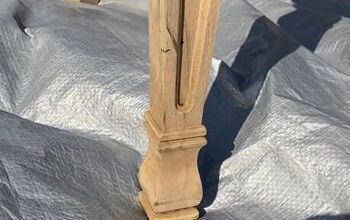
After a little bit of math and a lot bit of measuring and yet more math to get the feet in the right place into some solid wood, I drilled holes to hold the wood insert nuts. Tighten those in, then just screw in the feet.

One last errand, this time to Ikea for some new little LED display spotlights. Since the holes already existed in the hutch top, I merely had to fish wires through, peel the sticker on the light, and smush them into place.
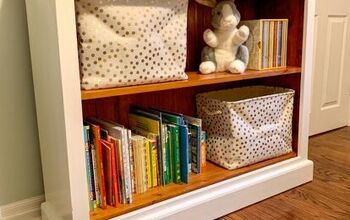
Ready to go, we skootched the cabinet, refinishing without sanding!, into place and my mom was giddy as a schoolgirl arranging her art inside!

Pretty cool, huh?

Be sure to drop by Flipping the Flip for loads more DIY ideas, projects, and inspiration!
Grab my free cheat sheet for 3 effortless steps to transform any room for $100 or less, and check out The $100 Room Glow-Up Guide to give your space a serious upgrade.
Don’t forget to subscribe here to be first in the know on new projects!
Check out the video for how it all went!

Comments
Join the conversation
-
Such a lovely transformation! Totally inspired.
-
At first I thought, “oh no, not paint again,” but I really like how this turned out. It’s beautiful.
never heard of ‘liquid sandpaper’ before - thanks.


Frequently asked questions
Have a question about this project?