No-Rub Magic DIY Cleaner & Degreaser for Your Kitchen Hood

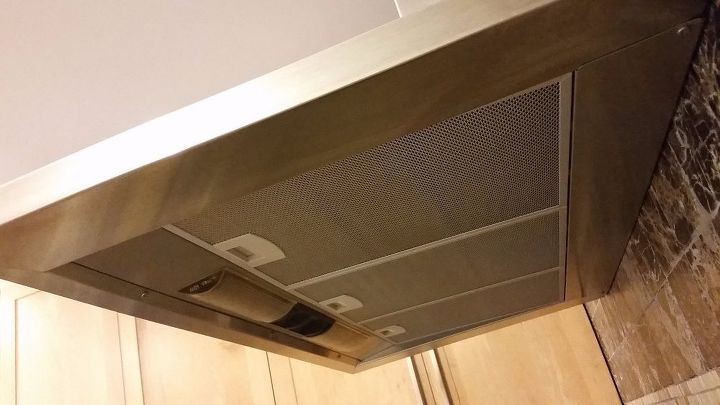
Seriously. Do you remember the last time you cleaned your kitchen hood? I do: Never! So it’s time to tackle the “Hood Project” and give it some love.
I was lucky to find a magic no-rub recipe that would dissolve the grease in no time -- perhaps the easiest and most satisfying thing I’ve ever used.
Want to know how to clean a kitchen hood with this DIY cleaner? Read on!
After perusing the internet looking for a recipe, I realized that my cleaning cabinet contained all the ingredients needed to make this magic formula. Can you take a guess?
1. GATHER YOUR INGREDIENTS
You know the magic of Dawn and Vinegar when it comes to get rid of grease, and the power of baking soda. Combine this with water and voila!
And the best part is that it doesn’t need any elbow grease.
Ready? Let’s get started!
2. REMOVE FILTERS
Before we start concocting, remove all filters off the hood.
TIP: To protect your countertop, place a kitchen rag underneath your ingredients. A little hot water and cleaner may spill as you move filters and spoons around.
3. ADD WATER
Now it’s time to make the solution!
Grab the tallest pot you have in your kitchen: one that fits the filters all the way in is best! Start making the DIY Magic Cleaner by filling the pot with tap water. Don’t worry about using hot tap water, we’re going to heat it anyway!
TIP: Don’t fill the pot all the way up! Leave at least 2” clearance off the top. The baking soda is going to fizz and we don’t want it to spill all over.
Put the pot on the stove, turn the flame on, and wait a few minutes.
4. VINEGAR IS NEXT
Get a cup (no need to use a measuring cup) and fill it up with vinegar. Then add it to the warm water.
Vinegar is one of my favorite cleaners, and works well removing grease, especially when combined with Dawn!
TIP: Don’t wait till the water is about to boil - Lukewarm is just fine. We still need to throw the soap and baking soda in before it gets too hot.
5. Now Add Dawn Soap
Grab the tablespoon and measure 1 full tablespoon of Dawn soap. Add it to the warm water. I prefer the blue (i.e. Classic) Dawn. It’s an excellent degreaser!
TIP: You can use FAIRY if you’re in Europe.
Repeat 3 times, to make 3 tablespoons.
Get the wooden spoon and stir well, so the vinegar and soap mix with the water. Keep the stove on high heat and get your baking soda ready.
6. End With Baking Soda
Fill 1/2 a cup with baking soda. I used about 1/3, but if your filters are really dirty go with 1/2 cup. Use the tablespoon to slowly add the soda to the hot water, one spoon at a time.
If your water is too hot (or about to boil) be extra careful.
TIP: You can add an ice cube to cool it down a bit.
CAUTION: Baking soda will fizz as you add it to the hot water. Add one tablespoon at a time, stir, and wait a few seconds before you continue.
If you see the cleaner “expanding” in your pot, turn the stove off -- or lower the flame to a minimum -- and continue adding the soda, a bit at a time, until you’re done.
7. Let it Boil
Keep stirring with the wooden spoon to make sure all ingredients -- especially the baking soda -- are well mixed.
Keep the stove on until it begins to boil, and then turn it off.
Get your filters ready and let the fun begin!
8. PLACE FILTERS IN THE POT
Get the first filter and put it in the water. Let it sit for a few minutes. I pulled it out in 30 seconds and -- amazing! -- most of the grease had already dissolved!
But I waited a few more minutes before turning it over. I couldn’t believe how quickly -- and easily -- the grease melted. Really!
If yours is older or thicker, it may take a little longer. I found the solution to be very effective without needing to scrub. But if there’s still grease adhered to the filter, use a scrubber or an old toothbrush to remove it.
TIP: Keep the filter in the pot while you’re scrubbing.
9. TURN FILTER AROUND
Unless you’re able to fully fit the filter in the pot, you still have the top area to clean. So turn it around and insert the top into the cleaning solution.
TIP: Again use the toothbrush to remove any grease that is still there.
10. RINSE & BRUSH
Once you’re done, bring it to the sink and give it a good rinse to get rid of the remaining grease and soapy water.
TIP: Use the brush to ensure the filter gets a good rinse, bringing the water into the grooves and getting rid of the remaining soap.
11. Repeat Steps
Repeat STEP 8-10 with all your filters, scrubbing if necessary, and turning them around once the bottoms are clean.
Again, once each filter is clean, give it a rinse and let it air dry. Now, we’re done!
12. CLEAN THE GREASE OFF THE HOOD
That was easy, right? But I’d guess you also want to clean the hood. The good news is that you can use the same cleaner!
Just dip the sponge/scrubber in enough to get it moist, without fully submerging your hand into the liquid. If it’s too hot, wait a bit until it cools down or add an ice cube.
Grab a sponge or scrubber and dip it in the Magic Cleaner. Squeeze to remove excess liquid.
Gently rub the sponge on the hood, concentrating in the greasy spots. Rinse the sponge under the faucet as it gets dirty and keep moving until you’re done.
13. CLEAN THE TOP
Repeat step 12 on the canopy, front, and sides, or as needed.
Use a lint-free rag or microfiber cleaning cloth to dry it.
After you’ve finished cleaning the hood and once it’s dry, feel free to use a stainless steel cleaner to get rid of the streaks. Or you can try it first with soapy water. Luckily, I didn’t need to use a cleaner.
TIP: Don’t worry about the cleaner leaving streaks on the stainless steel, you can apply a steel cleaner for a seamless finish.
CAUTION: Again, don’t use the solution if it’s still very hot, and make sure your hood is stainless steel, and not painted. Some appliances -- usually refrigerators -- have a stainless steel finish PAINT that looks like steel. The paint may get damaged with this solution. If you’re not sure, test it in a corner first!
More Oven Cleaning tips
How to Clean a Kitchen Hood
I’m so happy with my NEW FILTERS! And the best part was how easy it was to get that grease off.
Let me know if you have any DIY recipes for cleaning a kitchen hood.
Enjoyed the project?
Resources for this project:
See all materialsComments
Join the conversation
-
-
 Emily Harris
on Mar 20, 2025
This is genius! I’ll be honest, I can’t remember the last time I cleaned my kitchen hood filters, so this is definitely going on my to-do list. The mix of baking soda, vinegar, and Dawn makes total sense since I’ve used it to clean greasy pans before. I might check Filters Fast for replacement filters too because mine are looking rough. Cleaning is weirdly satisfying when you actually see the grime disappear.
-














Frequently asked questions
Have a question about this project?
How do you clean the vented parts that are part of the microwave?
I don't want to pour the dirty, greasy water down the sink when done cleaning filters. Any suggestions please?
I just run them through the dishwasher. They come out like new! 👍👍👍😉 Easy Peasy 😍