Lantern Made From Dollar Store Finds

I love the look of lanterns for decorating but they’re so expensive so I made my own out of Dollar Store items
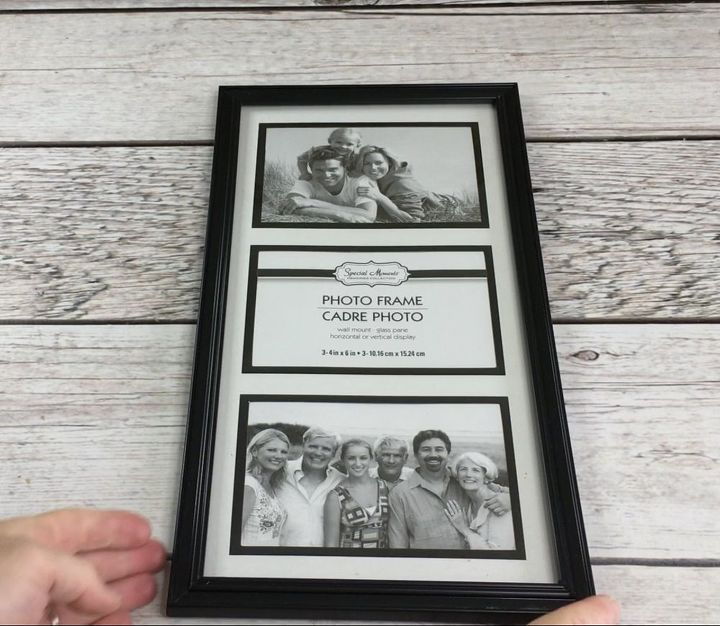
I wanted a tall lantern so I bought 4 collage frames.
Hometalk Recommends!
1 - I removed the back and all of the papers inside.
2 - Then I removed the glass
3 - I applied glue to each corner and along the edge.
4 - I cut the metal pins in half. These pins hold in the glass; however, if they aren’t cut, you can see them through the glass
5 - Putting the lantern together:
1: I applied glue on the edge of each frame
2: I place the edges of two frames together and taped them together using painter’s tape
3: I continued to glue the frames together
4: As I glued all the frames together, I continued to tape the corners together
5: Allow the frames to dry
6 - I wanted to make a peaked roof/top for the lantern. Using old wrapping paper, I made a template.
1 - I wrapped the paper around the top of the lantern. Bringing the center together on two sides, I taped it to secure
2 - I then brought the other two sides to the center and stapled to secure
3 - I took the paper off of the lantern and folded the bottom inside to make an even edge
4 - I brought both sides together again flattening the template
5 - I measured 3” from the bottom which would wrap around the lantern
6 - I folded the top right corner to the center, then folded the top left corner to the center.
7 - I flipped the template around and did the same thing on the other side.
8 - I cut out the 4 triangles that were created
These are my templates
7 - To make the actual roof/top:
1 - I purchased two packages of aluminum cookie sheets (2 in one pack)
2 - I cut the edge from all four sheets so I was left with a flat surface
3 - I laid one triangle onto the sheet and traced around it
4 - Using a utility knife, I cut out the triangle. I did not cut on the traced line but cut an inch wider
5 - I cut one diagonal cut from each of the top points
6 - I used a paint stir stick, laying the edge on the traced line, then folded the one inch piece up
This is what each of the four triangles should look like after they’ve been cut and folded.
8 - Putting the roof/top together
1 - I laid the lantern on it’s side and laid the first triangle underneath and taped it into place
2 - I righted the lantern and added the second triangle directly across from the first piece. I taped it to the lantern and taped the top together.
3 - I then added the other two sides, taping them into place.
4 - I removed the roof/top and hot glued the triangles together. The glue was applied to the one inch pieces which were inside the roof/top
9 - I spray painted the entire roof/top black using Rustoleum spray paint. This paint will stick to metal surfaces.
10 - I wanted a bottom for the lantern so using an 8”x 8” aluminum pan, I cut the sides down leaving one inch on all sides.
11 - I spray painted the pan black
12 - I attached the bottom by placing the pan inside the lantern, pushing it to the bottom and hot glued the sides directly to the lantern.
I added a battery operated candle and some seasonal greenery. I really like the way it turned out and to think this whole project cost $7 and everything was from the Dollar Store.
Enjoyed the project?
Resources for this project:
See all materialsComments
Join the conversation
-
 Nlw21017661
on Feb 28, 2022
I think an oil can funnel would look better as a top with the top cut off, of course, when it is tipped over.
-
-
-












Frequently asked questions
Have a question about this project?
This turned out Beautiful! 1 question how do you get back into it to change greenery and battery for candle?
is there anyway you can save a project to a wish list or something so I can do it later? and if you can where do you go then to find the saved projects?
Can you translate the proyect to spanish?