Give a Storage Bin a Fresh Makeover With This Simple DIY Project

You can give an ordinary storage bin a complete makeover with a few simple DIY techniques. This easy project will add style and functionality to your home.
This post was transcribed by a member of the Hometalk editorial team from the original HometalkTV episode.
Tools and Materials
- Storage Bin
- Mod Podge
- Decorative Paper
- Twine
- Adhesive Wheels
Hometalk may receive a small affiliate commission from purchases made via Amazon links in this article but at no cost to you.
1. Prepare the Storage Bin
Start with a plain storage bin. This could be any bin you have lying around, just make sure it's clean and ready for some fun!
The idea here is to give it a new look that’s both practical and visually appealing.
2. Apply Decoupage Medium
Next, grab your decoupage medium (like Mod Podge) and cover one side of the bin with a thin layer.
This will serve as the glue for your decoupaging paper.
Make sure you coat it evenly.
3. Add the Decoupaging Paper
Now, take your decoupaging paper and carefully place it over the glued surface.
There are two ways to apply the paper on a textured surface like this:
- Dampening the paper first to make it more flexible.
- Applying it dry and then dampening it after it’s on the bin.
Choose whichever method you prefer, and gently smooth it out with your fingers.
4. Cover All Sides
Move on to the next side, including any handles or openings.
For the handles, just cover the area with the decoupage medium and lay the paper over it.
Cut off excess material, however, you don't need to worry about smaller issues like a bit of overlap or trimming here and there—we’ll take care of that later.
5. Seal and Smooth the Paper
Once the paper is in place, brush a layer of Mod Podge over it to seal it and make it more durable.
This extra layer will ensure your makeover holds up over time.
Let the paper and glue dry completely.
6. Sand the Excess Paper
Once everything is dry, use a fine grit sandpaper to gently sand off any excess paper that may be sticking out on the edges.
This will give it a clean, polished finish and complete the makeover.
7. Add Some Style to the Handles
Now it’s time to give those handles some style.
Wrap thick jute twine around the handles, securing the end with some hot glue.
This simple addition will make your storage bin look extra neat and add a rustic touch that pairs perfectly with the green sack paper.
8. Attach Wheels for Mobility
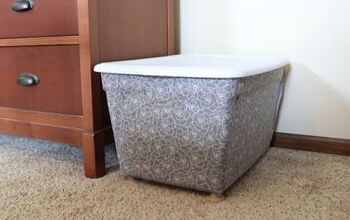
For the finishing touch, add wheels to the bottom of your bin.
These wheels come with adhesive backing, so all you need to do is peel off the paper and stick them in place.
Now your storage bin is both stylish and functional!
Looking for more bin ideas?
A Stylish Storage Bin Makeover in 8 Steps
And that’s how you give an ordinary storage bin a complete makeover!
Now you’ve got a personalized, upgraded bin that’s perfect for storing anything you need.
Leave a comment below and let me know how your makeover turned out!
Enjoyed the project?

Comments
Join the conversation
-
 Susan Tippy
on Jan 13, 2025
Wow! Nice
-
 Recreated Designs
on Jan 15, 2025
Thanks so much :)
-
-








Frequently asked questions
Have a question about this project?
Where can you buy the adhesive wheels?