The EASY Formula to Space Your Board & Batten Wall

Bad at Math? Me too! I spent a lot of time looking on the internet for a board and batten calculator or an easy formula to help space your boards evenly on any wall. I found one and it was so confusing, I couldn't make it work. So, with some help, I figured it out!
What's nice about this project is it's very inexpensive. The total cost including the new baseboard was $120. Make sure you read this entire tutorial before starting to take board and batten measurements. I have a lot of very important steps you don't want to skip.
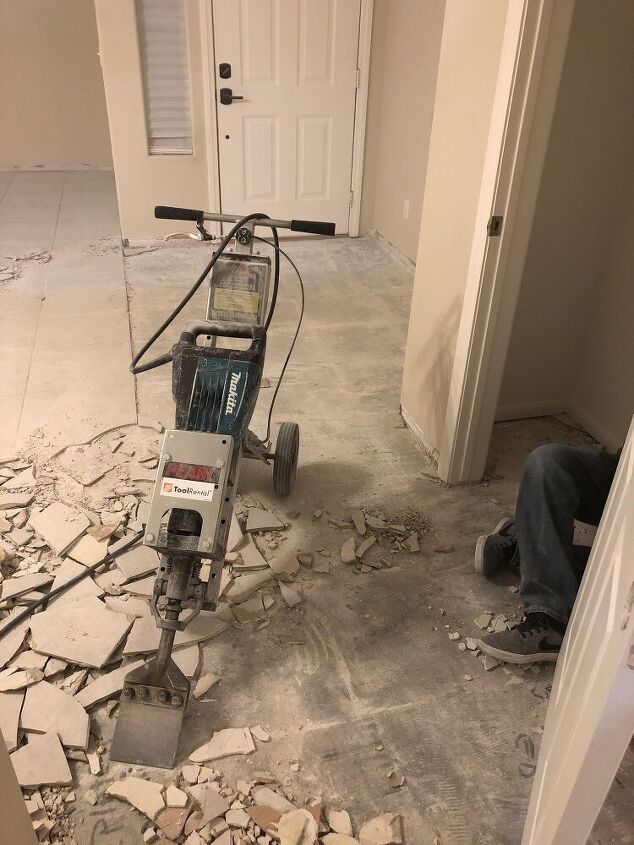
Before we get to the board & batten wall I wanted to show you how this wall started out. When we moved in we had this coat closet that you needed to walk around from the front door to get to the next room. We debated a lot on whether or not to remove it. I'm so glad we did! It made a huge impact on how the house flowed. So glad it's gone!
Because half of this wall used to be a closet there are a lot of imperfections and the Board & Batten is a great way to hide those.
Step 1: Measure Walls
Because half of this wall used to be a closet there are a lot of imperfections and the Board & Batten is a great way to hide those.
Now, this is the most important part because my measurements will be different than yours, but overall it's a reliable board and batten spacing calculator. I suggest drawing out a diagram first. My diagram is not the prettiest but it should help you understand how to draw one out.
After you draw your diagram you need to measure the length of the wall. The horizontal boards are traditionally 3". You need to decide how many battens you want. In our case it's 9. You can totally just guestimate at this point based on how big your wall is. You can adjust later. I suggest using an odd number so your 3" boards are and even amount.
Now, you take your length of the wall (mine is 108") minus 6" which are the two 3" boards on each end.
108 (length of your wall)
-6" (3" x2 = 6" , each 3" board at each end)
_____ (=)
102"
/ (divided by)
8 ( there are 8 boards between the two end boards)
______
12.75
So, each batten is spaced 12.75 inches apart. In this math equation you just substitute my numbers for yours.
Step 2: Gather Materials
- 2 - MDF 4'x8' boards ( $24.97 each)
- measuring tape
- Top trim ledge piece of choice
- air gun or finishing nails and hammer
- table saw
- wood filler
- sand block
- caulking
- paint & painting supplies
- Hooks
We had the nice guys at Home depot cut each 4'x8' x2 board as follows:
6 - 6" horizontally
6 - 4" horizontally
remaining material - 3" horizontally
Remember you needed two MDF boards so those number are doubled. (you will have extra material if you have a similar or smaller wall)
Side note: Before you start you need to decide if your keeping your existing baseboard or not. We decided to change ours to match the flow of the farmhouse theme. It was only $20 extra for us to do so. If you plan on keeping yours it probably doesn't have a flat surface to lay on the 3" boards on. There are several tips & tricks how to keep your existing baseboards on pinterest, so you can just search there.
Step 3: Install Boards
You also need to decide how tall you want this project to be. You have 96" to work with because you cut the 4'x8' boards horizontally. 8' is 96". We decided to cut our 3" boards to 60". We also need to add 5 1/2" to the height because of the baseboards and a additional 6" for the board sitting on top. ( the ledge we added is just a bonus and doesn't really matter in the tutorial) From the bottom of the baseboards to the top of the 6" board is 71-1/2 ". This is just an example for you. You can adjust it however you like. Our wall is not that tall and goes at an angle at the top.
My husband place the 6" top board first. This will make it easier to adjust the horizontal boards if needed (hopefully not) This would be 60" from the bottom of the baseboard. Your first 3" board needs to be placed at one end first. Then you measure ( in my case) 12.75" then place the second and so on. Now, you might want to wait and cut your 3" boards ( one at a time) till after the 6" board is in place. Measure a second time from the bottom of the baseboard to the bottom of the 6" board to make sure it is in fact 60" exactly. Walls can be wonky and uneven. No ones fault.
Your 4" boards to make square boxes will also be (in my case) 12.75 long and 12.75 high. Also, before you cut each 4" board re-measure the length. If you so make a mistake and there is a bigger gape then you wanted you can use would filler later on to fix it or start over because you should have plenty of extra.
Step 4: Fill in Wall Holes
I won't go into detail here because if you decided to take on this project I'm sure you already know how to do this :-) Caulk, sand, and paint as needed.
Step 5: Hang Coat Hooks
Traditionally, for a entry wall you hang hooks. The ones I bought are linked here.
Enjoyed the project?
Resources for this project:
See all materials
Comments
Join the conversation
-
 Martha Erwin Saliger
on Jul 27, 2021
That looks Fantastic! Yall did a beautiful job at a Great price! And your finished decor!?! Just Perfect! Love love love.
-
-
















Frequently asked questions
Have a question about this project?
Looks great but the math doesn't add up. If your boards are spaced 12.75 apart with 3" boards doing 9 sections you would need a 138.75" Wall. Any thoughts?
Hi Jessie, y'all did a beautiful job with the board and batten. My question is how high are your ceilings? I keep thinking about doing this wall treatment in our home but the ceilings are a little over 8 ft high and I'm not sure it would look good. Trying to gauge from the height of yours. Thanks so much!
Looks very beautiful but I don’t understand the hooks. What gets hung on them. I could see having them on the right, as coat hooks?, but the ones over the table seem useless.